手動新增L2TP over IPSec VPN
Zyxel小編 Eva
文章數: 46  Zyxel Employee

 Zyxel Employee
本篇範例使用設備:
防火牆:ATP200,對應韌體V4.62(ABFW.0)
情境:適用於行動使用者
隨需連線,讓外部使用者可以安全的存取內部資料
隨需連線,讓外部使用者可以安全的存取內部資料
網路架構圖:
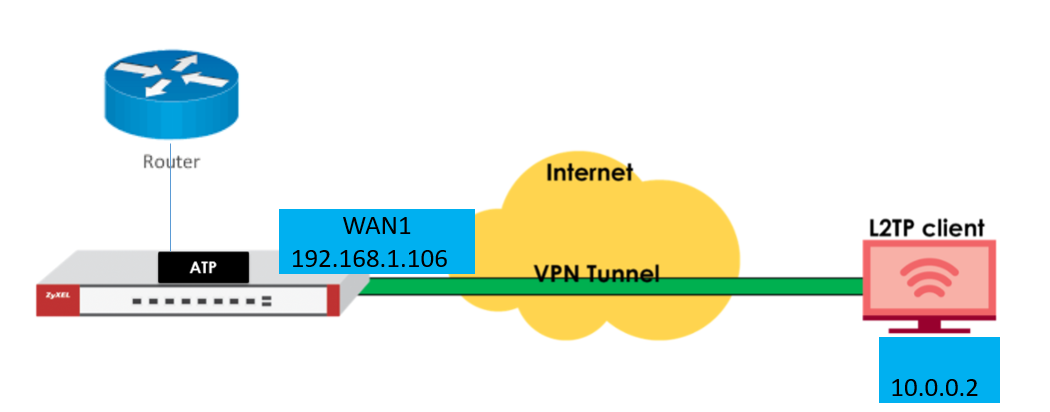
建立L2TP over IPSec VPN另有精靈模式供參考,連結如下:
一般模式逐步設定完成,相關步驟如下:
步驟一、建立使用者
設定>物件>使用者/群組>使用者>新增>輸入使用者名稱/密碼>OK
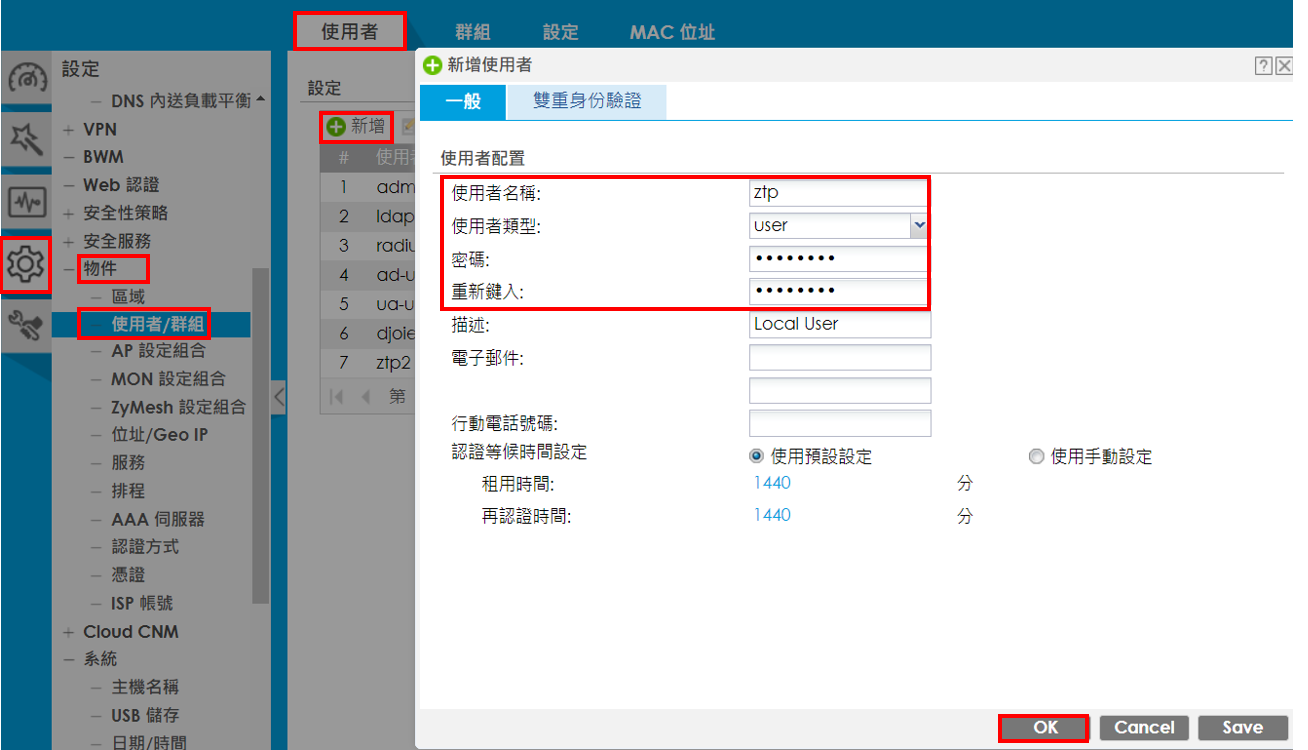
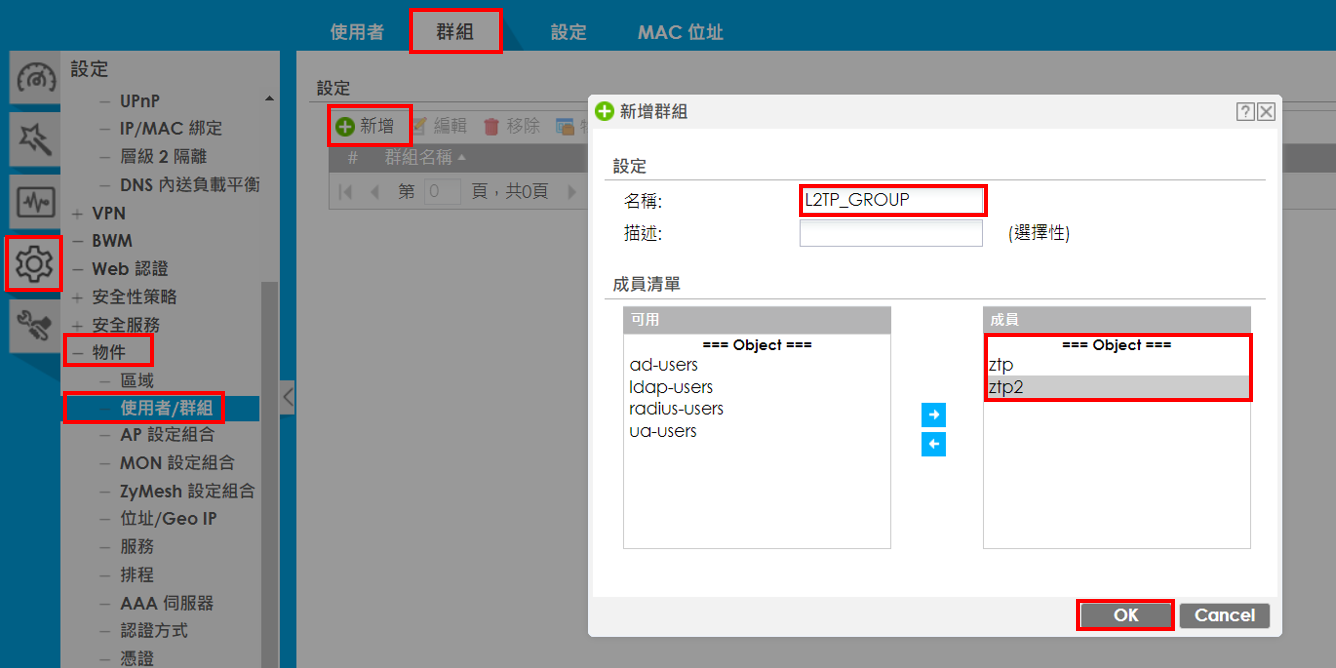
若有多個L2TP VPN使用者,可透過於上述步驟逐一建立使用者後,將所有使用者加至群組。
設定>物件>使用者/群組>群組>新增>輸入名稱>將成員清單加至成員>OK
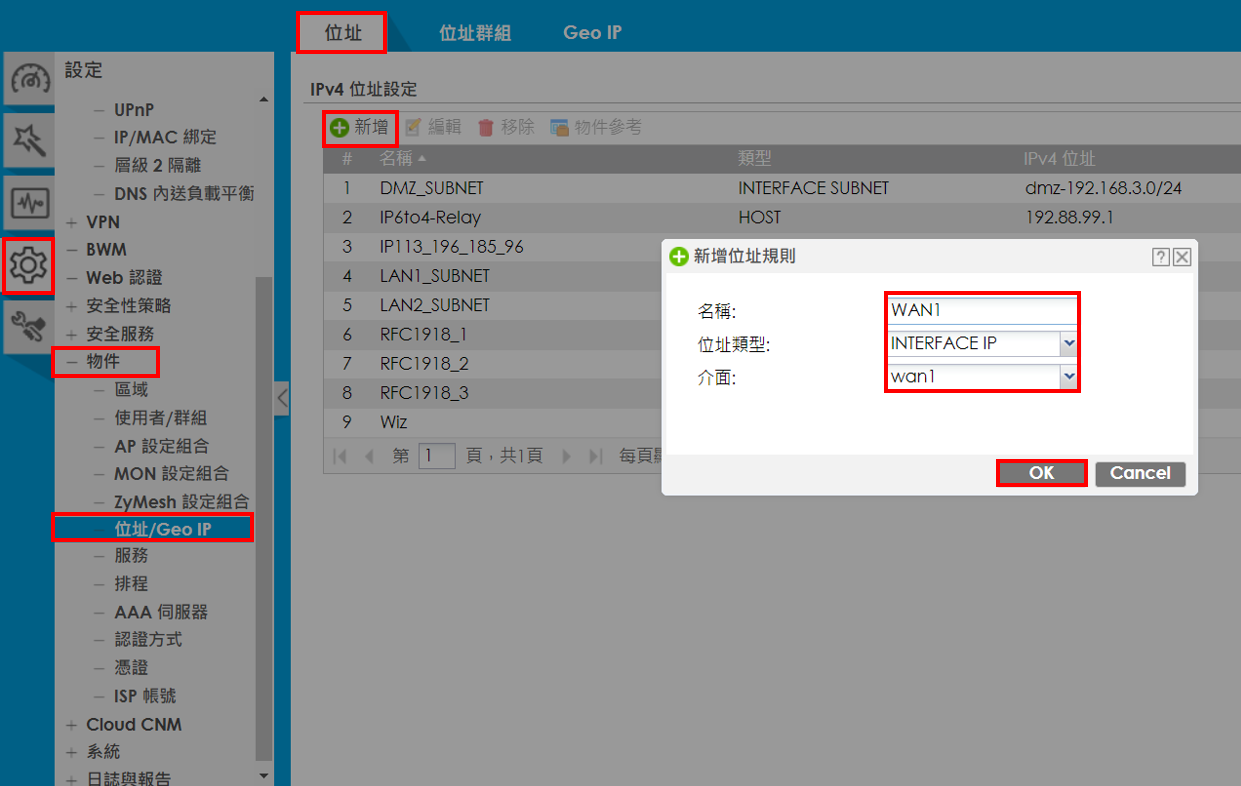
步驟二、建立WAN1介面位址
設定>物件>位址/Geo IP>位址>新增>輸入名稱、選擇位址類型、選擇介面>OK
步驟三、建立L2TP IP Pool,使用者自外部連路所取得的IP
設定>物件>位址/Geo IP>位址>新增>輸入名稱、選擇位址類型、填入IP
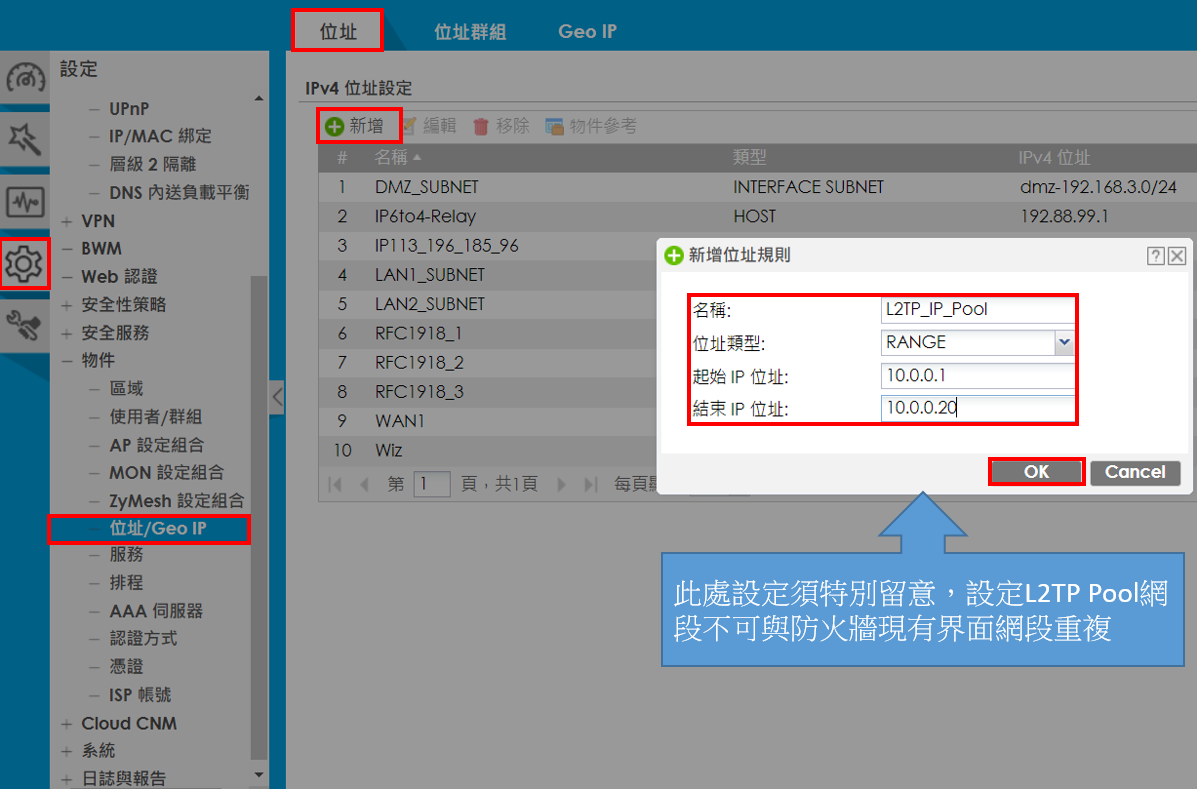
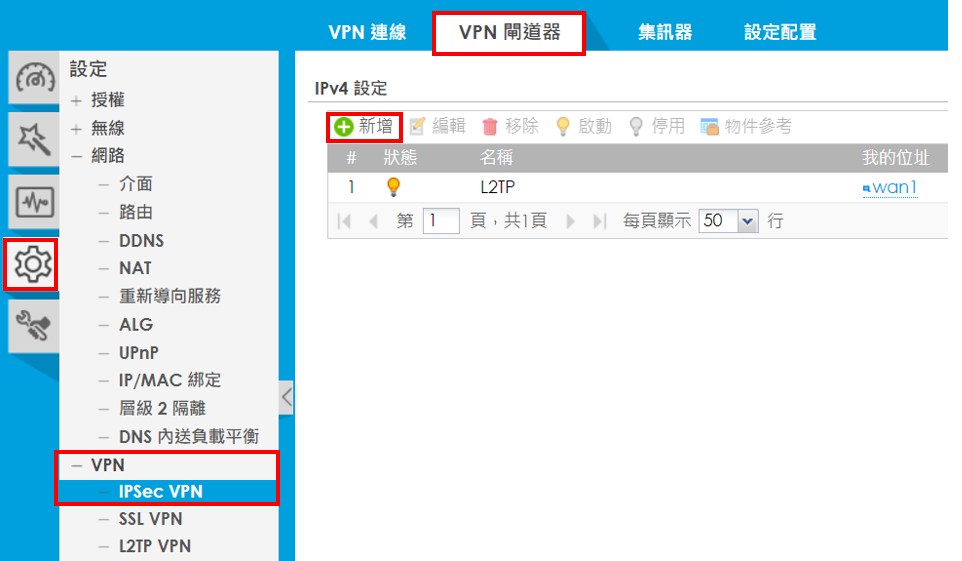
步驟四、IPSec VPN Gateway設定
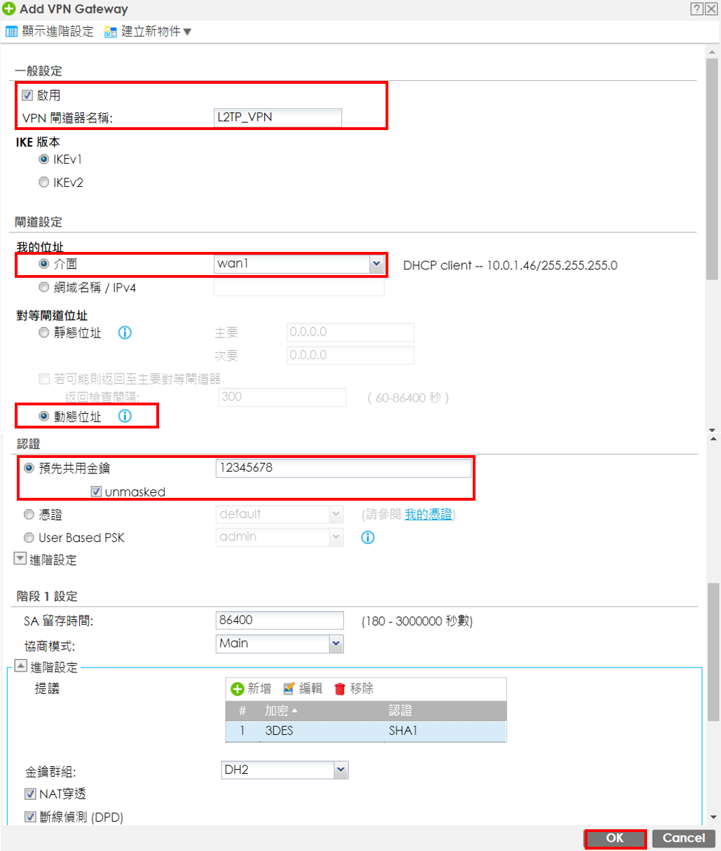
設定>VPN> IPSec VPN>VPN閘道器>新增>啟用
1、 輸入VPN閘道器名稱
2、 選取介面
3、 動態位址
4、 輸入預先共用金鑰(金鑰,必須與使用者電腦設定一致)
5、 Advance中的功能預設即可
6、 階段1設定預設即可
完成上述步驟設定後選取”OK”


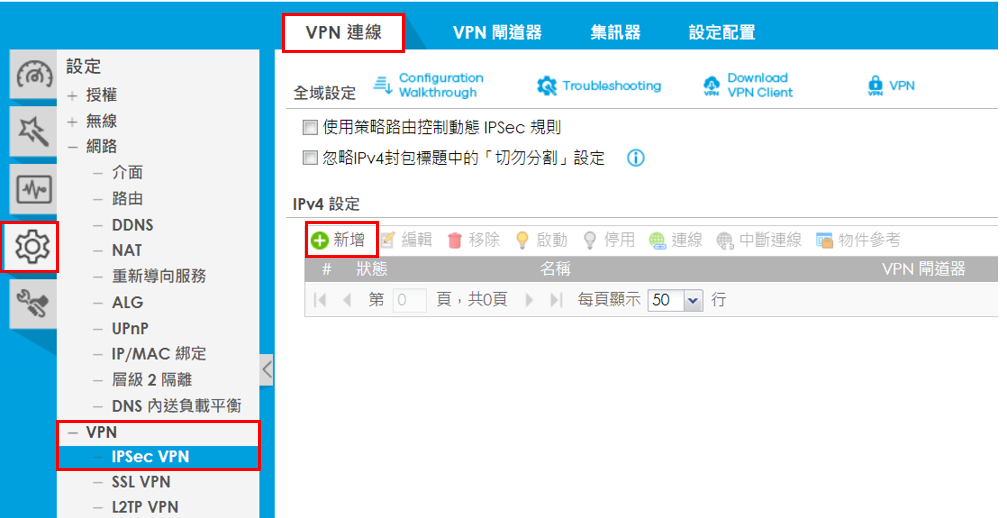
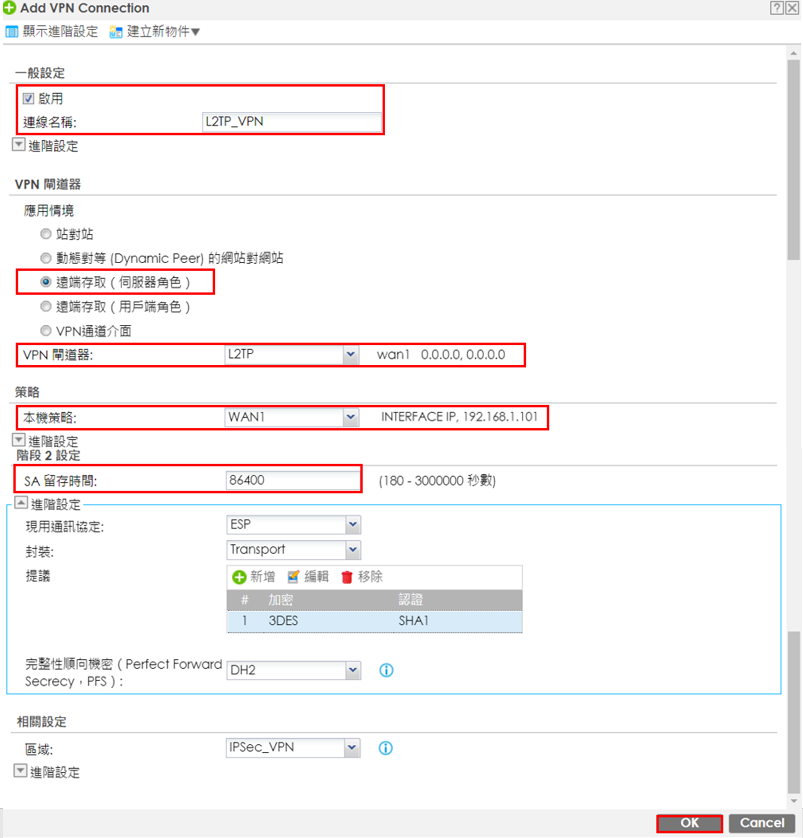
步驟五、VPN連線
設定> VPN> IPSec VPN>VPN連線>新增>啟用
1、 輸入連線名稱
2、 選取遠端存取(伺服器角色)
3、 選取VPN閘道器
4、 選取本機策略
5、 階段2留存時間比照步驟四的時間設定為86400
6、 完成上述步驟設定後選取”OK”
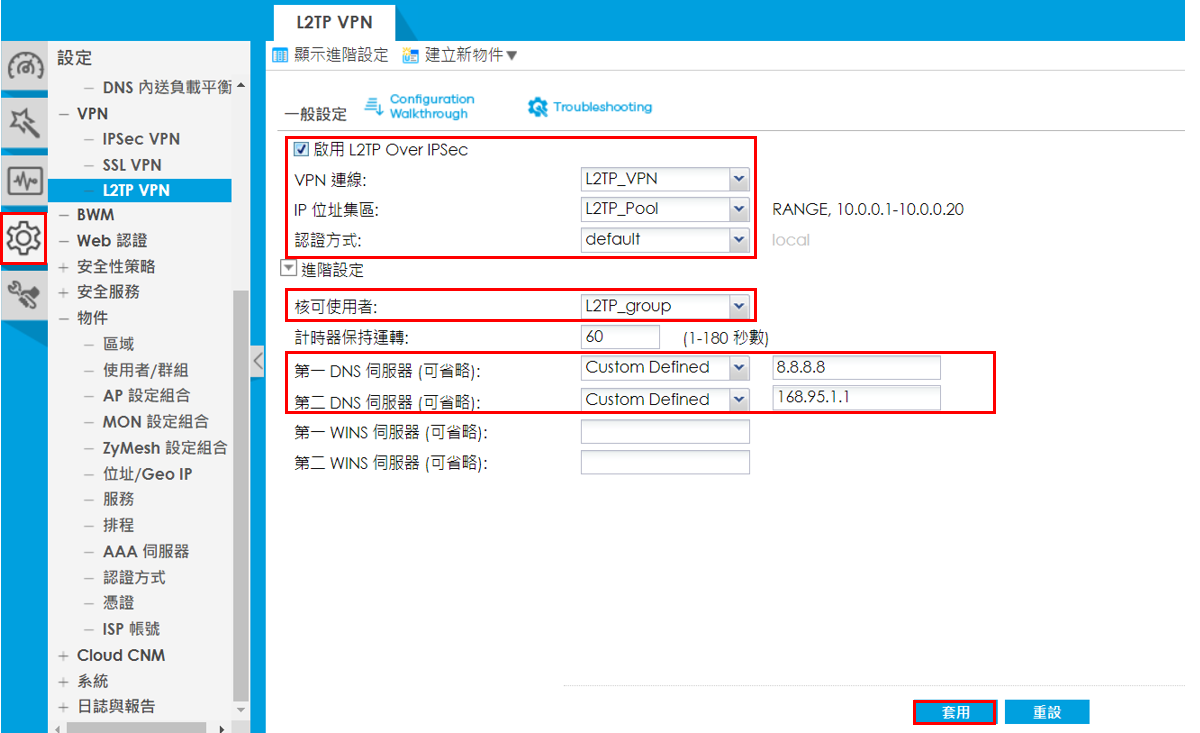
步驟六、L2TP VPN介面設定
設定>啟用L2TP Over IPsec
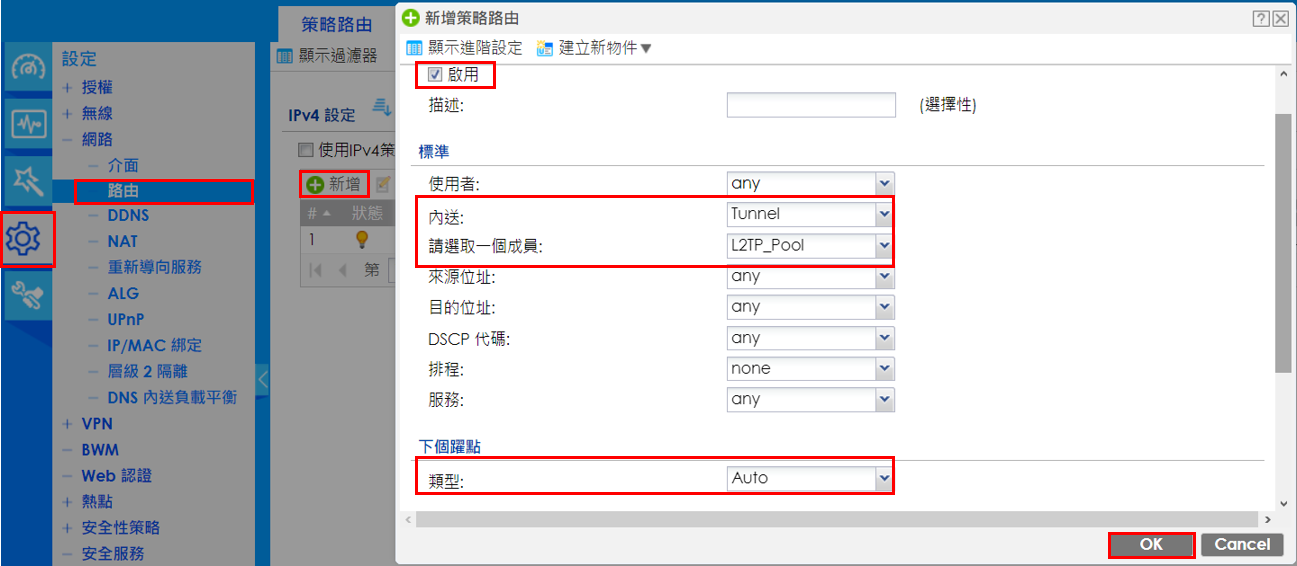
步驟七、VPN對外上網設定
設定>路由>策略路由>新增>啟用>內送選擇Tunnel、請選取一個成員:選擇L2TP Pool、類型選擇Auto>OK
步驟八、驗證
Monitor>VPN Monitor


0


