Need latest firmware V2.20(ABKJ.8)C0 for Multy X (WSQ50) USB recovery

 Freshman Member
Accepted Solution
-
Hello
Multy Plus/Multy X Firmware Upgrade Procedure
1. Copy the latest firmware file to a USB flash drive and place it in the root directory of the drive. (The USB drive must be formatted in ext4 format.)
When the Multy Plus /Multy X device is uninstalled (indicated by a blue LED), insert the USB drive into the device.
Firmware download link:
Multy Plus: Multy X:2. Insert the USB drive into the Multy Plus / Multy XTo connect to the Multy Plus / Multy X, set your computer’s IP address to a static IP:
192.168.212.55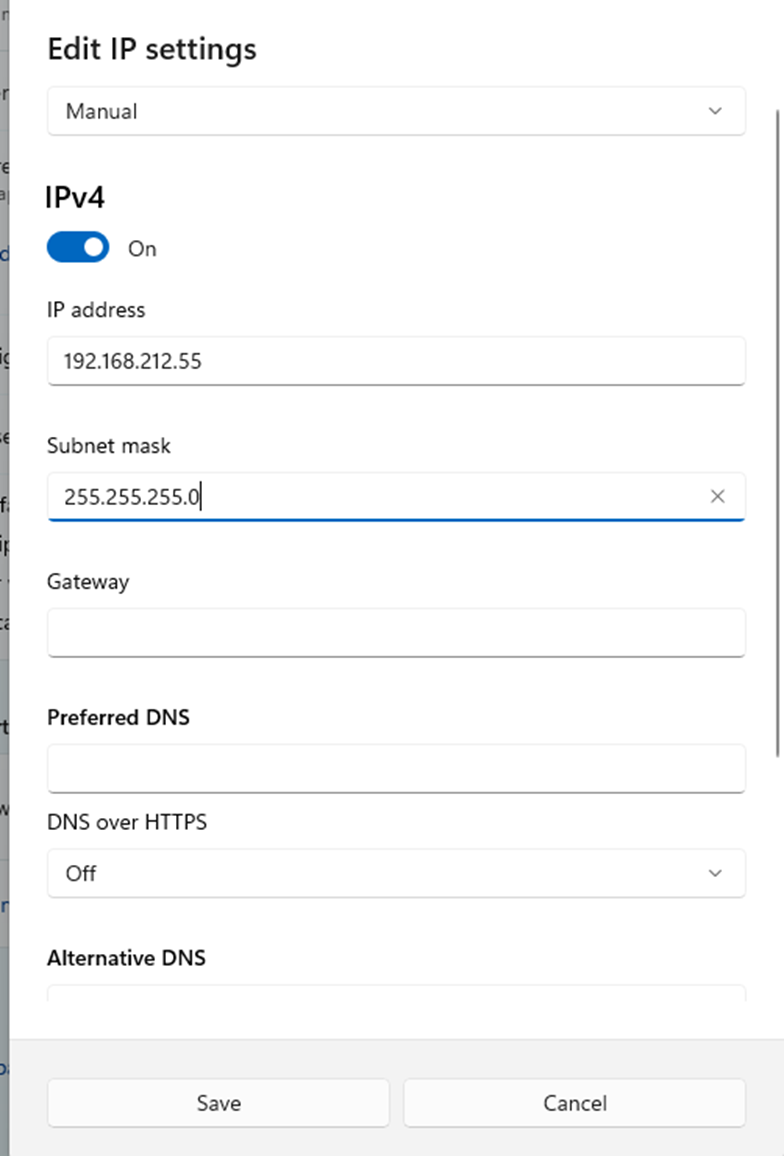
3. Use Tera Term or PuTTY to connect to the device
via Telnet at IP address
192.168.212.5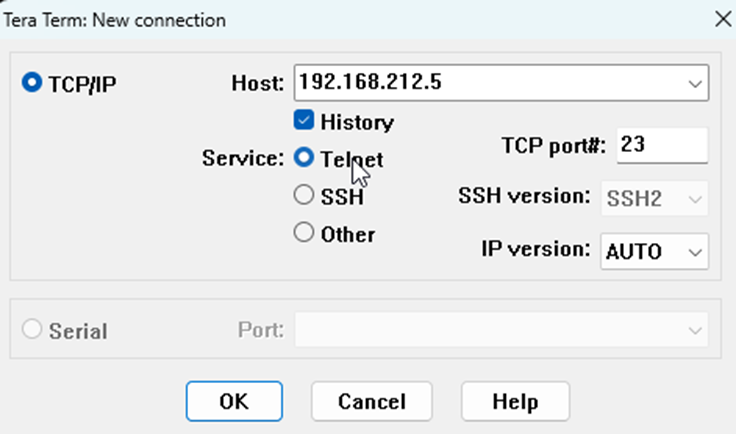
After pressing OK, a login prompt will appear:
Username:root
Password:12344.After logging in, enter the command mount to confirm that the device detects the USB drive
For example, when the USB is successfully mounted on a Multy Plus / Multy X device, the path will be located at: /tmp/storage/usb1/usb1_3-1_1/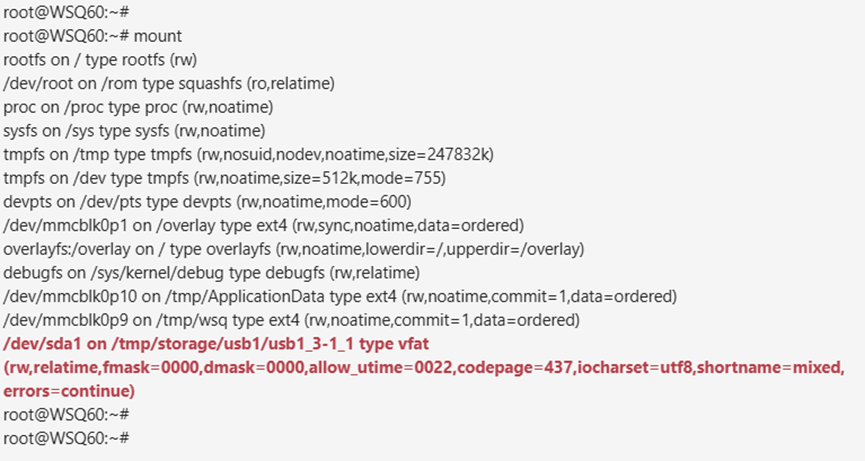
5.Copy the firmware file to the /tmp directory using the following command:
Multy Plus:
cp /tmp/storage/usb1/usb1_3-1_1/220ABND.9C0.bin /tmp
Multy X:
cp /tmp/storage/usb1/usb1_3-1_1/220ABKJ8C0.bin /tmp
6.Change to the/tmpdirectory and execute the firmware upgrade:
cd /tmp
Multy Plus: FW_upgrade 220ABND.9C0.binMulty X: FW_upgrade 220ABKJ8C0.bin
7.After entering the command, wait for 15 seconds, then reboot the device with the command:
reboot –f
The device will begin the firmware installation and reboot automatically.
8.Once the device restarts, use the command atsh to verify the firmware versionExample:
 0
0

 Zyxel Employee



All Replies
-
Hello
Multy Plus/Multy X Firmware Upgrade Procedure
1. Copy the latest firmware file to a USB flash drive and place it in the root directory of the drive. (The USB drive must be formatted in ext4 format.)
When the Multy Plus /Multy X device is uninstalled (indicated by a blue LED), insert the USB drive into the device.
Firmware download link:
Multy Plus: Multy X:2. Insert the USB drive into the Multy Plus / Multy XTo connect to the Multy Plus / Multy X, set your computer’s IP address to a static IP:
192.168.212.55
3. Use Tera Term or PuTTY to connect to the device
via Telnet at IP address
192.168.212.5
After pressing OK, a login prompt will appear:
Username:root
Password:12344.After logging in, enter the command mount to confirm that the device detects the USB drive
For example, when the USB is successfully mounted on a Multy Plus / Multy X device, the path will be located at: /tmp/storage/usb1/usb1_3-1_1/
5.Copy the firmware file to the /tmp directory using the following command:
Multy Plus:
cp /tmp/storage/usb1/usb1_3-1_1/220ABND.9C0.bin /tmp
Multy X:
cp /tmp/storage/usb1/usb1_3-1_1/220ABKJ8C0.bin /tmp
6.Change to the/tmpdirectory and execute the firmware upgrade:
cd /tmp
Multy Plus: FW_upgrade 220ABND.9C0.binMulty X: FW_upgrade 220ABKJ8C0.bin
7.After entering the command, wait for 15 seconds, then reboot the device with the command:
reboot –f
The device will begin the firmware installation and reboot automatically.
8.Once the device restarts, use the command atsh to verify the firmware versionExample:
0