How to configure a stacked switch for CX4800-56F series

 Zyxel Employee
Introduction
The CX4800 is equipped with 48 x 10G/25G SFP28 ports and 8 x 100G QSFP ports, delivering massive uplink and access bandwidth. It also features a specialized Networked AV mode designed for AVoIP (Audio-Video over IP) transmissions, which simplifies the configuration and monitoring of professional AV equipment. The following section outlines the stacking configuration steps for this model.
1. Pre-stacking Requirements
- a) Supported Models: CX4800 Series.
- b) Maximum Stack Capacity: Supports a maximum of 2 units.
- c) Firmware Consistency: All units in the stack must run the same firmware version.
- d) Configuration Reset: Switching to Stacking Mode will result in the loss of the switch's original configuration.
2. Stacking Deployment
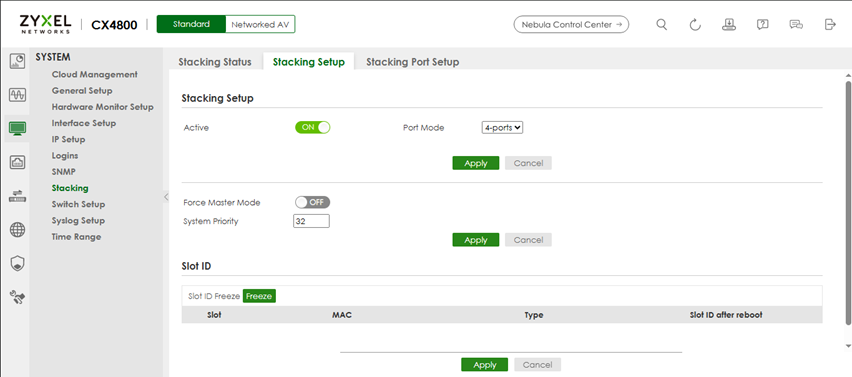
Step 1: Enable Stacking
- Navigation: SYSTEM > Stacking > Stacking Setup
- Enable stacking on the first unit and select the desired Stacking Port mode, then click Apply.
- Note: If you intend to use the remaining 2 ports to cascade other network devices, select the 2-Port Stacking Mode. Stacking ports are predefined as the last 2 or 4 ports of the device.
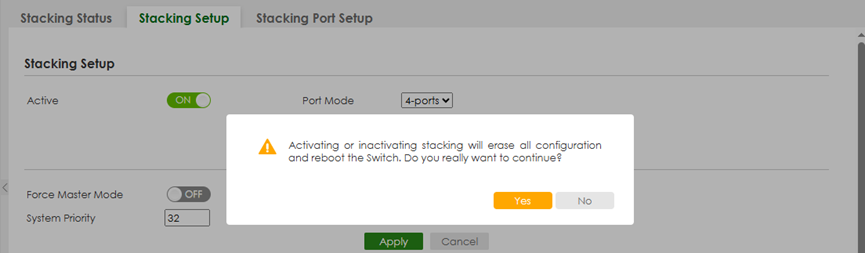
Step 2: Apply Stacking Settings
- Upon clicking Apply, a prompt will appear warning that the current configuration will be cleared and the device will reboot. After clicking "Yes," the device will enter Stacking Mode once the reboot process is complete.
Step 3: Configure the Second Unit
Repeat the Step 1 and Step 2 on the second switch to transition it into Stacking Mode as well.
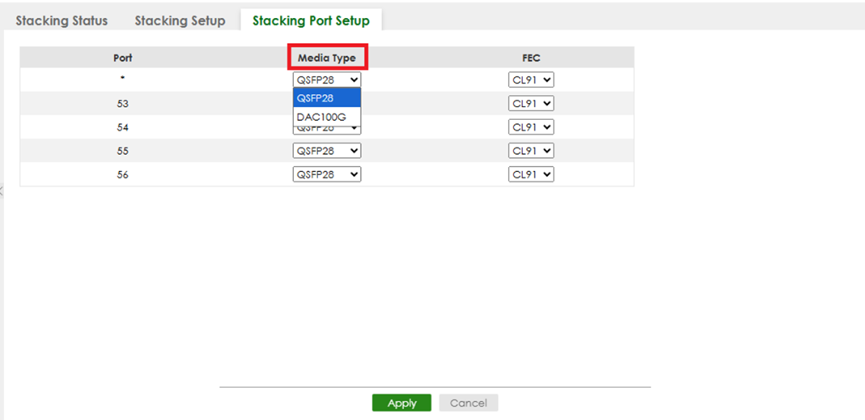
Step 4: Configure Stacking Port Media Type
- Navigation: SYSTEM > Stacking > Stacking Port Setup
- When configuring the physical stacking for CX4800, ensure that the Media Type for the stacking ports is identical on both switches.
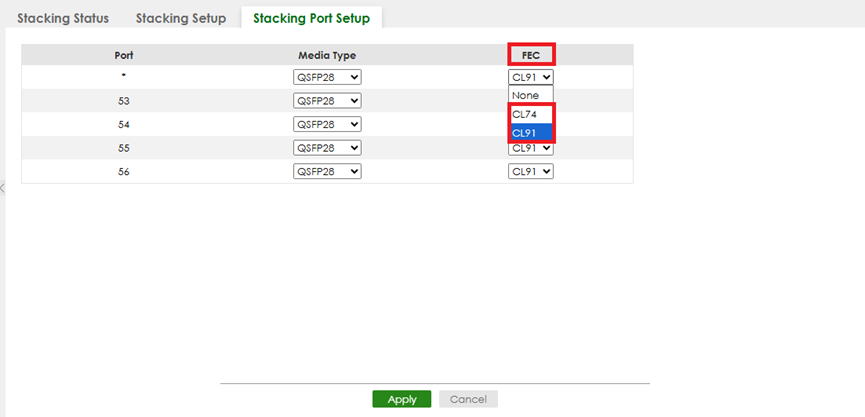
Step 5: Configure Stacking Port FEC
- Navigation: SYSTEM > Stacking > Stacking Port Setup
- CL91: Select CL91 when both connected ports support 25 Gbps and 100 Gbps speeds.
- CL74: Select CL74 when both connected ports support 25 Gbps speed and require low latency in data transmission.
When configuring the physical stacking for CX4800, ensure that the FEC (Forward Error Correction) settings for the stacking ports are identical on both switches.
Step 6: Physical Connection
Connect the stacking cables to the predefined stacking ports.
Step 7: Stack Initialization
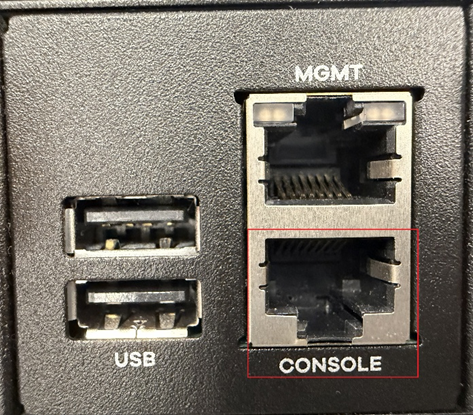
The second switch will begin the initialization process. During this stage, you may connect Console to identify which unit has been elected as the MASTER.
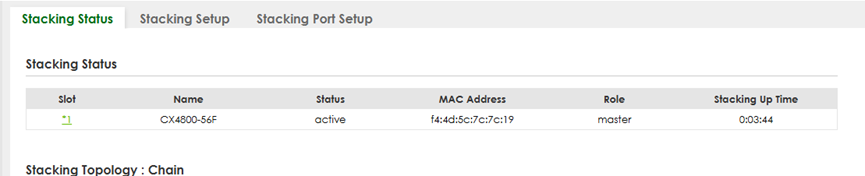
Step 8: Verify Stacking Status
- Navigation: SYSTEM > Stacking > Stacking Status
- You can verify the current state and roles of the stack members here.
Important Notes
- Management IP: In Stacking Mode, the default management IP is 192.168.1.1/24. In Non-Stacking Mode, the device will first attempt to obtain an IP via DHCP. If no DHCP server is available, it will default to 192.168.1.1/24.
- Mode Persistence: Once the 2-Port or 4-Port stacking mode is selected, it cannot be modified directly. To change the mode, the stack must be disbanded before re-establishing it.
- Master Election Priority (Descending Order):
- a) "Force Master Mode" selection.
- b) Higher System Priority value.
- c) Longer Up-time (calculated in 10-minute increments).
- d) Lower MAC Address value.
- Example: If all units have "Force Master Mode" enabled, the election will proceed to the next criterion (System Priority). The unit with the highest priority will be elected as the Master.
(For further details, please refer to the User Guide.)
Categories
- All Categories
- 442 Beta Program
- 3K Nebula
- 234 Nebula Ideas
- 6.7K Security
- 693 USG FLEX H Series
- 365 Security Ideas
- 1.8K Switch
- 87 Switch Ideas
- 1.4K Wireless
- 56 Wireless Ideas
- 7.1K Consumer Product
- 312 Service & License
- 508 News and Release
- 97 Security Advisories
- 31 Education Center
- 10 [Campaign] Zyxel Network Detective
- 5.1K FAQ
- 34 Documents
- 89 About Community
- 114 Security Highlight