How to pre-config USG FLEX H on Nebula before it is online

 Zyxel Employee


Starting from firmware uOS1.35, Zyxel’s USG FLEX H series supports remote pre-configuration directly from Nebula—even before the device is powered on. To use this feature, make sure your device is running the required firmware:
- Newly purchased units must complete the initial setup wizard to keep the firmware up to date.
- Existing deployed units must also be upgraded to uOS1.35 and then reset to factory default by holding the reset button for 30 seconds.
This new capability is especially valuable for MSPs and IT admins who manage multi-site deployments or need to streamline installation at remote locations. Here's how it works:
Here’s how you can set it up step by step: 👇
- Creates the organization and site
Log in to Nebula Control Center using your Zyxel account- Click Create Organization

- Enter names for the organization and site, then click Next
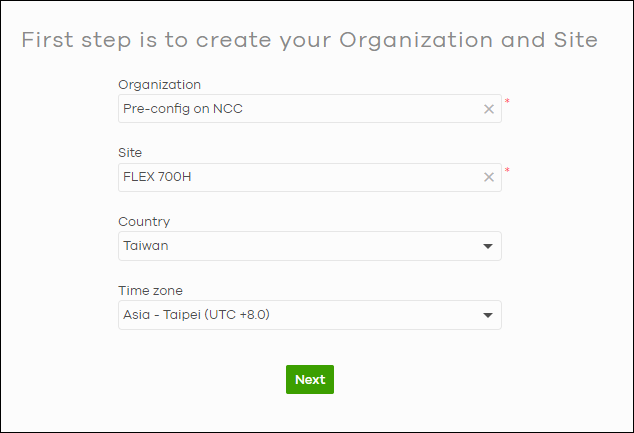
- Click Create Organization
- Skip the device and license for now
- Click Next to skip adding a device at this stage
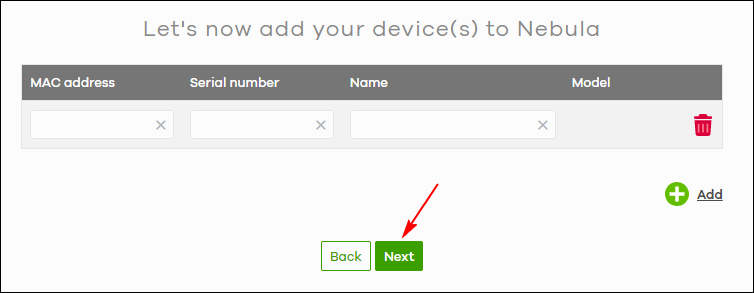
- Click Next to skip the license info as well

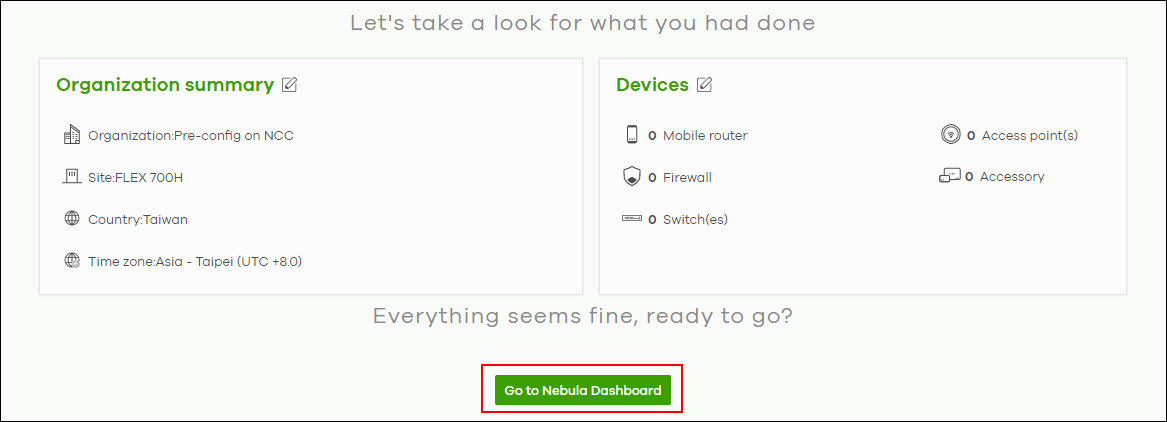
- Click Go to Nebula Dashboard.
- Click Next to skip adding a device at this stage
- Pre-configure your firewall
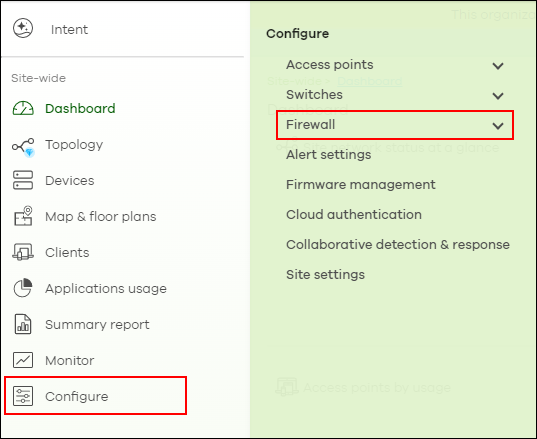
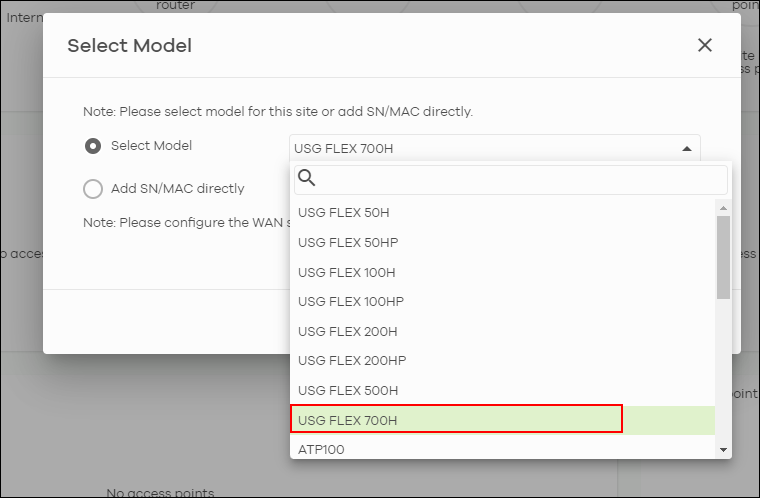
- On the Nebula Dashboard, go to Configure> Firewall
- Select the model you'll be deploying (e.g., USG FLEX 700H), then click OK to proceed.
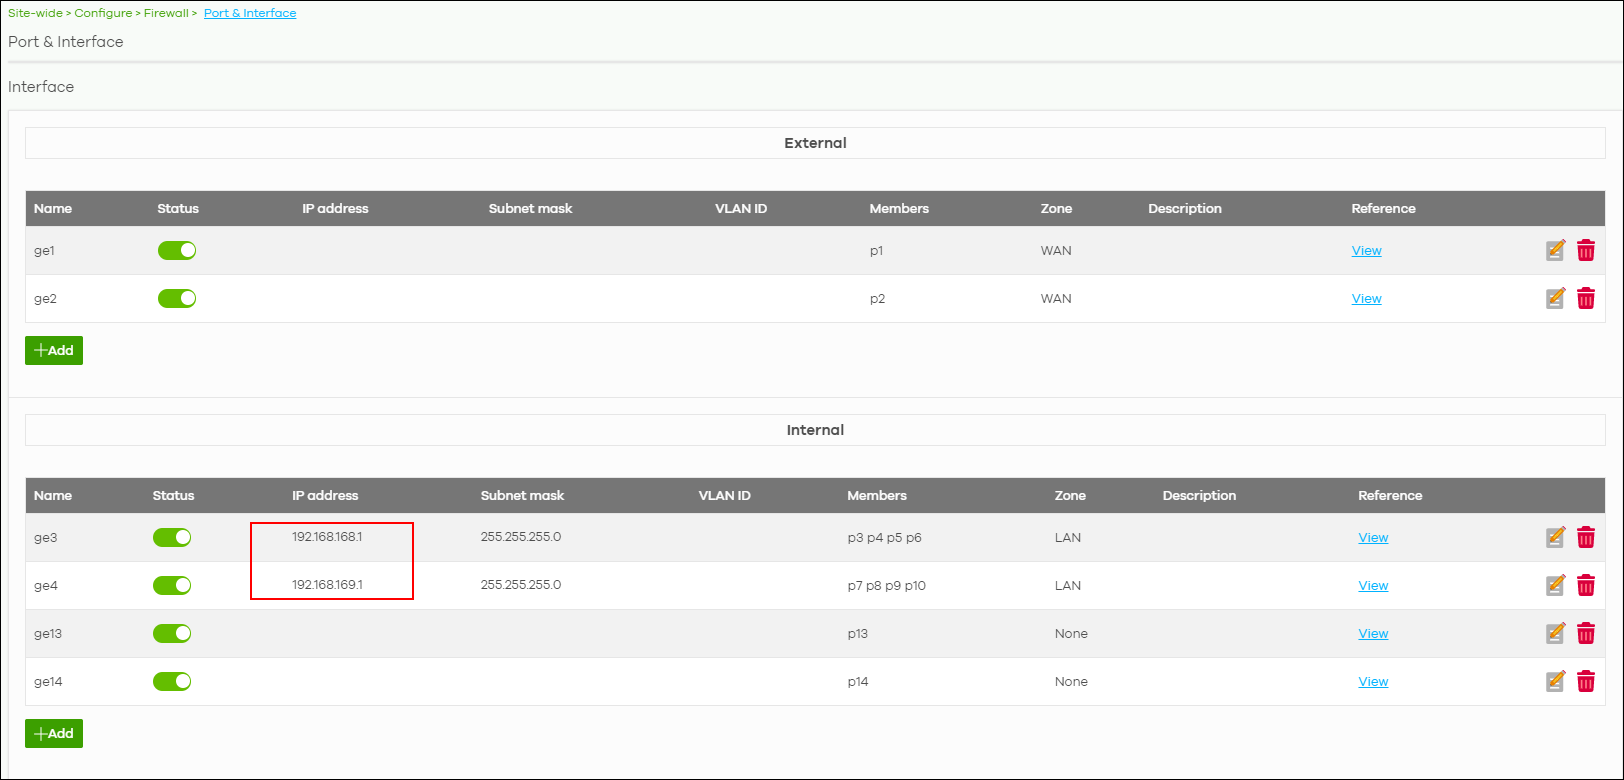
💡 Note: If the deployment site does not use DHCP, you’ll still need to configure WAN settings directly via the device GUI later. - You can now perform the full configuration—set up policies, interfaces, objects, and more.

- On the Nebula Dashboard, go to Configure> Firewall
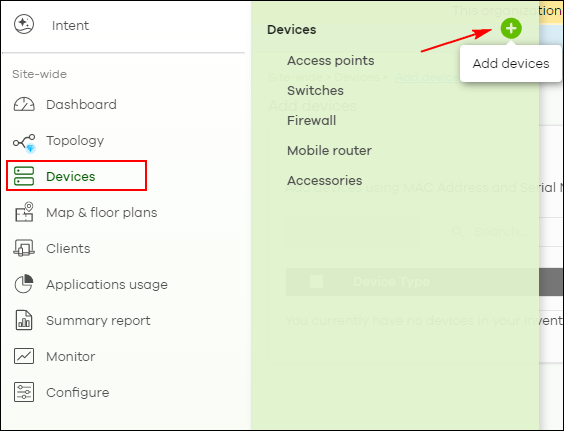
- Add your device to Nebula
Once your pre-config is done:- Go to Devices > Add Devices
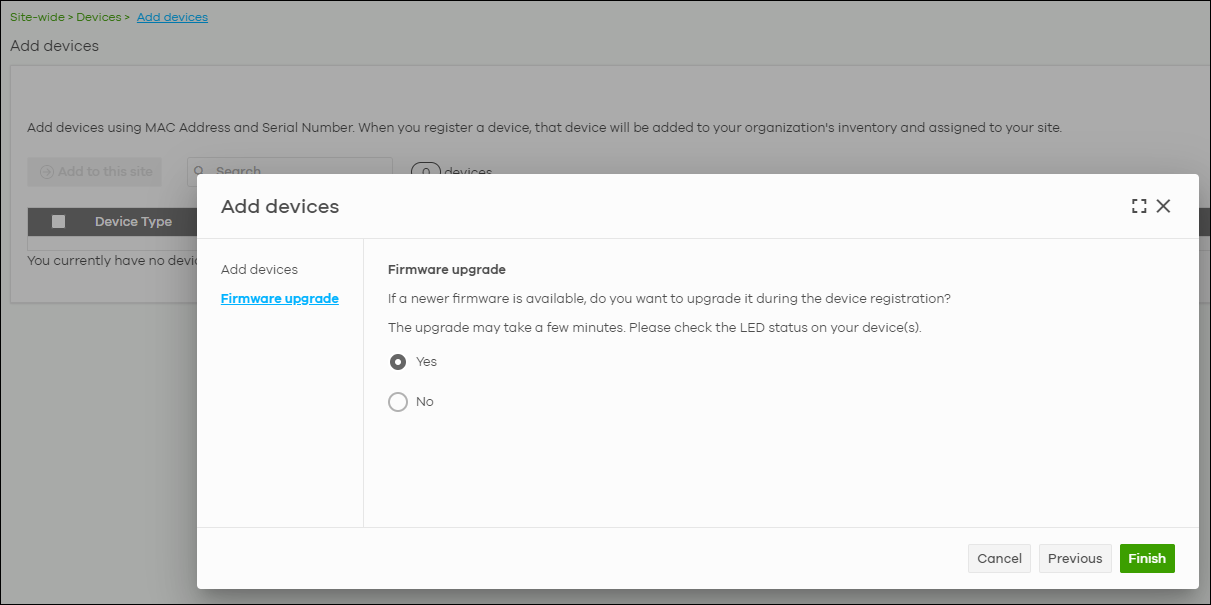
- Enter your device’s MAC address, Serial Number, and Name. Click Next.
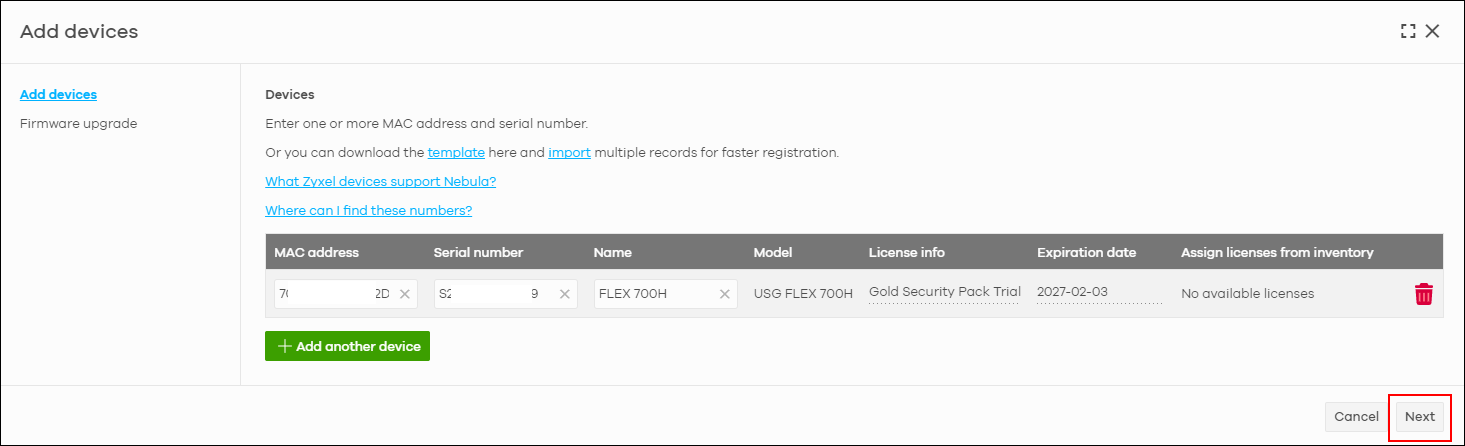
- If a newer firmware version is available, Nebula will offer to upgrade the device automatically during registration. Select Yes to apply the upgrade, or No to skip. Then click Finish.
- Go to Devices > Add Devices
Connect physical cable to your firewall and make sure Internet connection is available.
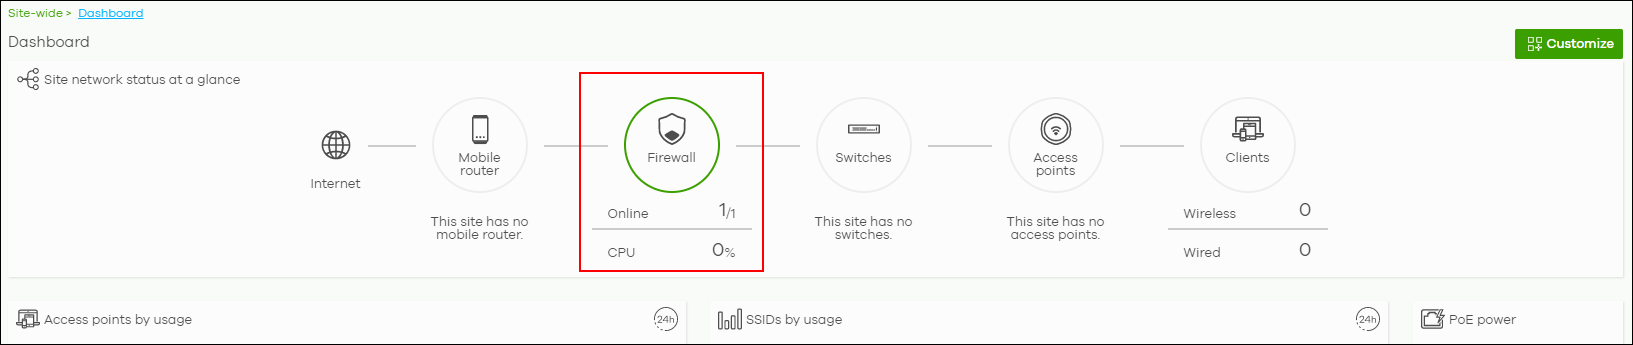
And you’ll see your device appear in the Dashboard—fully set up and ready for deployment.
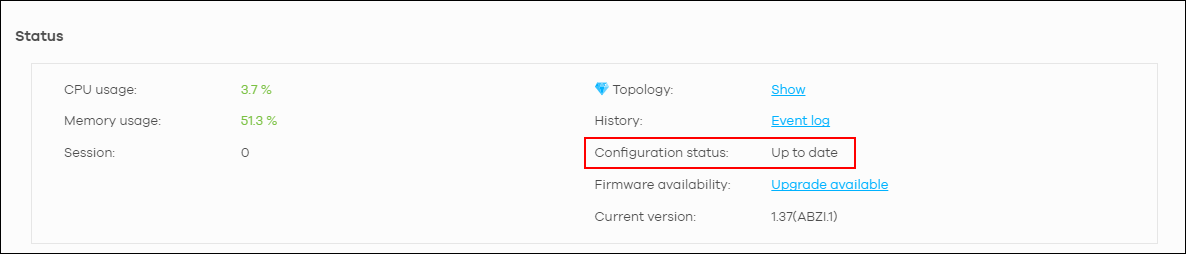
💡 Note: The firewall will apply the configuration from NCC server. It will takes around 5~15 mins for wait configuration deploy. Do not change any settings by local WebGUI before applying configuration completely.
If configuration deploy successfully, you can check "Configuration Status" shows as UP to date.
Categories
- All Categories
- 442 Beta Program
- 3K Nebula
- 229 Nebula Ideas
- 130 Nebula Status and Incidents
- 6.6K Security
- 662 USG FLEX H Series
- 359 Security Ideas
- 1.8K Switch
- 86 Switch Ideas
- 1.4K Wireless
- 56 Wireless Ideas
- 7.1K Consumer Product
- 305 Service & License
- 497 News and Release
- 95 Security Advisories
- 31 Education Center
- 10 [Campaign] Zyxel Network Detective
- 5K FAQ
- 34 Documents
- 89 About Community
- 110 Security Highlight