OIDC Setup for NID FS on Nebula Control Center and Microsoft Entra ID


 Zyxel Employee
This article describes how to configure OpenID Connect (OIDC) on both Nebula Control Center (NCC) and Microsoft Entra ID. It enables administrators to integrate their existing user directory with the Nebula identity federation service (NID FS) via OIDC, allowing users to leverage the service for additional network services such as SSID and SSL VPN authentication.
Note: Please ensure that the user's email address is set to allow successful authentication via OIDC
This guide focuses on the application registration process in Microsoft Entra ID and the collection of required information to configure a valid Identity Provider (IdP) profile in NCC.
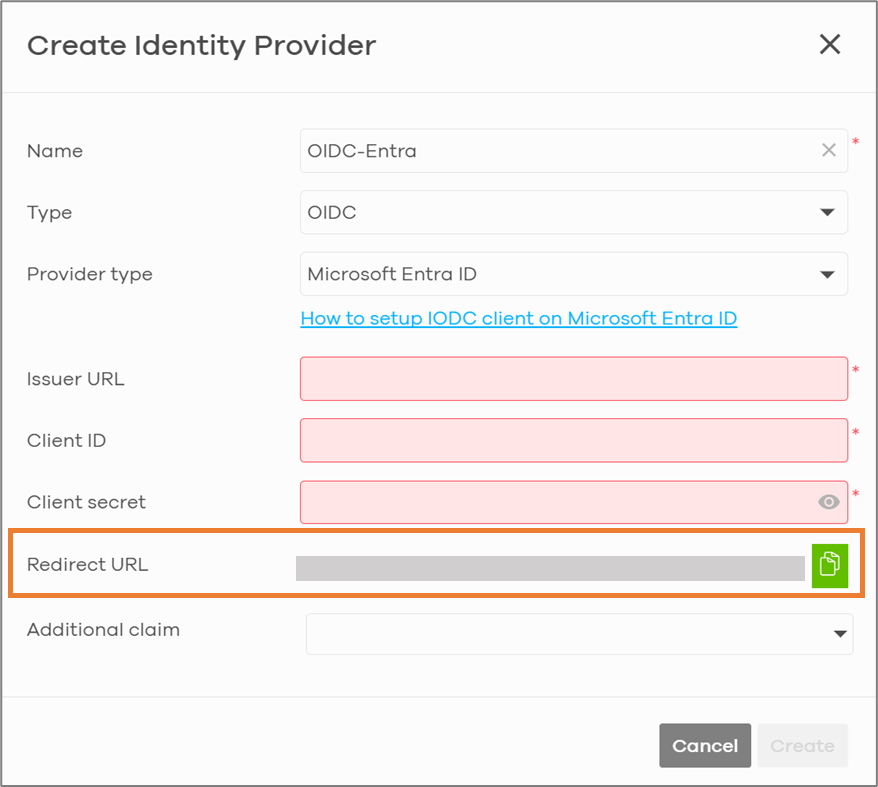
Step 1 : Copy the Redirect URL on NCC
- In the “Add Identity Provider” dialog in NCC, copy the Redirect URL value for later use.
Step 2: Register an Application in Microsoft Entra ID
- Sign in to the Microsoft Entra Admin Center.
- Navigate to App registrations > New registration.
- Click + New registration in the top menu.
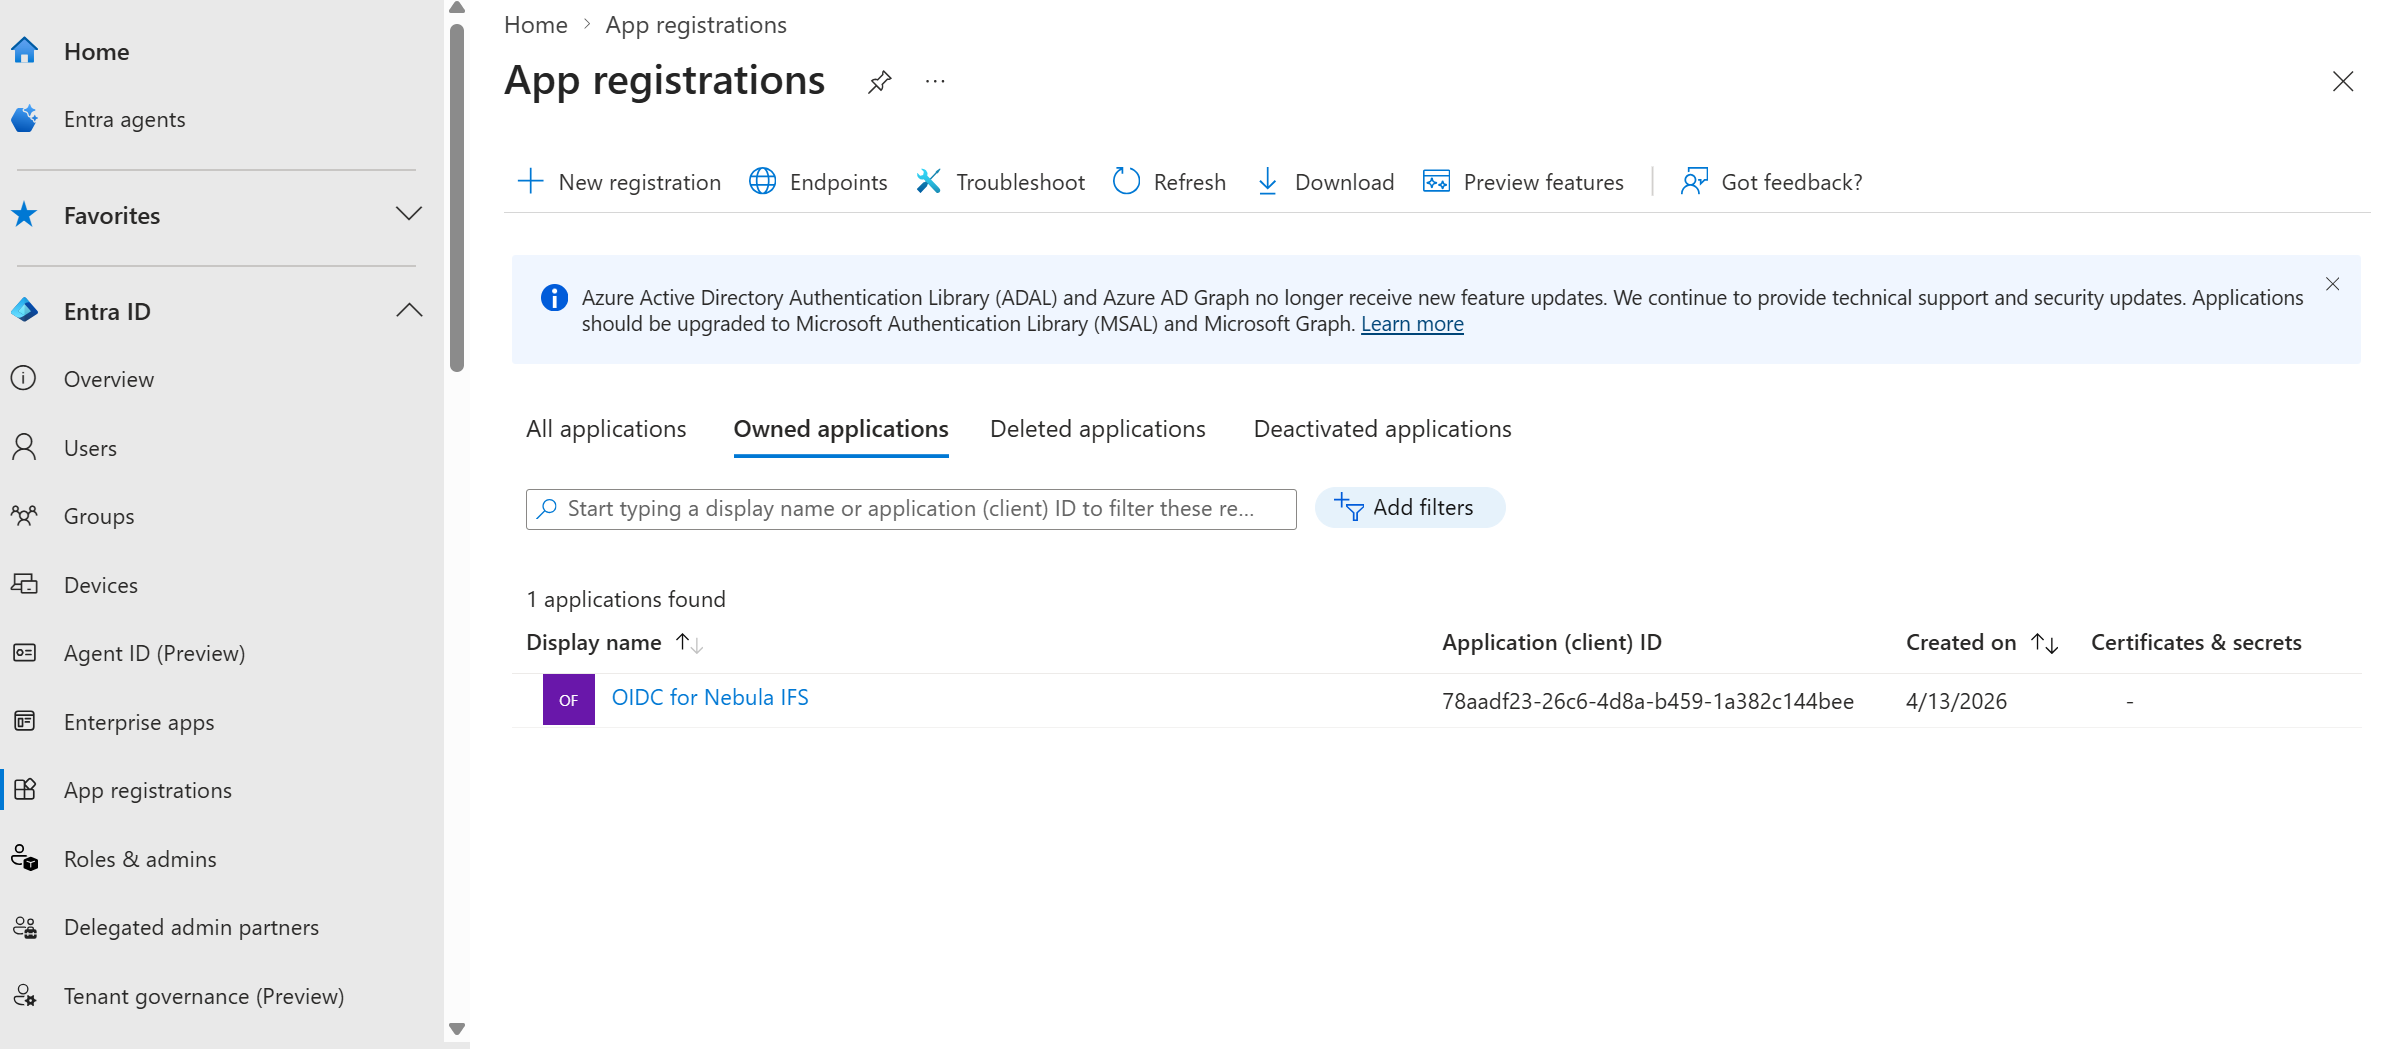
- On the Register an application page:
- Enter a descriptive name for your application.
- Under Supported account types, select the account types that should be allowed to access the Nebula identity federation service.
- Under Redirect URI
- Select Web as the platform.
- Paste the Redirect URL copied from NCC.
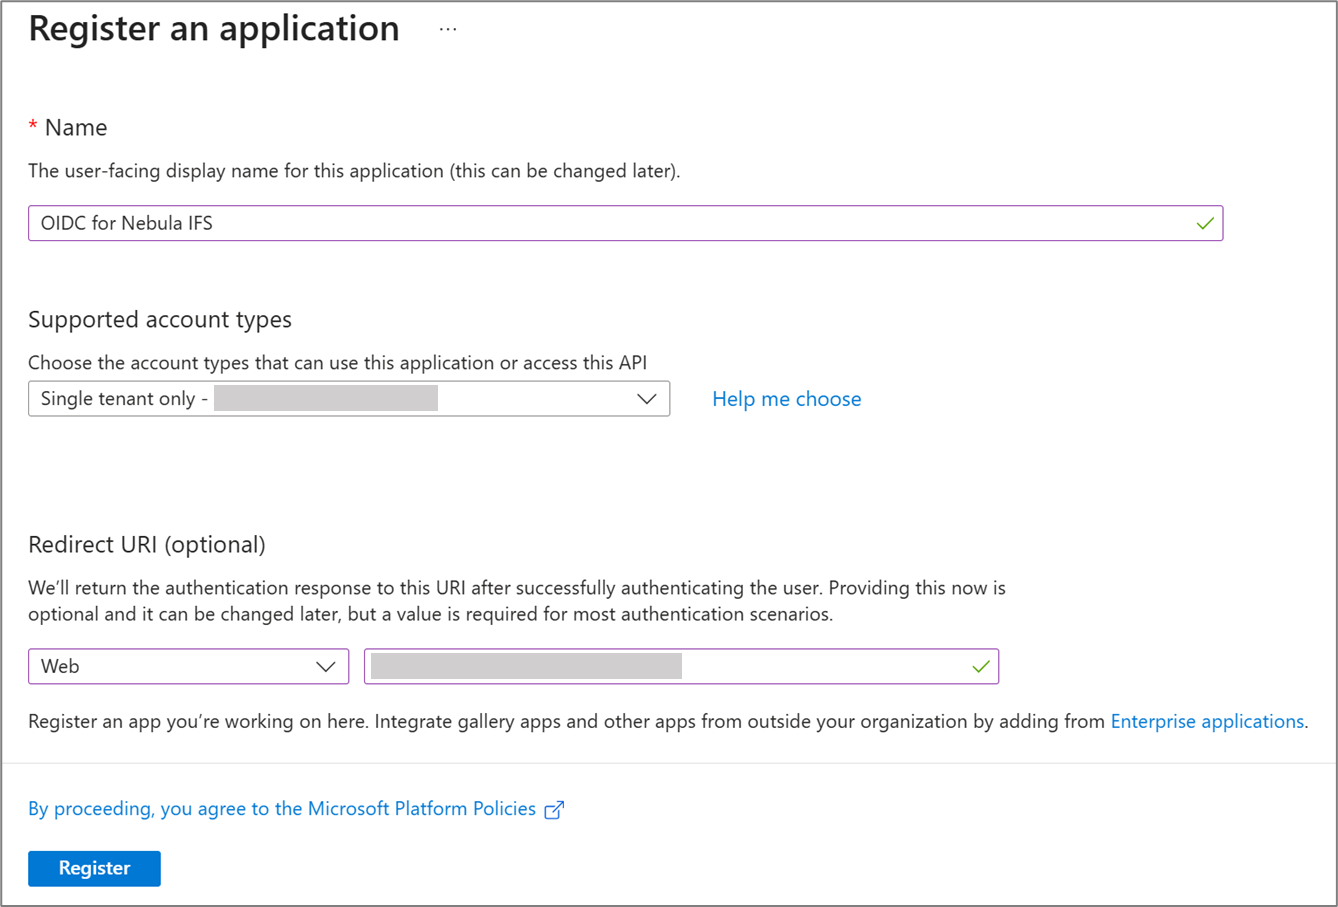
- Click Register.
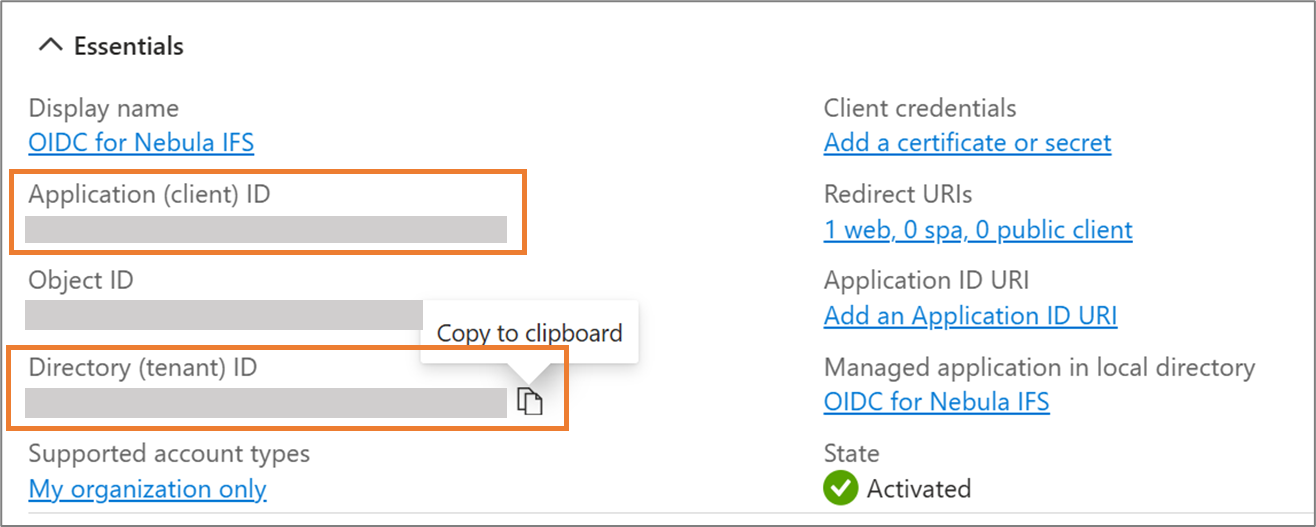
- After registration, record the following values in the application detail page:
- Application (client) ID
- Directory (tenant) ID
Step 3: Create an OIDC Client Secret in Microsoft Entra ID
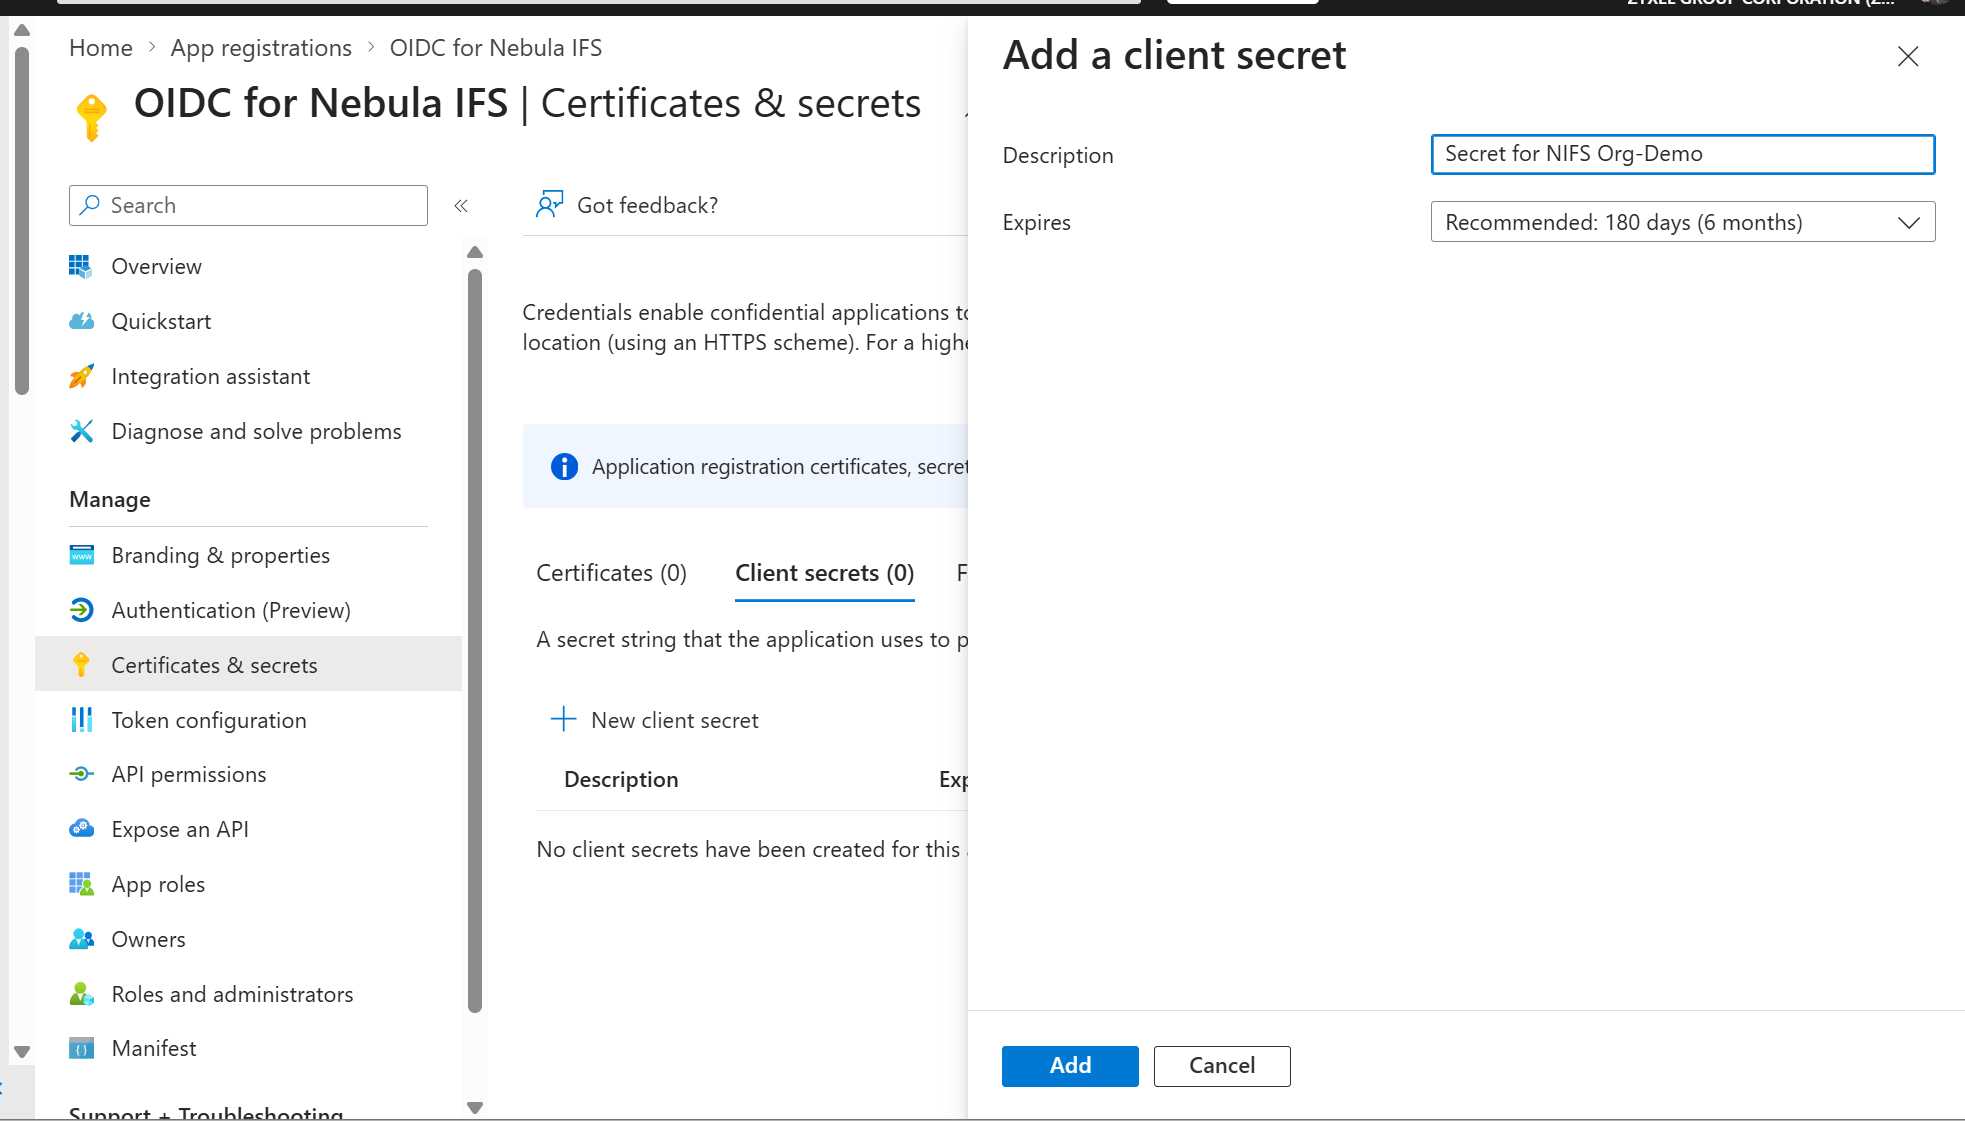
- In the application detail page, navigate to Manage > Certificates & secrets.
- Click + New client secret.
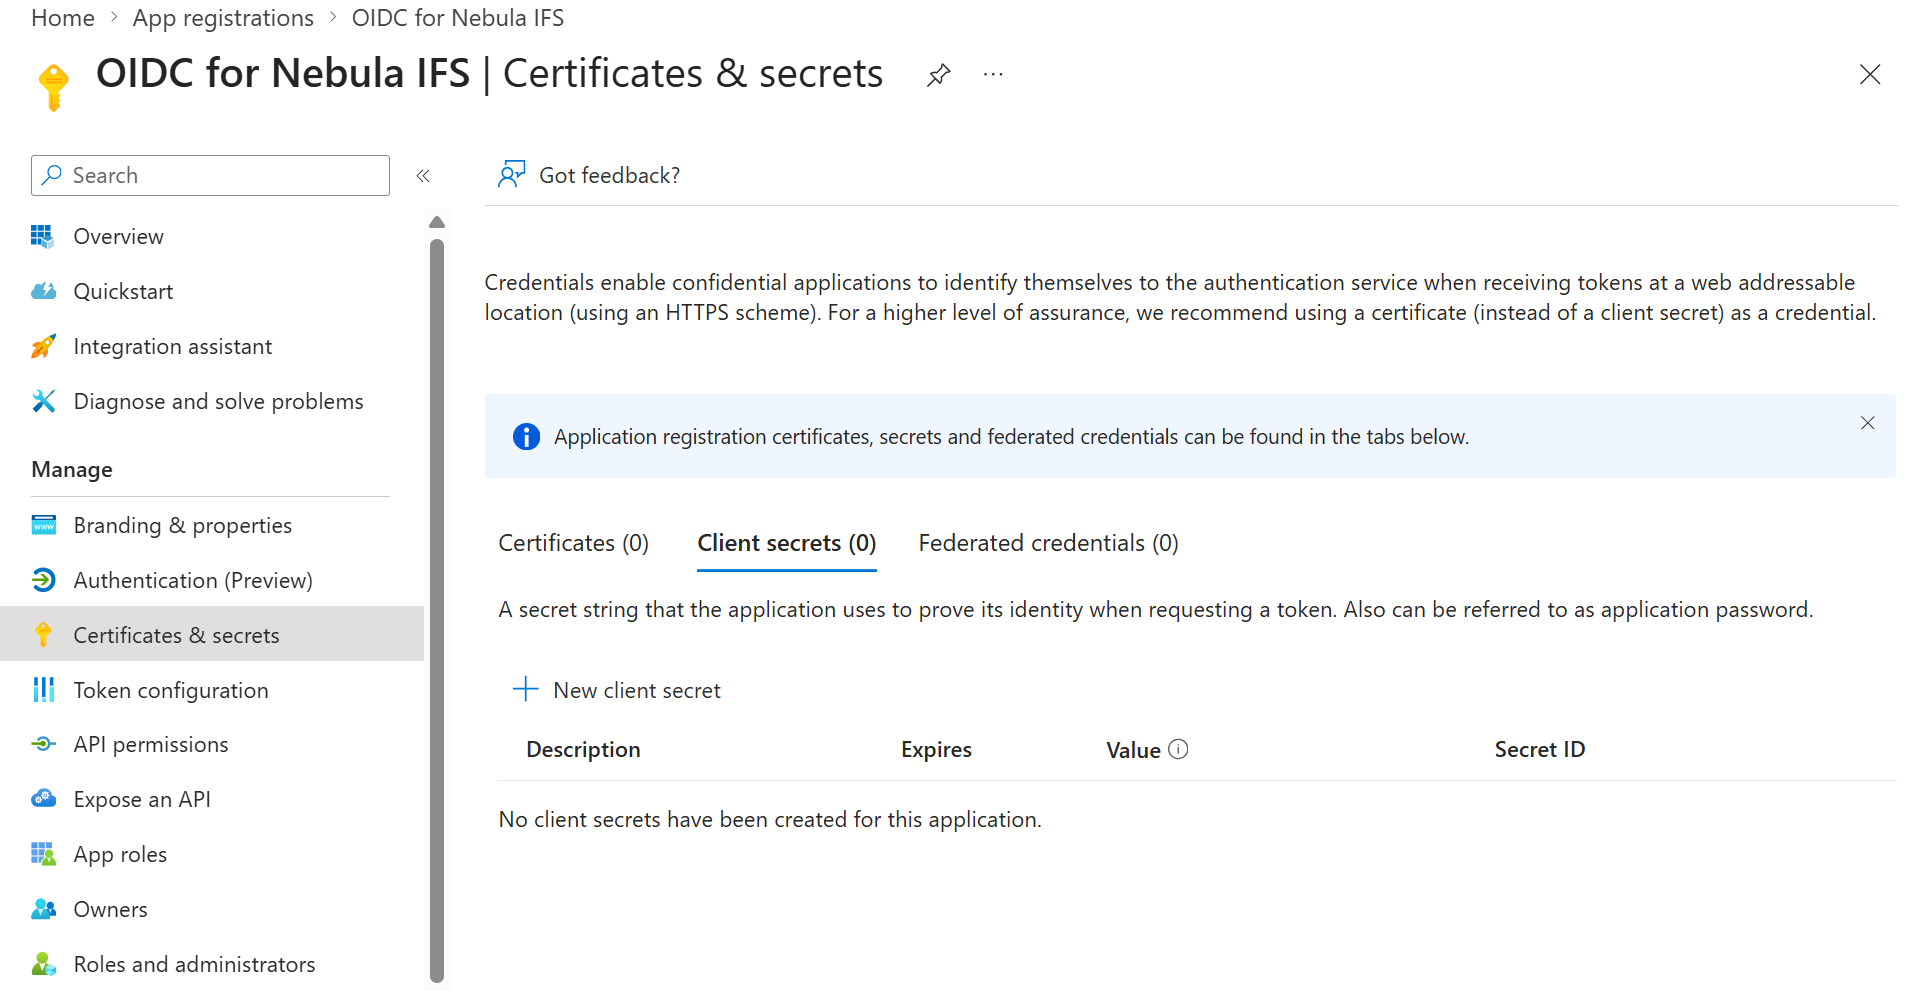
- In the configuration panel:
- Enter a name (description) for the secret.
- Select an appropriate expiration period.
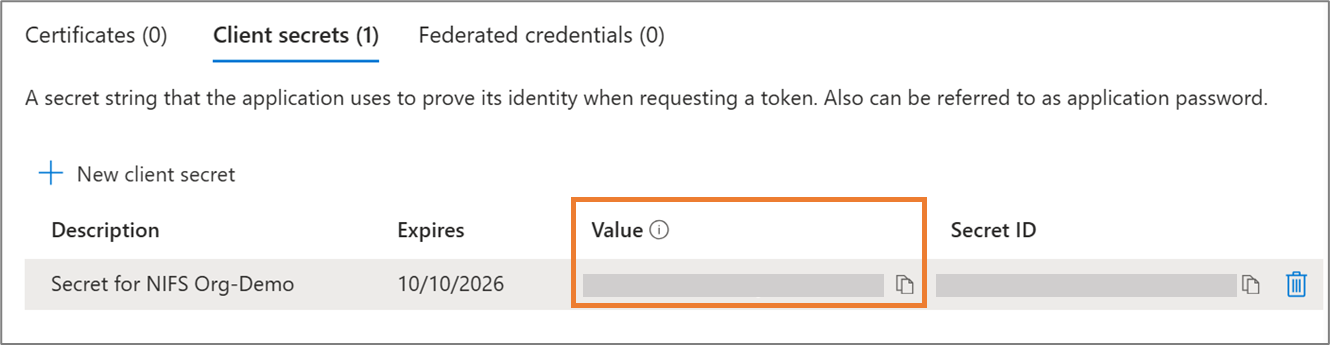
- After creation, copy and securely store the client secret value.
Step 4: Configure the Identity Provider in NCC
- Return to the “Add Identity Provider” dialog in NCC and enter the following details:
- Issuer URL: https://login.microsoftonline.com/<tenant_id>/v2.0
- Client ID: <Application (client) ID>
- Client Secret: <Client Secret Value>
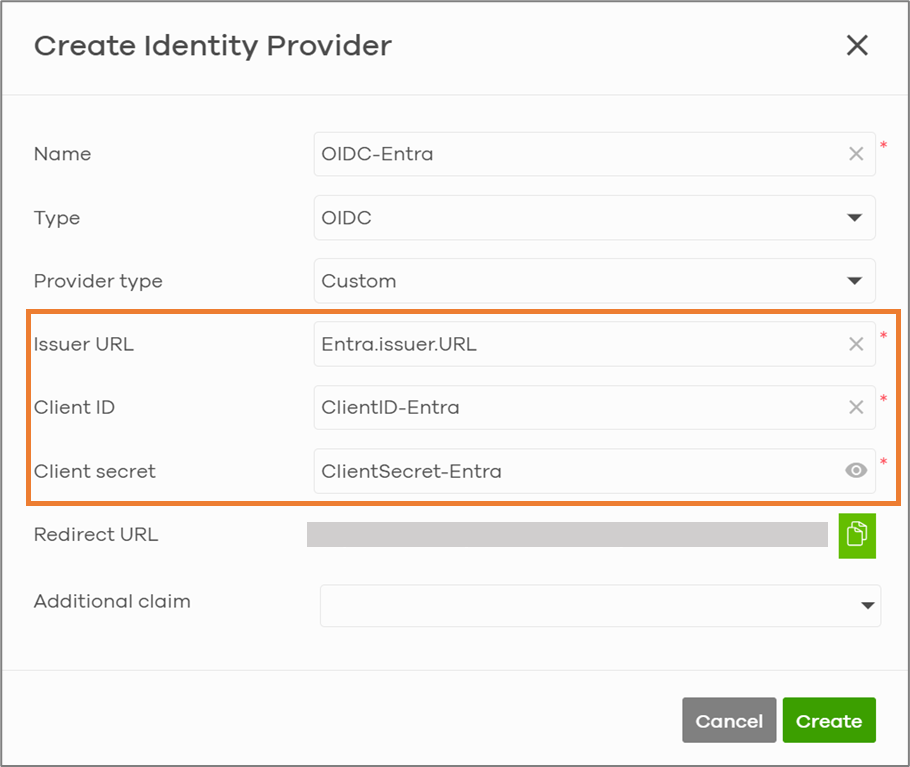
- Click Save to complete the Identity Provider configuration.
Related content:Claim settings and usage on Microsoft Entra ID and NCC.
Categories
- All Categories
- 442 Beta Program
- 3.1K Nebula
- 242 Nebula Ideas
- 6.8K Security
- 764 USG FLEX H Series
- 385 Security Ideas
- 1.8K Switch
- 87 Switch Ideas
- 1.5K Wireless
- 58 Wireless Ideas
- 7.2K Consumer Product
- 324 Service & License
- 524 News and Release
- 100 Security Advisories
- 31 Education Center
- 10 [Campaign] Zyxel Network Detective
- 5.3K FAQ
- 34 Documents
- 91 About Community
- 121 Security Highlight