How to implement Compound Authentication with Dynamic VLAN Assignment?

 Zyxel Employee


Dynamic VLAN Assignment separates and isolates devices into different network segments based on the device or user authorization and their characteristics.
Scenario and Topology

Configuration
The following steps are applicable for switches supporting compound authentication. MAC authentication + Dynamic VLAN assignment is only supported on GS2220, XGS2210, XGS2220, XGS4600, and XS3800 in standalone mode while using a RADIUS Server (Windows Server 2019).
1. Configure switch
1.1 Configure VLAN and ports.
- XGS4600
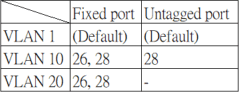
Port 28 = PVID 10
- GS2220

1.2 Configure RADIUS IP address, Shared secret, and AAA settings at Advanced Application > AAA > RADIUS Server Setup & AAA Setup.


1.3 Configure 802.1x, MAC authentication, and Guest VLAN as well as Compound Authentication on client port at Advanced Application > Port Authentication.


1.4 Keep Compound Authentication Mode as strict for client port.

2. Set up NPS on Windows Server 2019
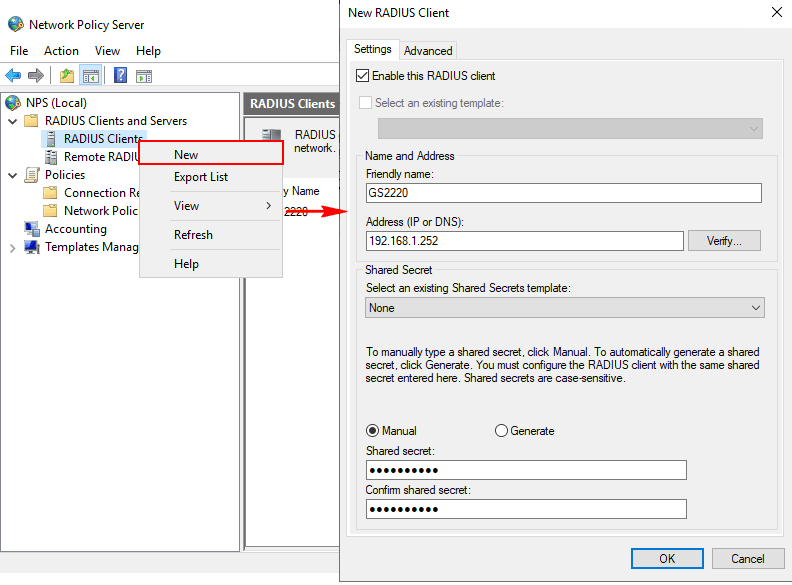
2.1 Open Network Policy Server and right-click on RADIUS Clients > New, to configure Friendly name, IP address, and Shared secret.
2.2 Configure Connection Request Policies(CRP)
- Right-click on CRP > New
- Specify CRP policy name
- Specify Conditions
We suggest using NAS Identifier (device hostname) and NAS IPv4 Address here if you are unfamiliar with this page. In addition, if you have a lot of devices that plan to be added to RADIUS clients, you can use the symbol * to avoid adding many conditions for a CRP, for example, “GS22*” or “192.168*”.

- Specify Connection Request Forwarding > Next
- Specify Authentication Methods > Next
- Configure Settings > Next
- Check everything you just configure and click Finish.
2.3 Configure Network Policies
- Right-click on Network Policies > New
- Specify Network Policy name
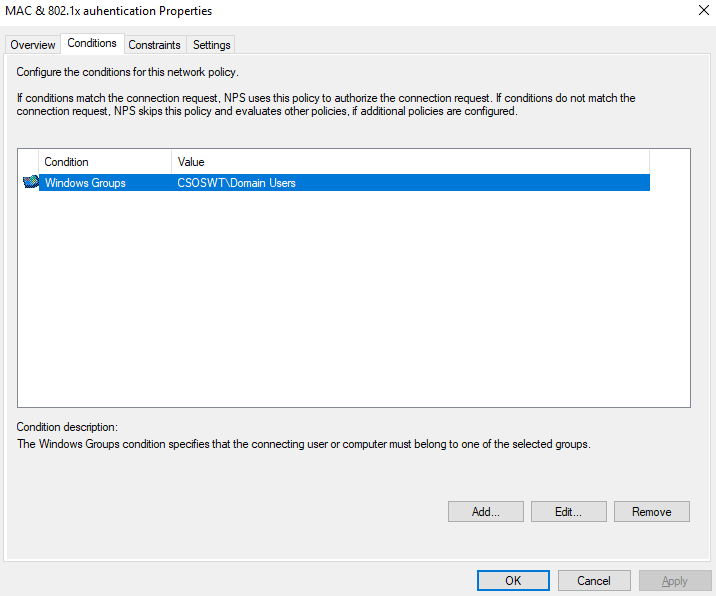
- Specify Conditions > Add > choose Windows Groups.
- Specify Access Permission > Next
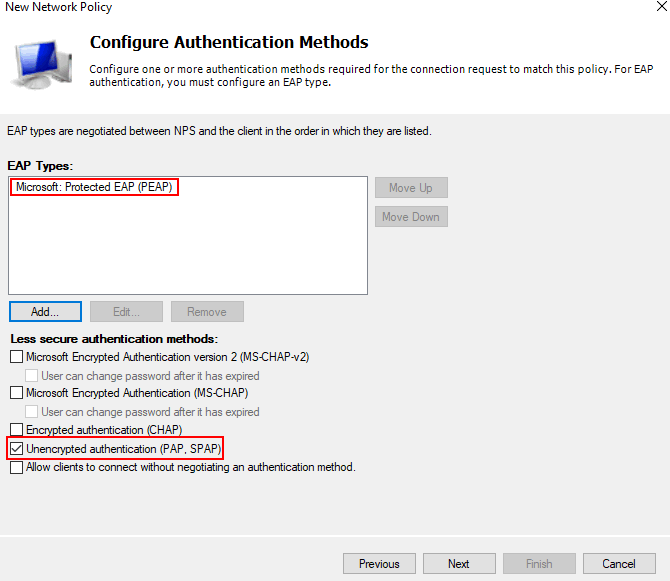
- Configure Authentication Methods.
- Configure Constraints > Next
- Configure Settings.

- Check everything you configure, and click Finish.
3. Set up user/device account on Windows Server 2019
3.1 Open Active Directory Users and Computers
3.2 Right-click on domain > New > User
3.3 Create accounts for 802.1x and MAC authenticationNotice: for MAC authentication users, the User logon name should be filled in exactly the same format as set in the switch MAC authentication page.

Plus, user password should be matched to switch setting as well.

4. Verification
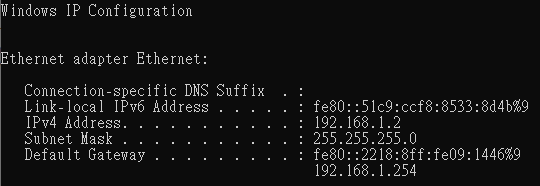
4.1 Client passes compound authentication; it gets the IP address of Data VLAN.

4.2 Client fails compound authentication; it gets the IP address of Guest VLAN.
1. Make sure DHCP Server functions in the network.
2. L3 switch should enable DHCP Smart Relay and point to the DHCP server.
3. Note that while you connect an IP phone and PC/Laptop (connect behind the IP phone), you don't need to set a VLAN tag on your IP phone in this Dynamic VLAN application.
4. If your Network Policy Server(NPS) is installed in VM, and NPS is not functioning even if it is running, you should STOP and START NPS again.
Adam
Categories
- All Categories
- 442 Beta Program
- 3K Nebula
- 232 Nebula Ideas
- 132 Nebula Status and Incidents
- 6.7K Security
- 691 USG FLEX H Series
- 365 Security Ideas
- 1.8K Switch
- 87 Switch Ideas
- 1.4K Wireless
- 56 Wireless Ideas
- 7.1K Consumer Product
- 312 Service & License
- 505 News and Release
- 97 Security Advisories
- 31 Education Center
- 10 [Campaign] Zyxel Network Detective
- 5.1K FAQ
- 34 Documents
- 89 About Community
- 112 Security Highlight