How to configure the switch and RADIUS Server to provide network access through 802.1x Port-Auth
 Zyxel Employee


This example will instruct the administrator on how to configure the switch to provide access to machines that provides valid user credentials. With 802.1x Port Authentication, the organization can ensure that only authorized personnel can access core network resources.
Note:
All network IP addresses and subnet masks are used as examples in this article. Please replace them with your actual network IP addresses and subnet masks. The authentication server used in this example is FreeRADIUS running in Ubuntu server. All UI displayed in this article are taken from the XGS4600 series switch.
1. Configuration in the Switch
1-1. Access the Switch’s Web GUI.
1-2. Go to Advance Application > AAA > RADIUS Server Setup. Configure the RADIUS server’s IP address and set the shared secret. Click Apply.
Note:
The shared secret must match the secret of your RADIUS server’s client profile.
1-3. Go to Advance Application > Port Authentication > 802.1x. Check the 802.1x Active box as well as for all ports connected to end devices. Do not check active box of ports connected to either the USG, RADIUS-Server, or Private-Server.
2. Configuration in the RADIUS Server
2-1. Edit the client profile in /etc/freeradius/clients.conf. Save the file and exit.
Note:
The client IP address and secret must match the management IP and shared secret of the Switch.
2-2. Add the following user profiles in /etc/freeradius/users. Save the file and exit.
2-3. Restart FreeRADIUS service.
3. Test the Result
3-1. Access User-A, User-B, and Guest device.
3-2. If using Windows OS, click the Start button and type services.msc into the search box.
3-3. In the Services window, locate the service named Wired AutoConfig. Make sure the service status is “Started”.
3-4. Right-click on your network adapter and select Properties.
3-5. Click on the Authentication tab and check “Enable IEEE 802.1X authentication”. Make sure that the network authentication method is Microsoft: Protected EAP (PEAP).
3-6. Click on Additional Settings, select Specify authentication mode and specify User authentication.
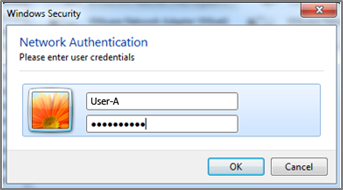
3-7. Connect User-A device to the Switch. User-A should show an “Additional information is needed to connect to this network.” pop-up message.
3-8. Enter the username (User-A) and password (zyxeluserA) which must be consistent with the RADIUS-Server’s user profile settings.
3-9. Devices using User-A and User-B credentials can communicate with USG and Private-Server.
3-10. Connect User-A device to the Switch. User-A should show an “Additional information is needed to connect to this network.” pop-up message.
3-11. Enter the username (Guest) and a random password.
3-12. Device using Guest credentials cannot communicate with USG and Private-Server.
3. What Could Go Wrong
If the Switch does not allow access to users that submitted the correct credentials, the following problems may have occurred:
3-1. Usernames and passwords are case-sensitive. Make sure that the user input the correct lower-case or upper-case characters.
3-2. The RADIUS-server is unreachable. The Switch should be able to ping the RADIUS-Server at all times. Make sure network settings were configured correctly between Switch and RADIUS-Server.
3-3. The shared secret between the Switch and RADIUS-Server is not identical.
Categories
- All Categories
- 442 Beta Program
- 2.9K Nebula
- 217 Nebula Ideas
- 127 Nebula Status and Incidents
- 6.5K Security
- 580 USG FLEX H Series
- 344 Security Ideas
- 1.7K Switch
- 84 Switch Ideas
- 1.4K Wireless
- 52 Wireless Ideas
- 7K Consumer Product
- 297 Service & License
- 476 News and Release
- 91 Security Advisories
- 31 Education Center
- 10 [Campaign] Zyxel Network Detective
- 4.8K FAQ
- 34 Documents
- 87 About Community
- 102 Security Highlight


