How to Configure 802.1x EAP-TLS to Secure the Wireless Environment with Self-Signed Certificate?

 Zyxel Employee


This example shows how to use Android/iOS phone import the self-sign certificate from NXC to get the wireless connection with 802.1x EAP-TLS protected. We need a certificate which is generated by the NXC.

Configure Certificate
1 Go to CONFIGURATION > Object > Certificate > My certificates, and add a self-signed certificate. In Subject Information, Set the NXC’s IP in the Host IP Address.
In Enrollment Options, select Create a self-signed certificate

2 Export the self-signed certificate from My certificates. Double click the self-signed certificate and scroll down the page to press Export Certificate Only. Save the certificate.


3 Go to Trusted Certificate and import the self-signed certificate.


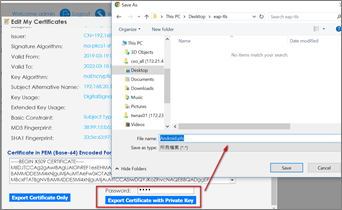
4 Go to My certificate and Export the “Self-signed certificate with Private Key”. Double click the self-signed certificate and scroll down the page to press Export Certificate with Private Key. Save the certificate and add file extension(*.pfx, *.p12 or *.crt).
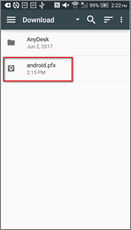
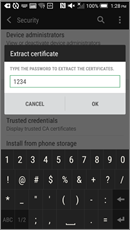
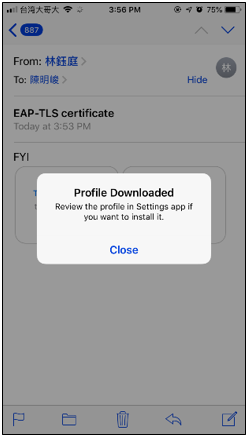
5 Import the self-signed certificate into Android phone. (Here I copied the certificate to the Android phone storage then import them. I send the mail with certificate to iPhone and install it.)
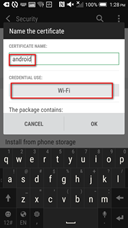
Android: In step “e”, the “CREDENTIAL USE” must select as “Wi-Fi”
a

b

c
d
e
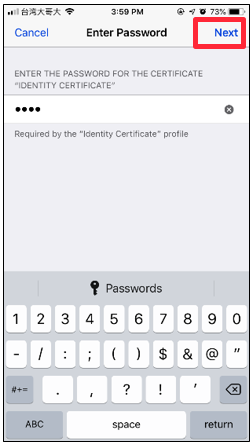
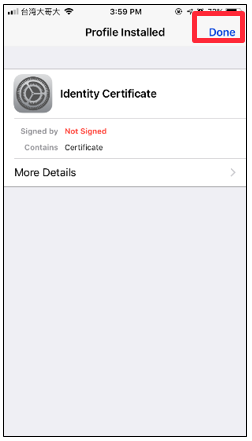
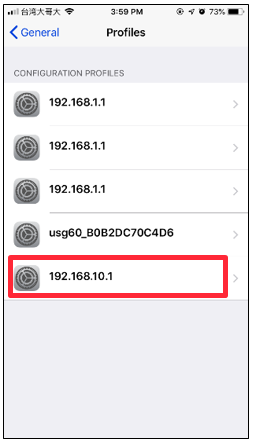
iOS:
a

b
c

d

e

f

g
h
i
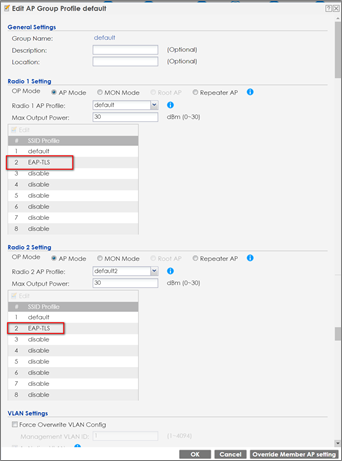
Configure AP profile
1 Go to CONFIGURATION > Object > AP Profile > SSID> Security List, and add a Security profile

2 Go to CONFIGURATION > Object > AP Profile > SSID> SSID List, and add an SSID profile.

3 Go to CONFIGURATION > Wireless > AP Management > AP Group, and add this SSID into the default group.
Test the Result
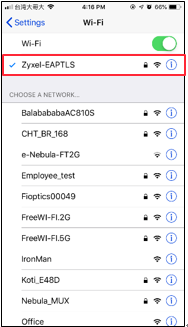
1 Use Android/iOS phone and connect to the SSID Zyxel-EAPTLS.
Android:
a

b
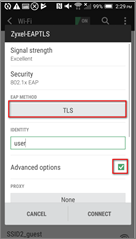
c
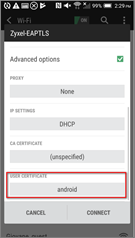
d

e

iOS:
a

b

c
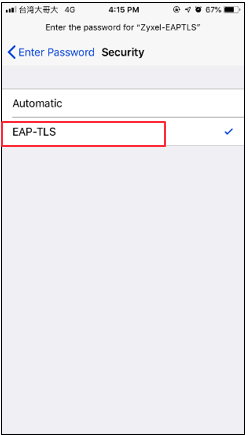
d

e

f

g

i
2 Check the station information On NXC station info. Go to Configuration > Wireless > Station info.

Comments
-
What Could Go Wrong?
1 Users must import the certificate which is signed by NXC, and credential use must select Wi-Fi.
2 When pressing disconnecting on the Android phone, we might need to import the certificates again.
3 Different Android/iOS firmware versions may have different certificate importing behavior. Please ensure the certificates are imported successfully.
4 The Windows PC doesn’t support self-signed certificate.
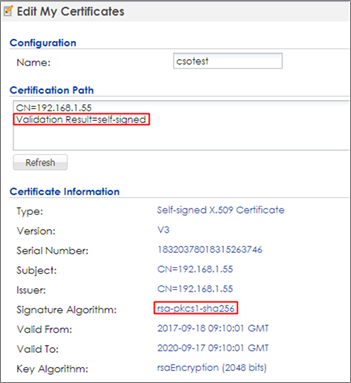
5 Go to CONFIGURATION > Object > Certificate > My Certificates, click the self-signed certificate and click edit. It shows validation result=self-signed in certification path.
6 When the customer connects to a SSID with 802.1x security, there is a certificate trust request pop-up screen with the detailed information of the certificate in iOS.
 0
0


Categories
- All Categories
- 442 Beta Program
- 3K Nebula
- 229 Nebula Ideas
- 131 Nebula Status and Incidents
- 6.6K Security
- 666 USG FLEX H Series
- 359 Security Ideas
- 1.8K Switch
- 86 Switch Ideas
- 1.4K Wireless
- 56 Wireless Ideas
- 7.1K Consumer Product
- 306 Service & License
- 498 News and Release
- 96 Security Advisories
- 31 Education Center
- 10 [Campaign] Zyxel Network Detective
- 5K FAQ
- 34 Documents
- 89 About Community
- 111 Security Highlight