Captive Portal authentication with Google

 Zyxel Employee


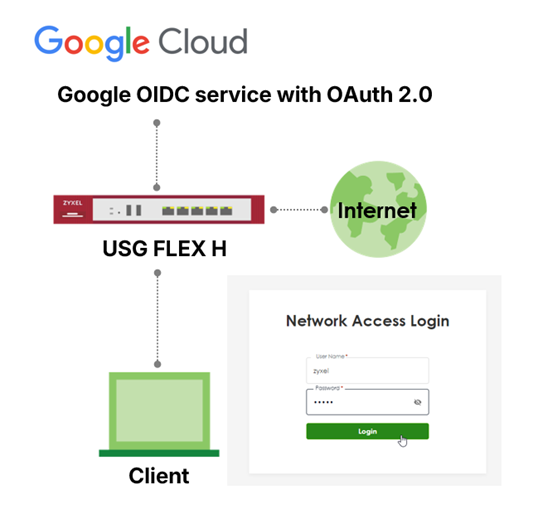
This article describes how to configure Captive Portal authentication on the USG FLEX H series using Google (OIDC). It covers application registration in Google Workspace/Cloud and the required firewall settings to enable OIDC-based authentication, allowing users to sign in with their existing Google accounts instead of local credentials.
Before You Begin
Before you begin, make sure you have:
- Valid licenses for your identity provider (Google Workspace/Cloud)
- Network connectivity between your device and Google Workspace/Cloud
- SSL certificates properly configured
- DNS and HTTPS access for the firewall
- FQDN1 for OIDC redirect address (resolve to your WAN IP)
- FQDN2 for Captive portal Server (resolve to your captive portal server address,
- default is 6.6.6.6)
- The certificate must be issued by a trusted CA
- The Common Name (CN) and SAN (Subject Alternative Name) of the certificate that
- include above 2 FQDNs.
The Captive Portal uses HTTPS to protect user authentication traffic and to support redirection to external Identity Providers (IdPs) such as Google Workspace/Cloud. If the SSL certificate is not trusted or does not match the Captive Portal address, client devices will display browser warnings or may block the authentication flow.
Supported Certificate Types
One of the following certificate types must be used:
• Public (Commercial) CA–signed certificate
o Automatically trusted by most client devices
o Recommended for guest or BYOD environments
• Internal CA–signed certificate
o The internal CA root certificate must be installed and trusted on all client devices
o Suitable for managed corporate environments
Self-signed certificates are not recommended for Captive Portal authentication.
Certificate Naming Requirements
The SSL certificate must meet the following requirements:
• The Common Name (CN) or Subject Alternative Name (SAN) must be a Fully Qualified Domain Name (FQDN)
• The FQDN must resolve to the Captive Portal server address
o Default Captive Portal address: 6.6.6.6
Example:
• FQDN: portal.company.com
• Certificate CN or SAN: portal.company.com
• DNS resolution: portal.company.com → 6.6.6.6
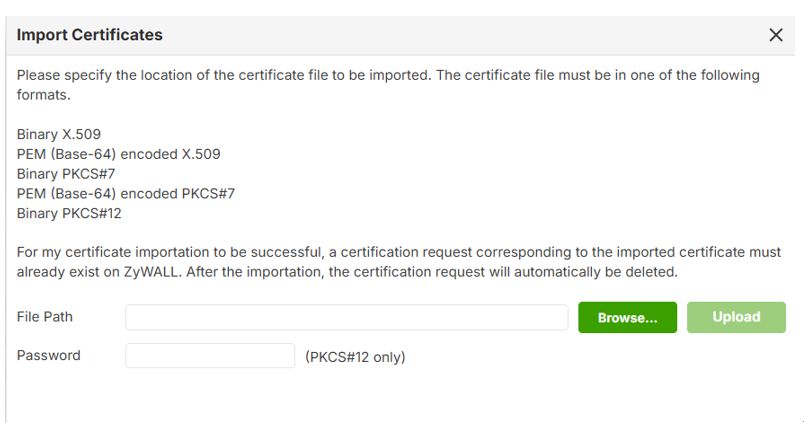
Uploading the Certificate to the USG FLEX H Series
- Log in to the USG FLEX H series web interface.
- Navigate to System > Certificate.
- Import the SSL certificate and private key.
- Verify that the certificate status is valid.
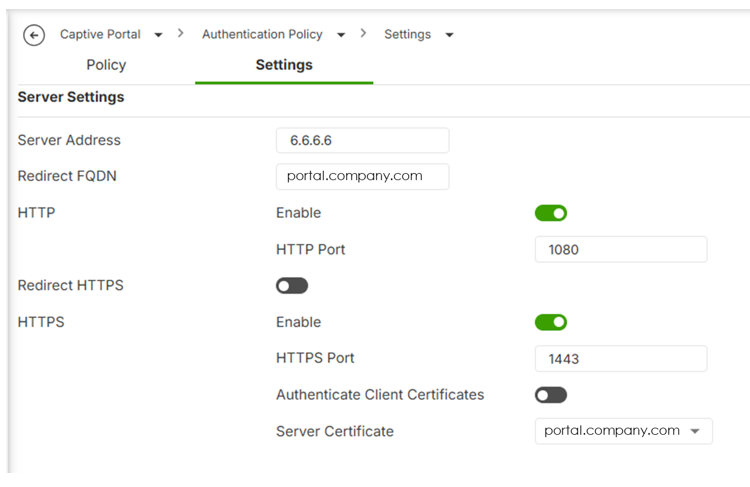
Assigning the Certificate to Captive Portal
- Go to Captive Portal > Authentication Policy > Settings.
- Locate the HTTPS / Server Certificate settings.
- Select the imported certificate.
- Apply the configuration
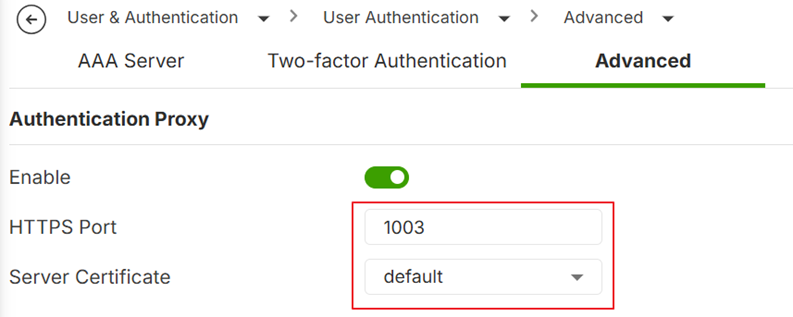
Authentication Proxy
Navigate to User & Authentication > User Authentication > Advance
To prevent certificate warnings during the authentication phase, this should be a commercial CA-signed certificate or your internal CA's certificate must be distributed to all client devices. And the Common Name (CN) or SAN (Subject Alternative Name) of the certificate should be a FQDN that can be resolve to the WAN IP of your firewall.
Note: Allow Authentication proxy port (default TCP 1003) on your WAN to ZyWALL secure-policy
Google Workspace/Cloud
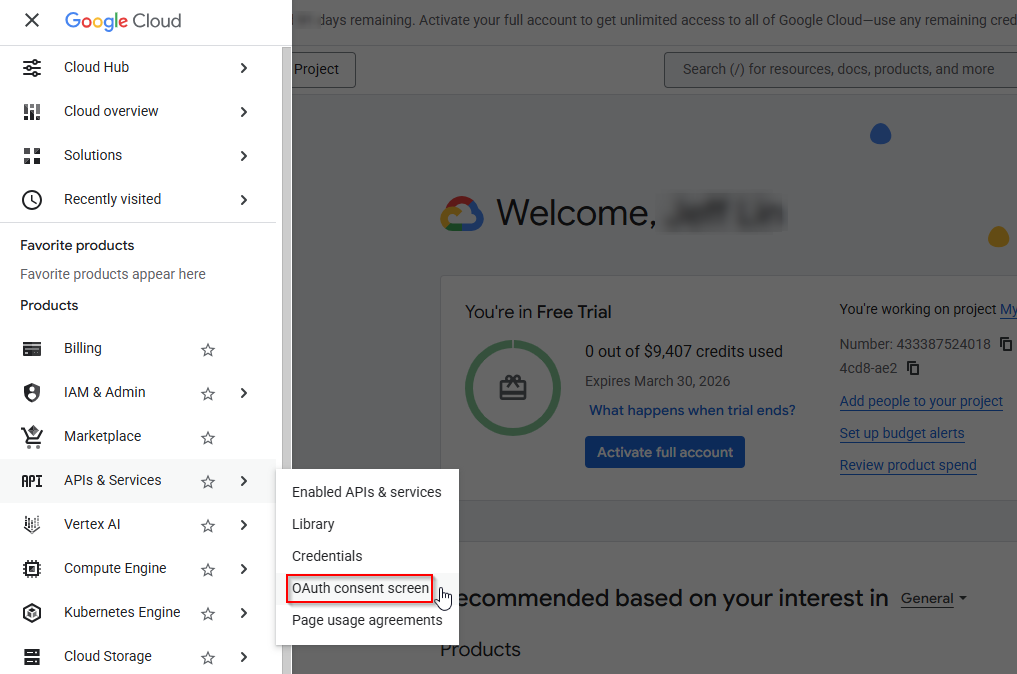
Go to Google Cloud Console > APIs & Services > OAuth consent screen
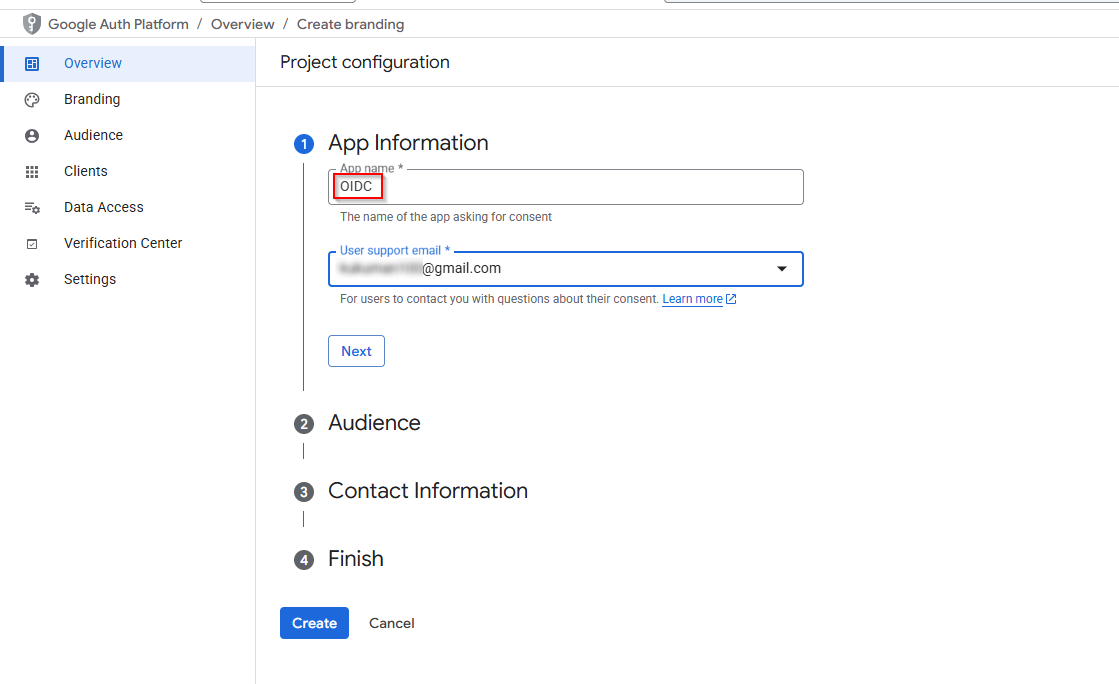
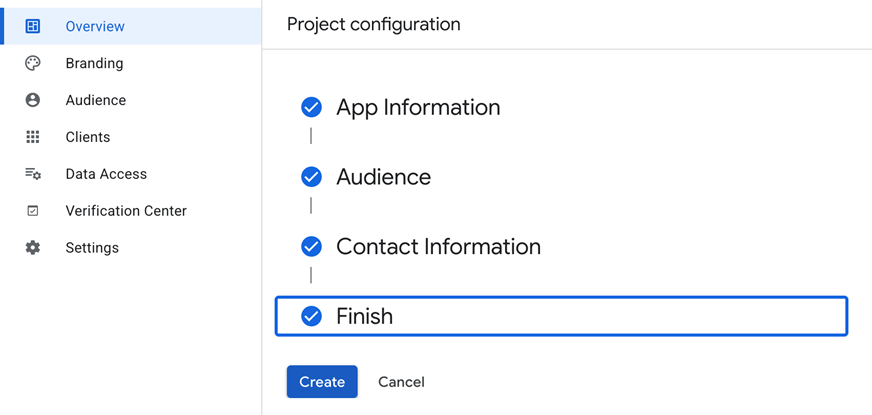
Follow the setup wizard to enter your application details. Create a project name.
The Audience is set to Internal to restrict API access exclusively to authorized workshop participants and ensure environment isolation.
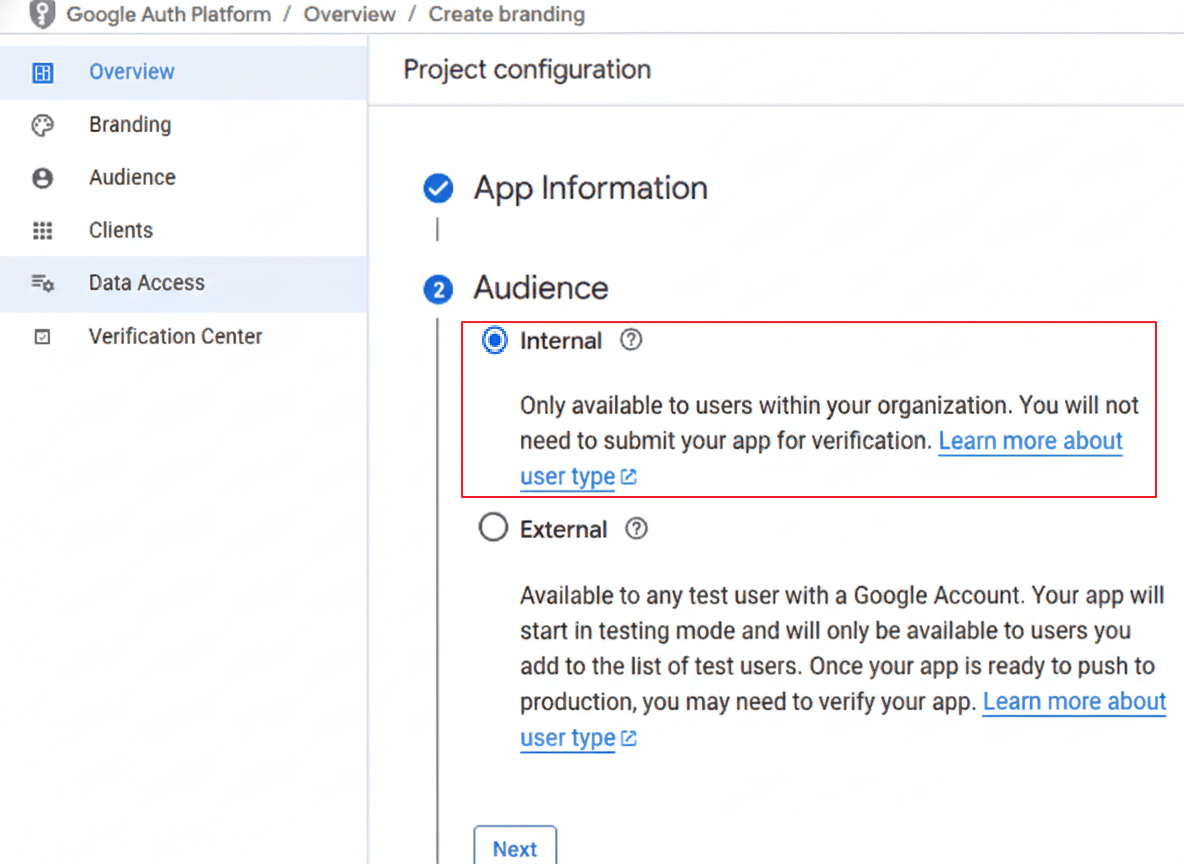
Note: For External Type, to maintain strict access control, you must restrict login permissions under the Audience > Test Users section. Only Google accounts manually added to this whitelist will be authorized to access the application.
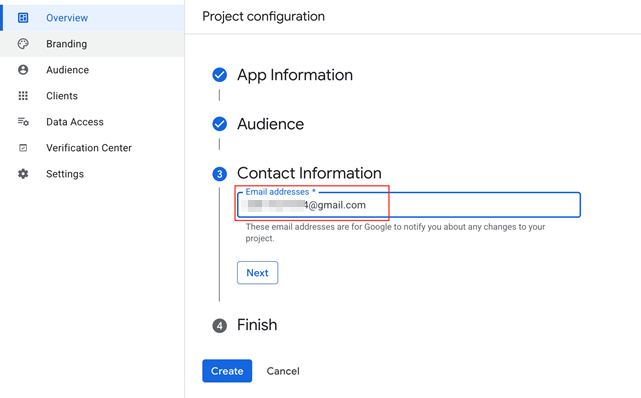
Enter Contact Information and Create.
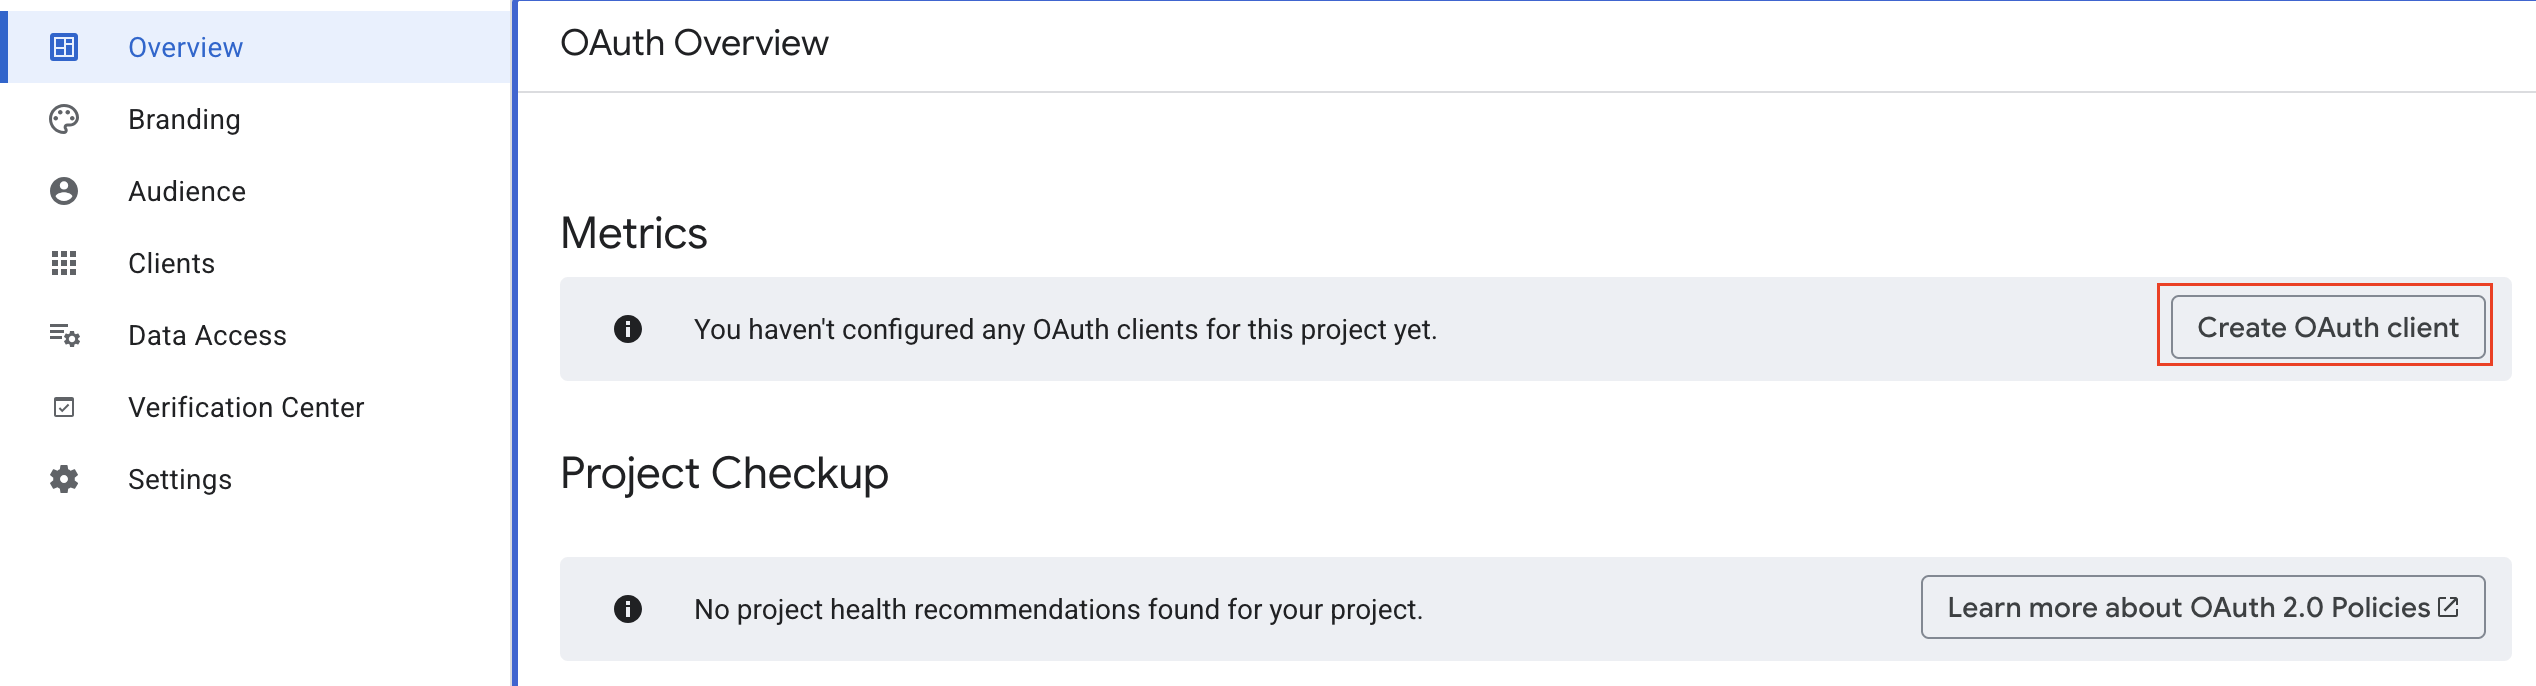
Continue with the setup wizard to create your OAuth client.
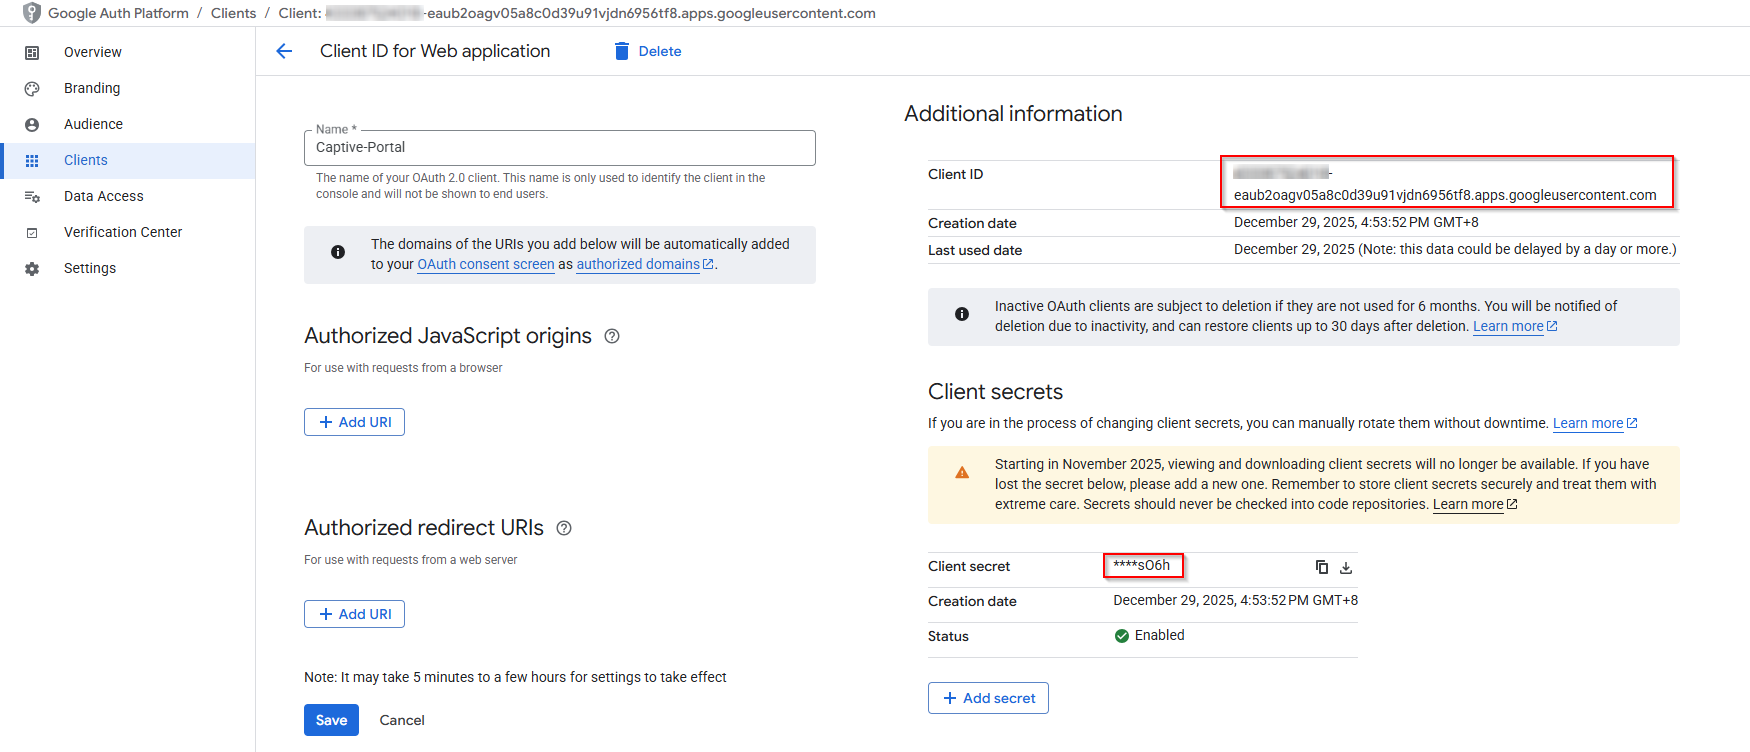
Select Application type as "Web application". Assign a recognizable name to your client.

Configure OIDC on USG FLEX H Series
- Login to the USG FLEX H
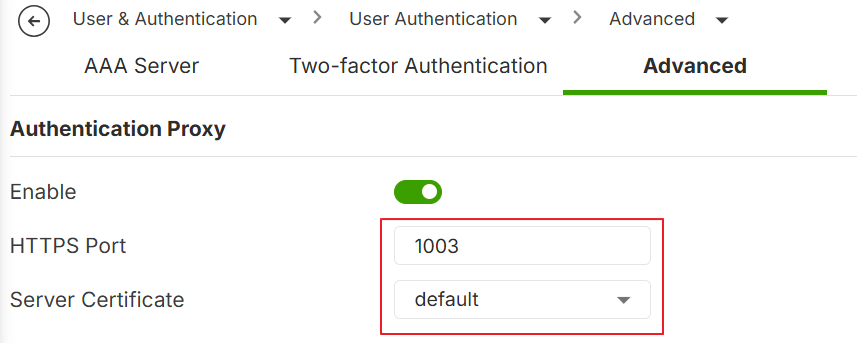
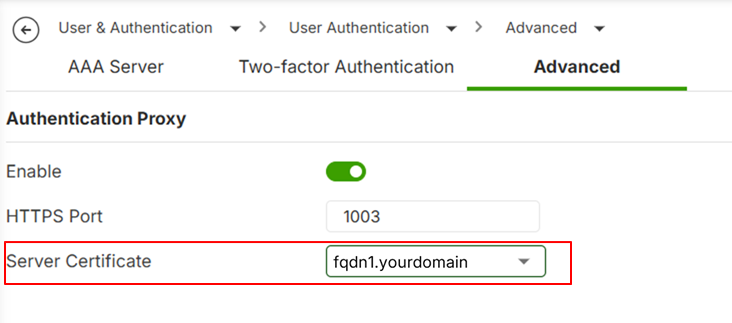
- Go to User & Authentication > User Authentication > Advanced
- Enable the Authentication Proxy
- Sec the HTTPS Port to 1003
- Select the Server Certificate
Overview your OAuth Client IDs, you need to copy “Client ID”, “Client secret” for Firewall setup.
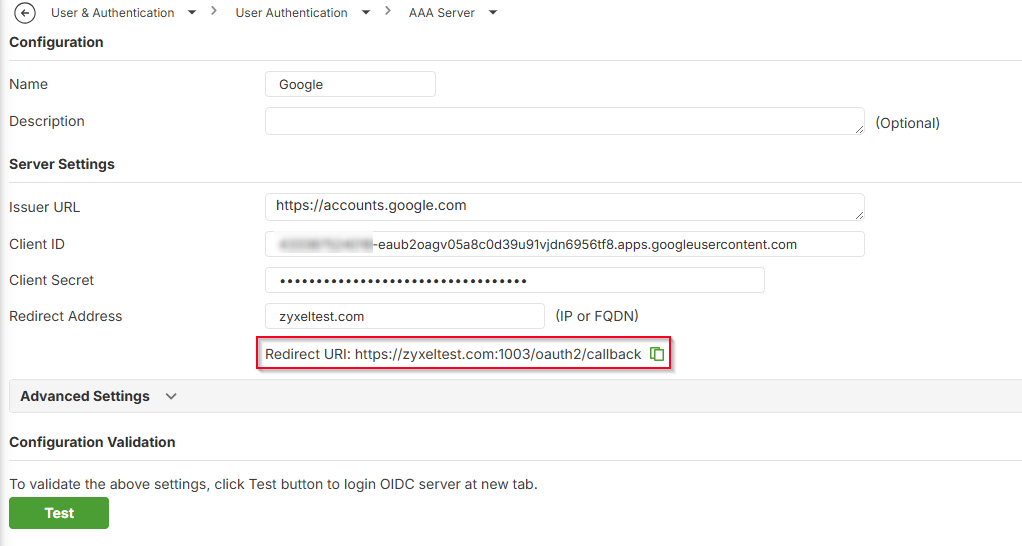
Navigate to User & Authentication > User Authentication > AAA Server. Add OIDC Server

Fill in Server details
Issuer URL: https://accounts.google.com
Client ID: {Client ID}
Client Secret: {Client Secret)
Redirect Address: {FQDN}
Note: The hostname of the redirect URI should be a FQDN. And the FQDN should match the certificate settings of Authentication proxy on your firewall.
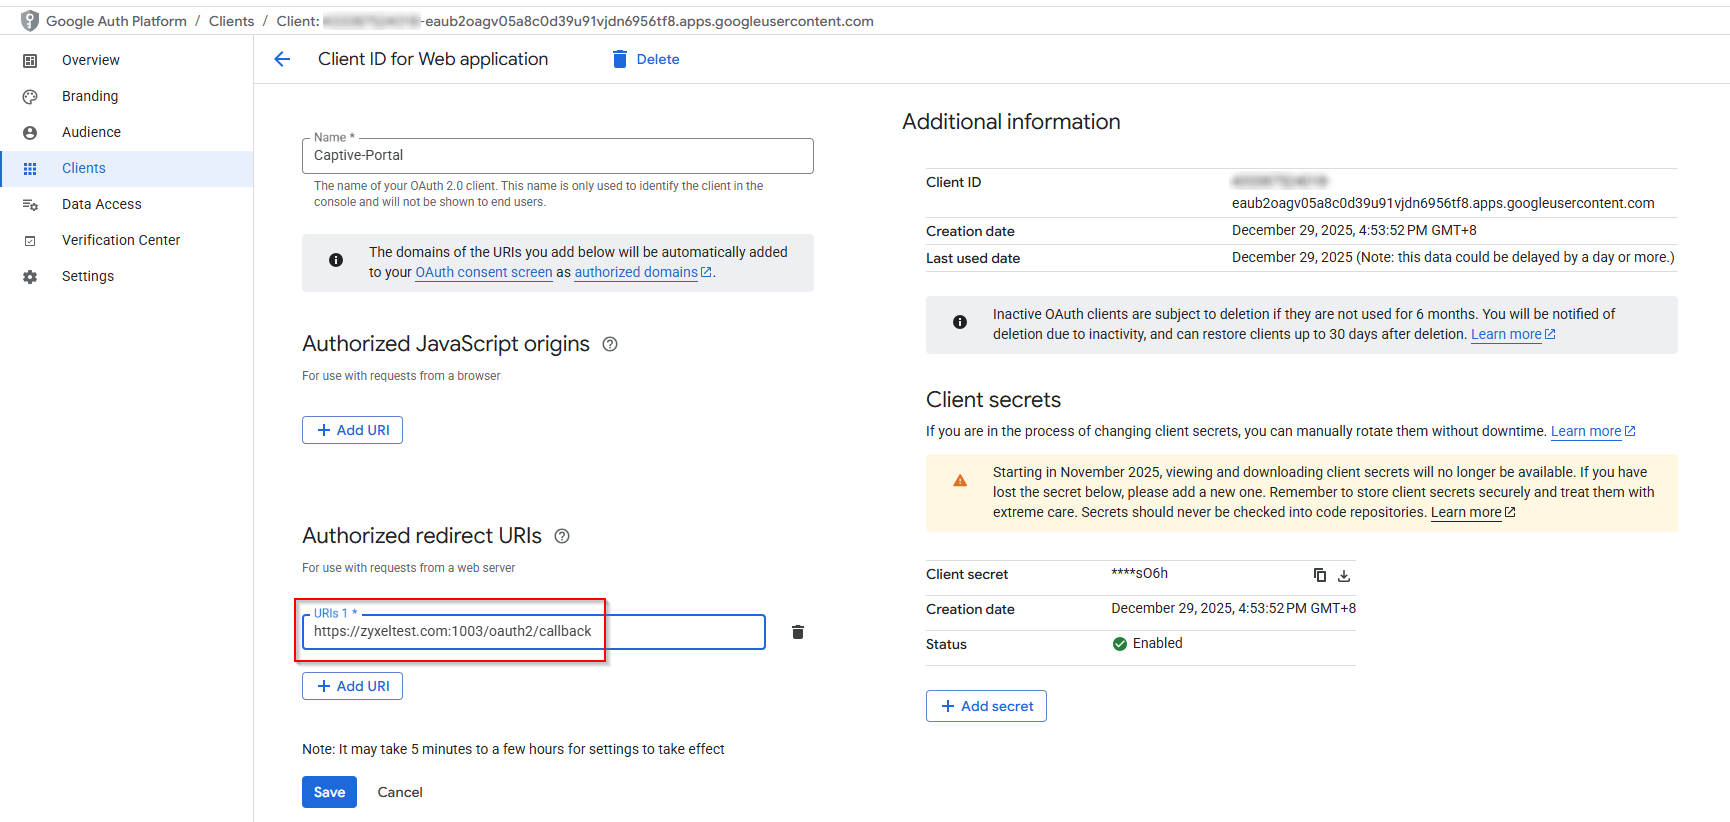
Copy the following “Redirect URL” and back to Google Oauth 2.0 Client IDs and paste in Authorized redirect URLs
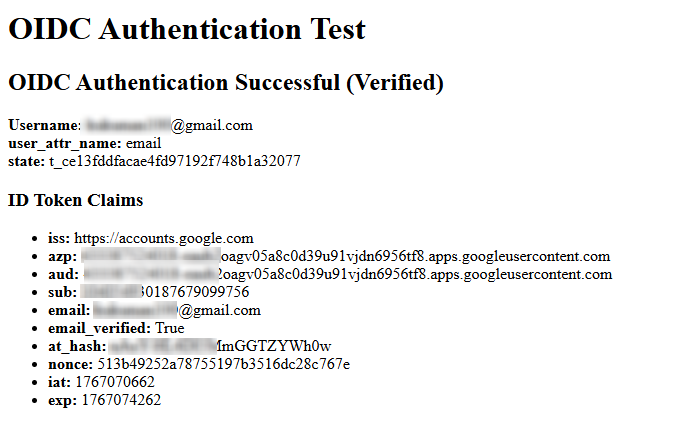
Go back to the USG FLEX H, OIDC Server page, at Configuration Validation andclick Test.
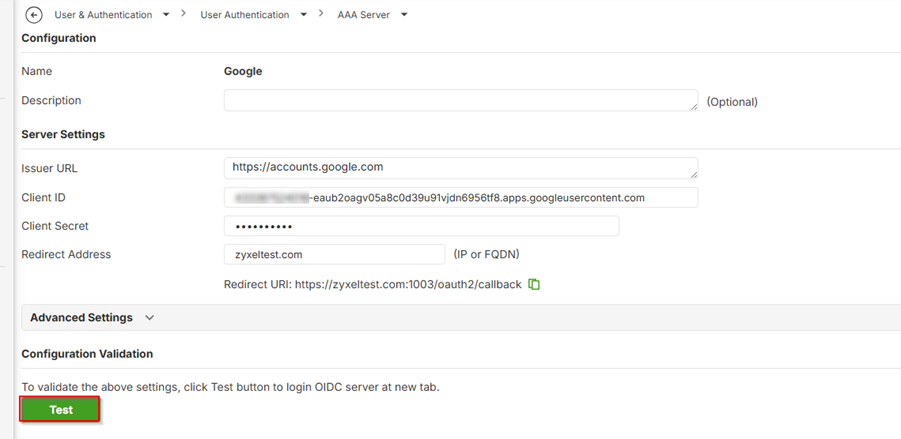
You should see "OIDC Authentication Successful."
Note: The Advanced Settings at USG FLEX H GUI are optional.
- Additional Scope: Specifies additional scopes to include in the OIDC authentication request. To request multiple scopes, separate them with spaces. The recommended value is email.
- Login Name Attribute: Set user-attr-name field for login username. The recommended value is email.
Configure Portal Service Settings on USG FLEX H Series
To ensure a smooth and secure Captive Portal authentication experience, proper certificate and DNS preparation is required before configuring OIDC authentication.
Configure the Certificate of the OIDC Server
- Go to User & Authentication > User Authentication > Advanced.
- Select the Server Certificate that you prepared (FQDN1).
Note: Allow Authentication proxy port (default TCP 1003) on your WAN to ZyWALL secure-policy
Configure the Certificate of the Captive Portal Server
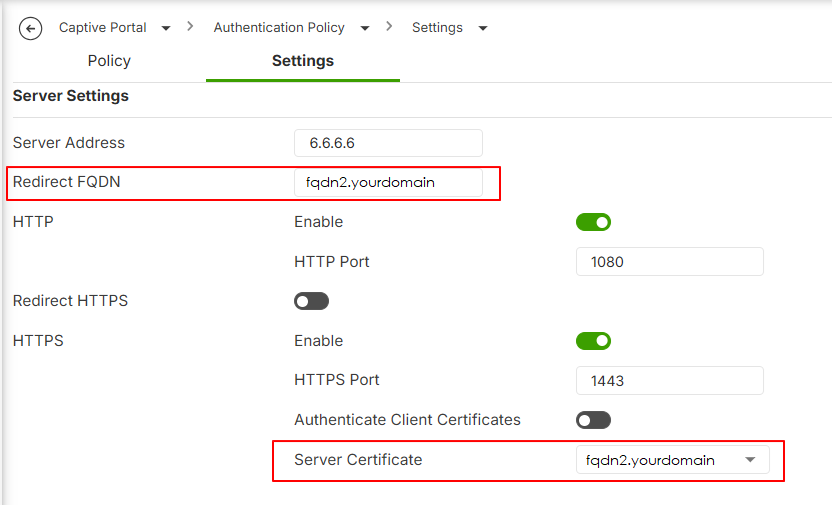
- Go to Captive Portal > Authentication Policy > Settings
- Set the Redirect FQDN
- Select Server Certificate that you prepared (FQDN2)
Configure DNS Records for Captive Portal Access
Captive Portal authentication requires:
- A dedicated FQDN for the Captive Portal
- DNS resolution of the FQDN to the Captive Portal server address
- Default address: 6.6.6.6
Client devices must be able to resolve this FQDN before authentication.
Scenario 1: Client DNS Points to an Internal DNS Server
If client devices use an internal DNS server (for example, Active Directory DNS), create a static DNS record that resolves the Captive Portal FQDN to the Captive Portal server address (default is 6.6.6.6).
Scenario 2: Client DNS Points to the USG FLEX H Series
If client devices use the USG FLEX H series as their DNS server, configure a static DNS entry using the firewall’s built-in DNS feature.
Edit as following:
- Go to System > DNS & DDNS > DNS
- Add an Address Record
- Leave the Hostname empty
- Select or +Add a Domain fqdn2.yourdomain
- Fill-in IP address in 6.6.6.6
- Click Apply

Configure Captive Portal on USG FLEX H Series
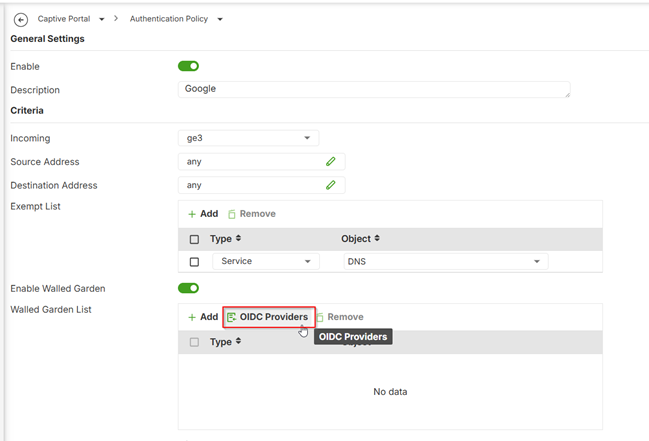
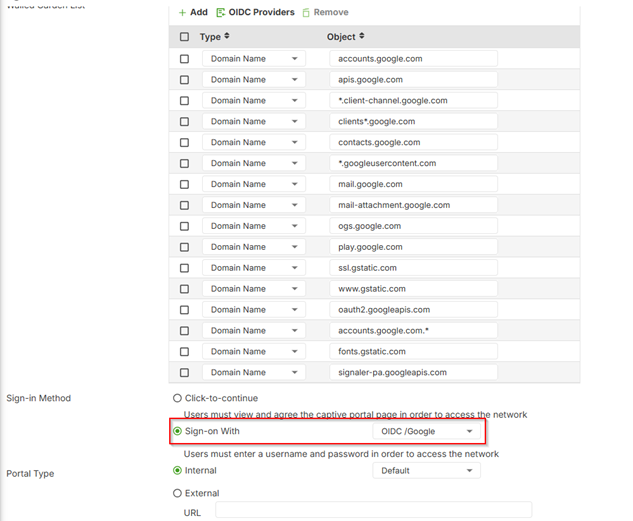
Configure Captive Portalon USG FLEX H Series1.Go to Captive Portal >Authentication Policy > Policy
2.Add a Policy and enable and configure the policycriteria details.
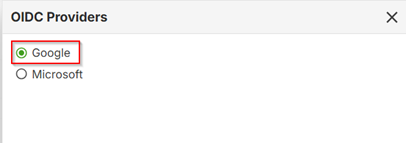
3.In the Walled Garden List,click OIDC Providers and select Google.
4.Select Sign-on With > OIDCserver at Sign-in Method.
5.Click Apply
Verification- Test User Login
Verify that the Captive Portal correctly redirects unauthenticated users to Microsoft Entra ID and grants access after successful authentication.
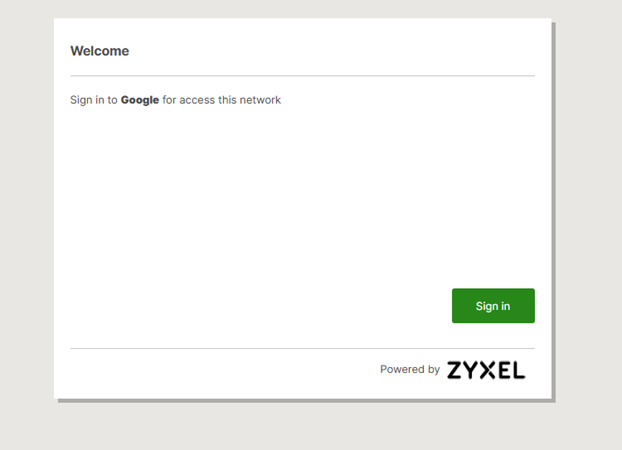
1. Connect a client device
2. Open a browser, display the Captive Portal page, and then click Sign in
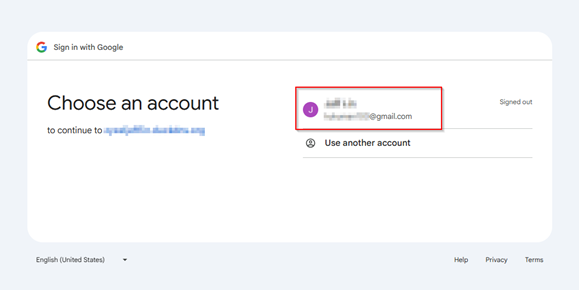
3. Confirm redirect to Google login
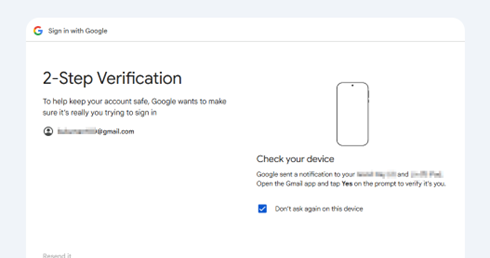
4. Successful Authentication and Access Granted.
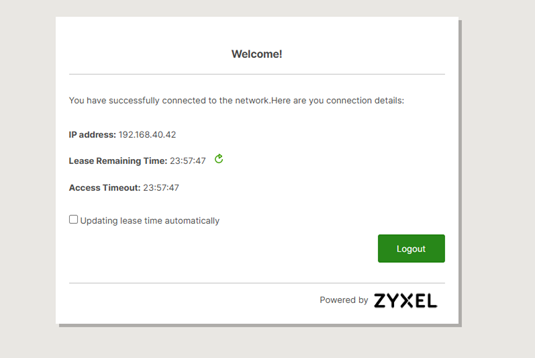
Internet access is successful.
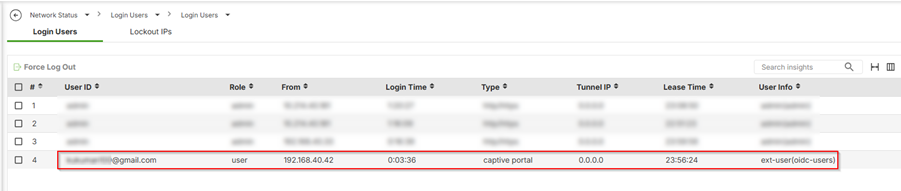
5.Check login user status at Network Status > Login Users > Login Users
User shown as authenticated via OIDC
Categories
- All Categories
- 442 Beta Program
- 3K Nebula
- 231 Nebula Ideas
- 131 Nebula Status and Incidents
- 6.6K Security
- 680 USG FLEX H Series
- 362 Security Ideas
- 1.8K Switch
- 87 Switch Ideas
- 1.4K Wireless
- 56 Wireless Ideas
- 7.1K Consumer Product
- 309 Service & License
- 502 News and Release
- 96 Security Advisories
- 31 Education Center
- 10 [Campaign] Zyxel Network Detective
- 5.1K FAQ
- 34 Documents
- 89 About Community
- 111 Security Highlight