[2026 August Notification] Set Up Passkeys Login for Firewall Captive Portal and SSL VPN with NID FS


 Zyxel Employee
![[NCCSR] Community Post Banner_600x200.png](https://us.v-cdn.net/6029482/uploads/DPFI2169RFVN/5bnccsr-5d-community-post-banner-600x200.png)
Nebula Identity Federation Service (NID FS) brings network access into the same identity-driven model used by cloud applications, helping IT teams manage authentication consistently across network services.
This tutorial shows how one organization-level NID FS configuration can provide Nebula Cloud Authentication Server (NCAS) authentication for both Firewall Captive Portal and SSL VPN, eliminating separate sign-in setups for each service. An IT administrator enables NID FS, adds NCAS as an identity source, configures both services, and grants the required user privileges. Each end user then registers a Passkey once and uses it to sign in to both services without entering a password.
🎯What You’ll Learn
IT Administrator Configuration
Step | What You’ll Do |
|---|---|
1 | Enable NID FS and Add NCAS |
2 | Configure the Firewall Captive Portal to use NID FS |
3 | Configure SSL VPN to Use NID FS |
4 | Authorize NCAS Users for Both Services |
5 | Create an NCAS User |
End-User Enrollment and Login Experience
Step | What You’ll Do |
|---|---|
6 | Register a Passkey |
7 | Sign In to the Firewall Captive Portal with an NCAS Passkey |
8 | Sign In to SSL VPN with an NCAS Passkey |
🧑💻IT Administrator Configuration
Complete the following steps in Nebula to configure NID FS, network access policies, and NCAS users before end users connect to the network.
Step 1 - Enable NID FS and add NCAS
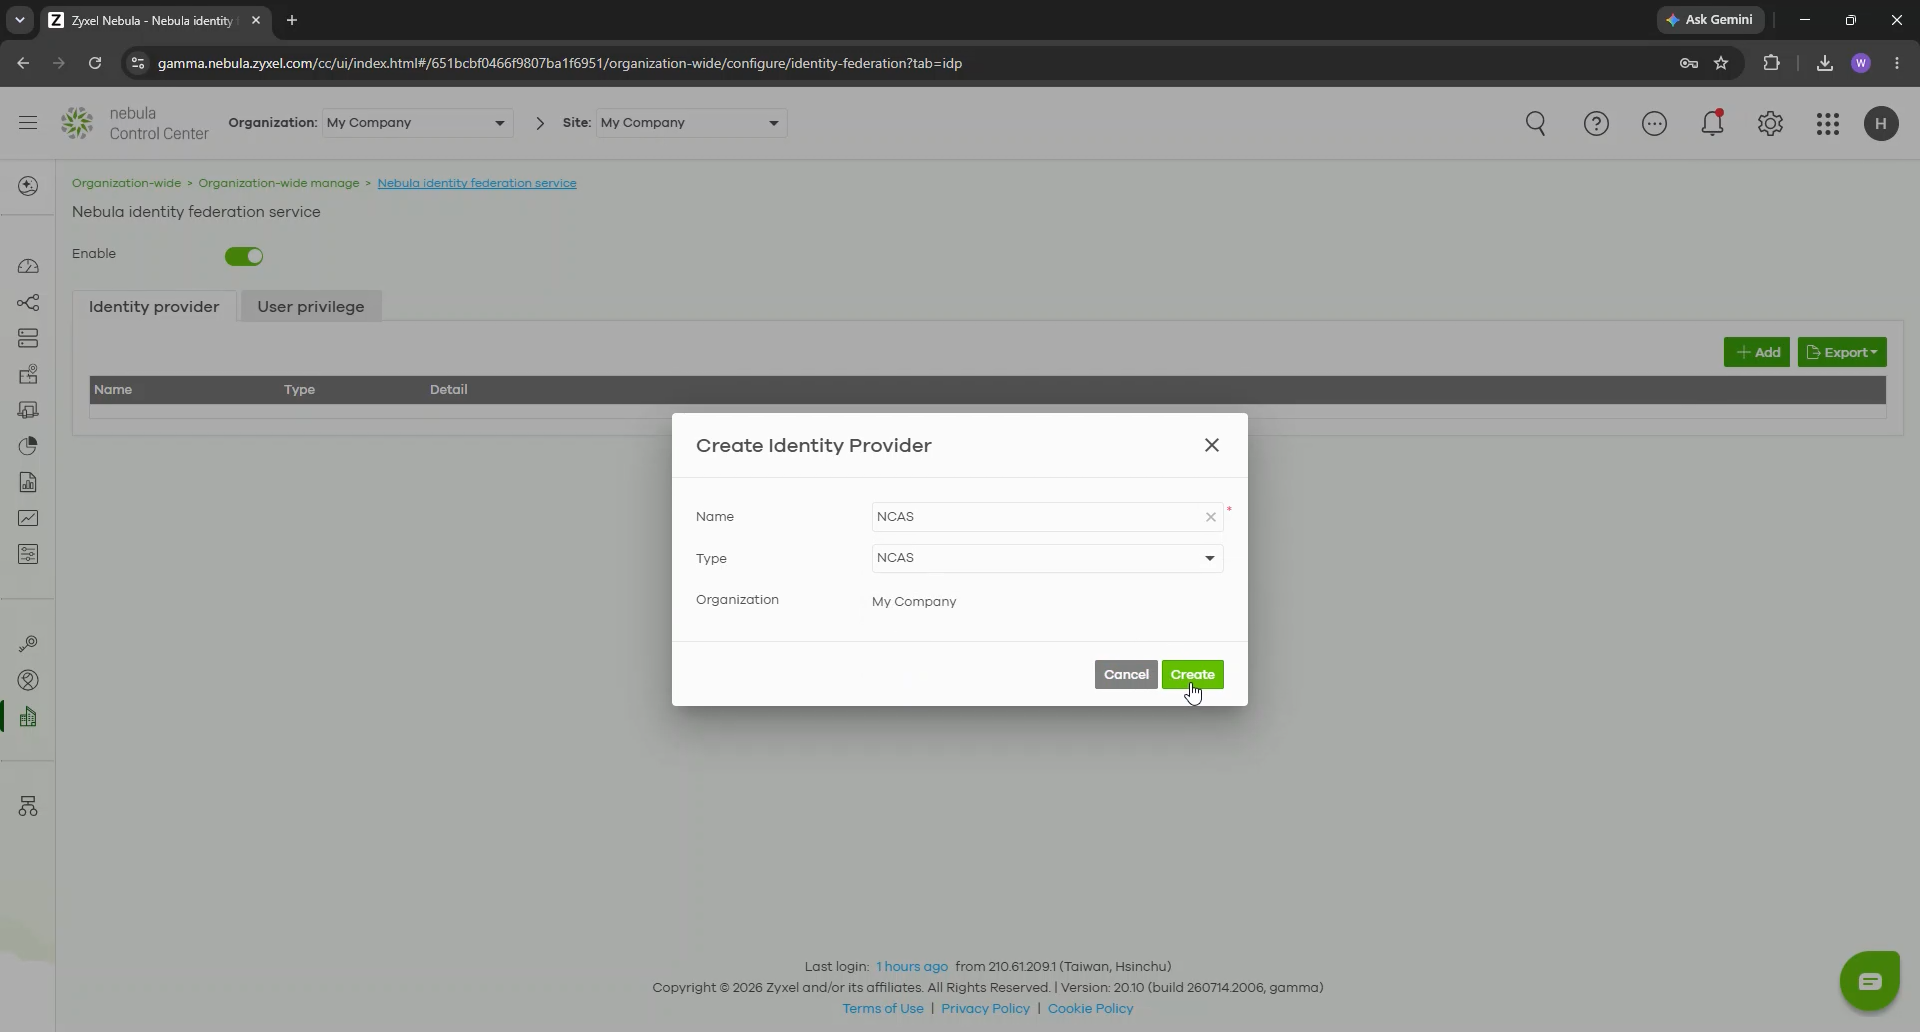
In NCC, go to Organization-wide > Organization-wide manage > Nebula identity federation service.
- Turn on Enable.
- On the Identity provider tab, click Add.
- Enter a descriptive Name, such as NCAS.
- For Type, select NCAS.
- Click Create, then save the page when prompted.
Step 2 - Configure the firewall captive portal to use NID FS
- Go to
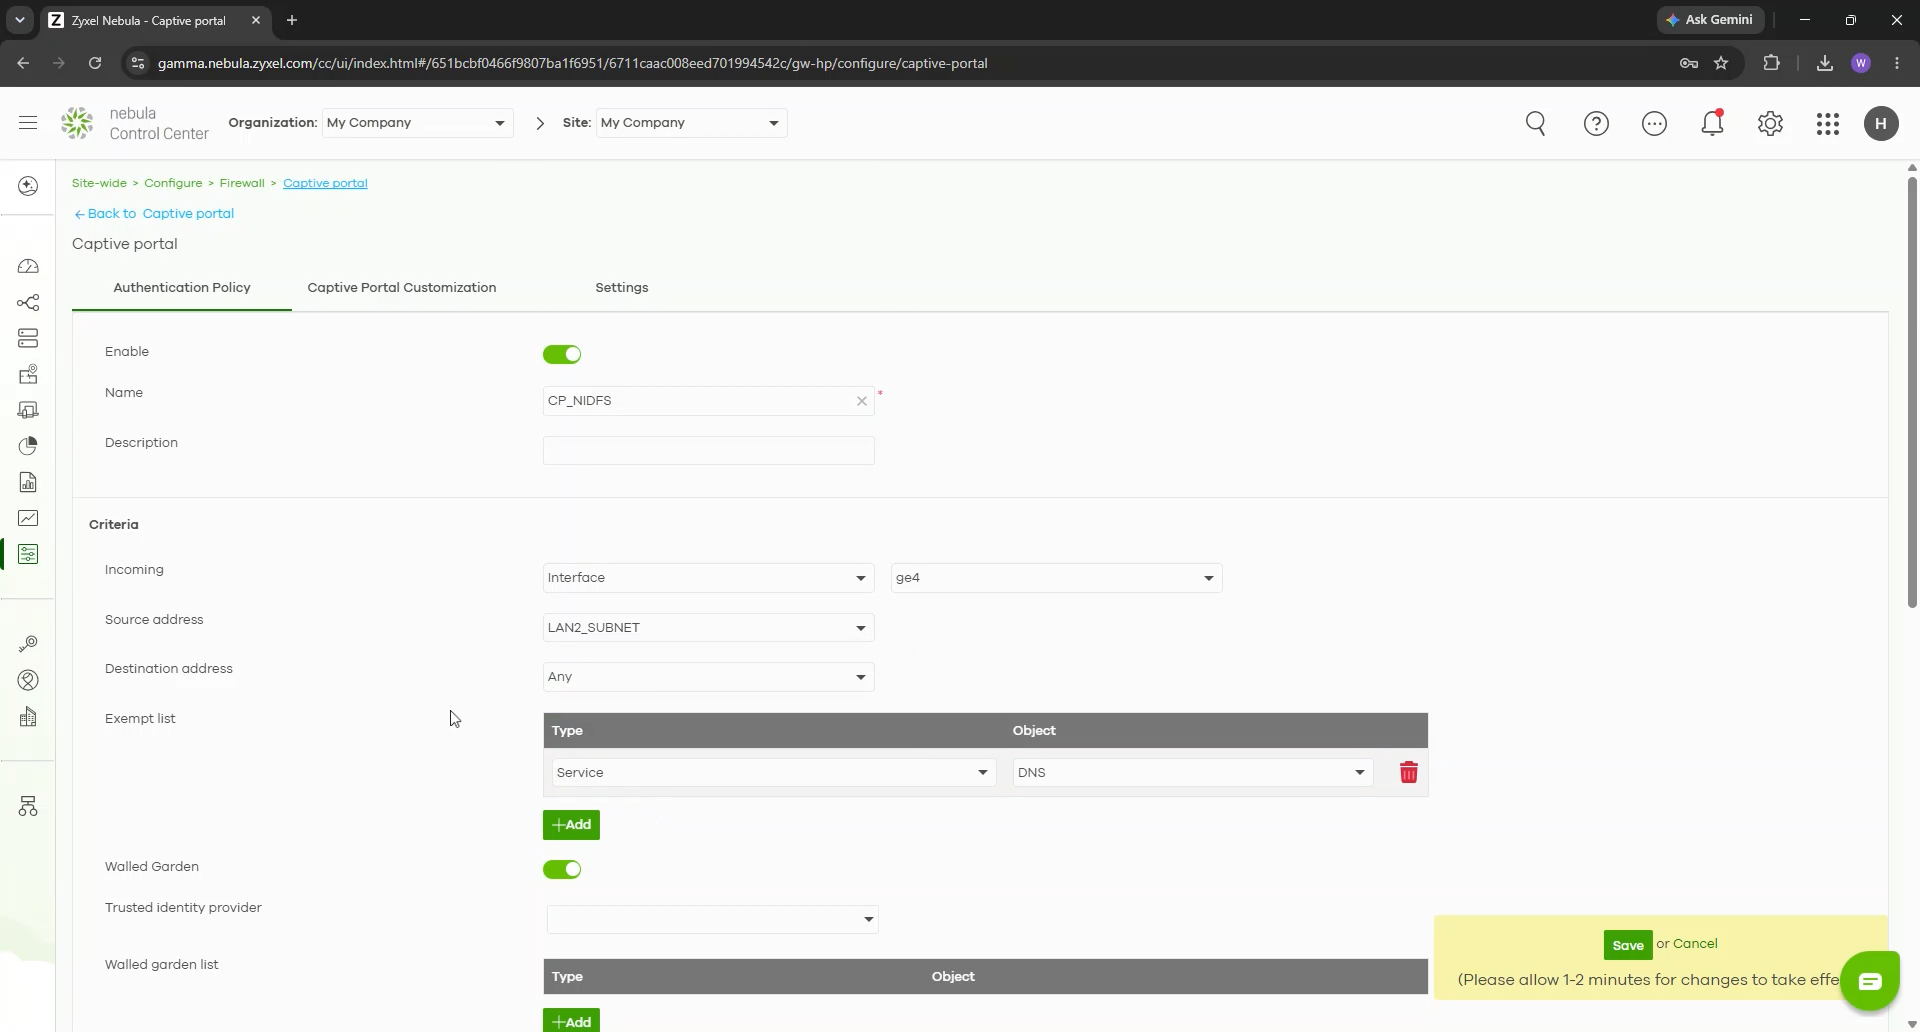
Site-wide > Configure > Firewall > Captive portal - On the Authentication Policy tab, click Add.
- Turn on Enable and enter a policy Name.
- Under Criteria, select the incoming interface, source address, and destination address to which the policy applies.
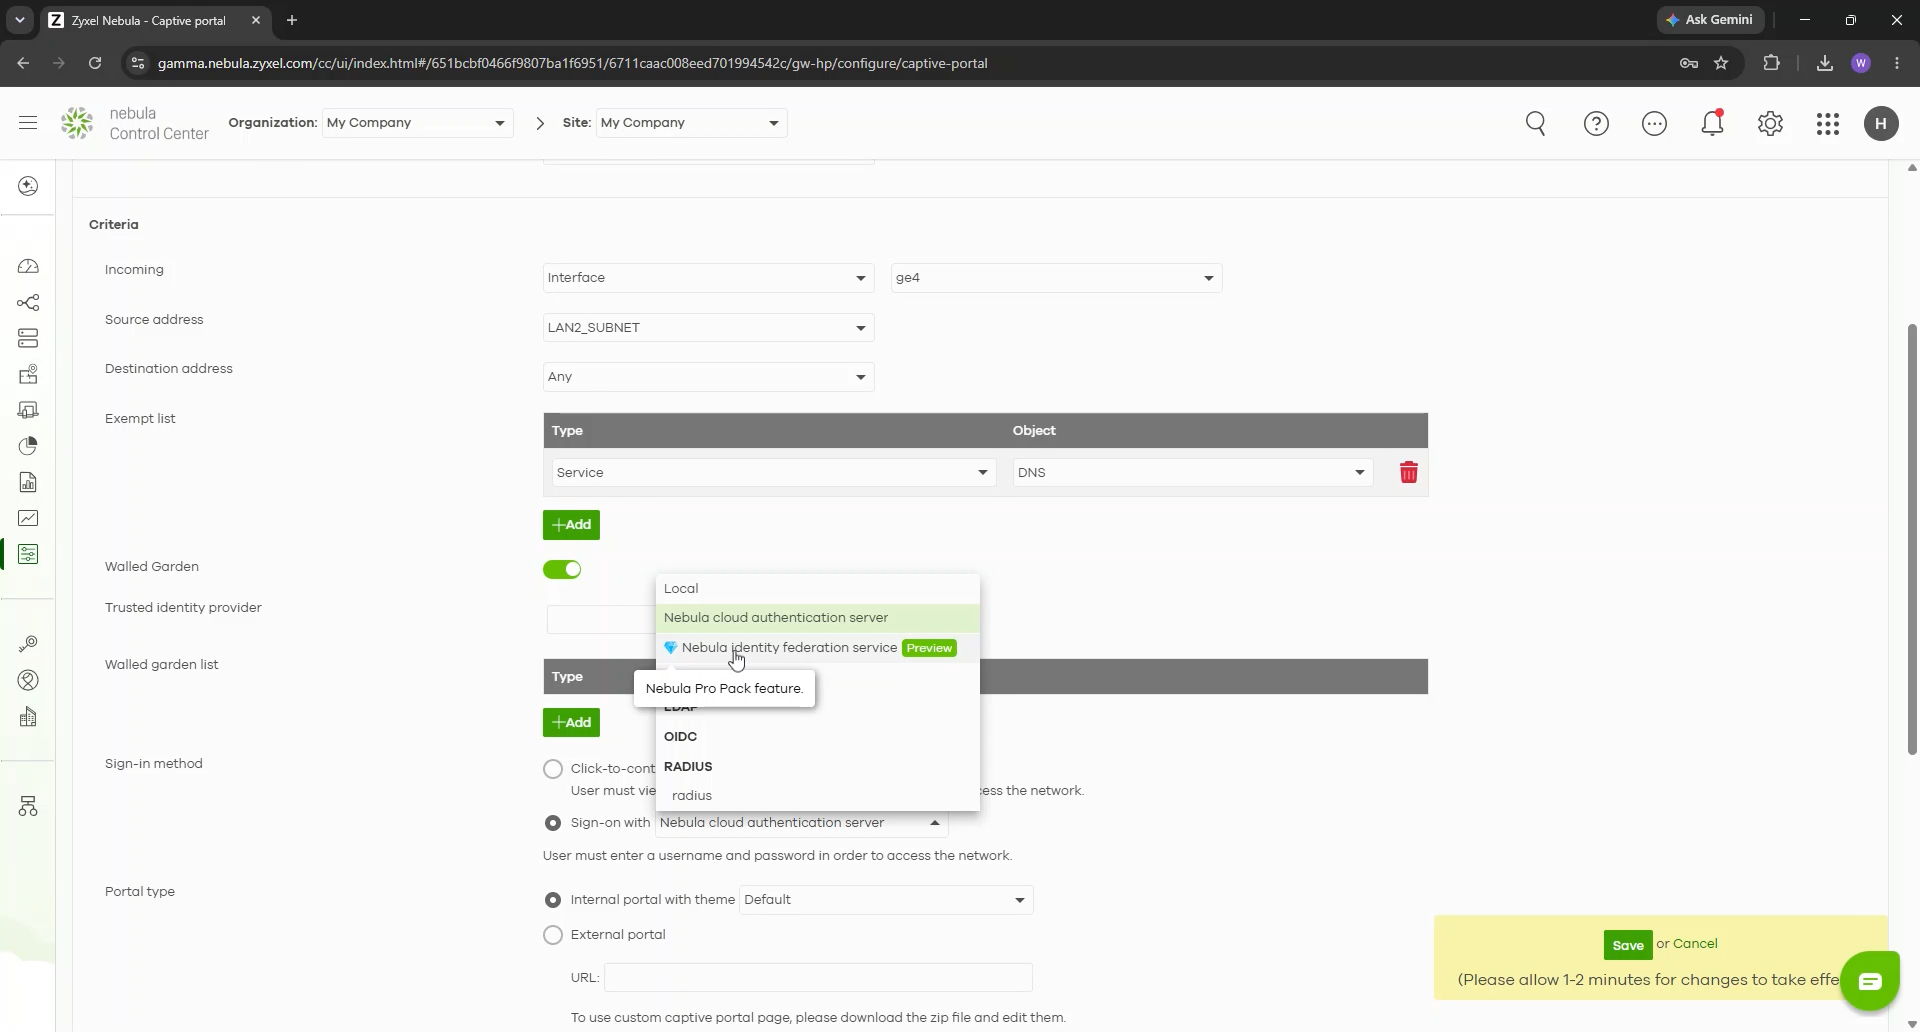
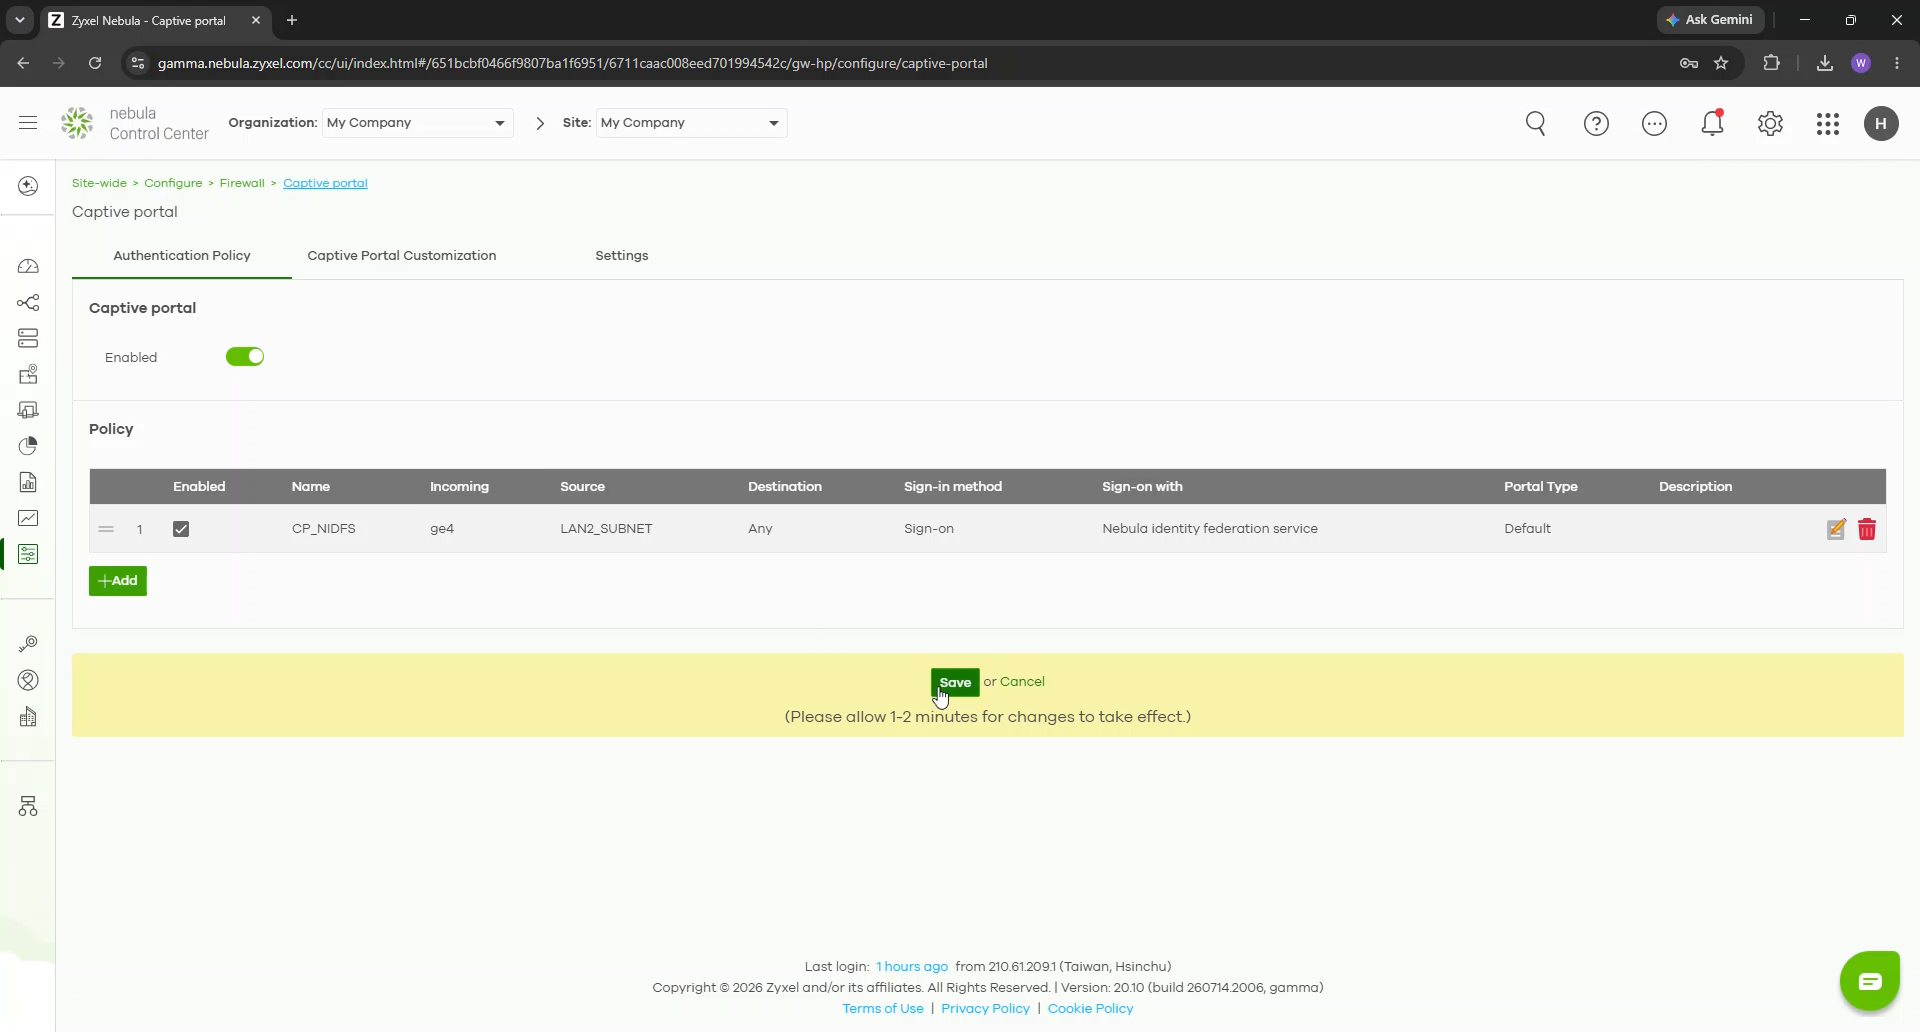
Under Sign-in method, select Sign-on with, then choose Nebula identity federation service. Click Save to take effect.
Don't forget to enable it.
.Step 3 - Configure SSL VPN to use NID FS
- Go to
Site-wide > Configure > Firewall > Remote access VPN - Enable SSL VPN Server
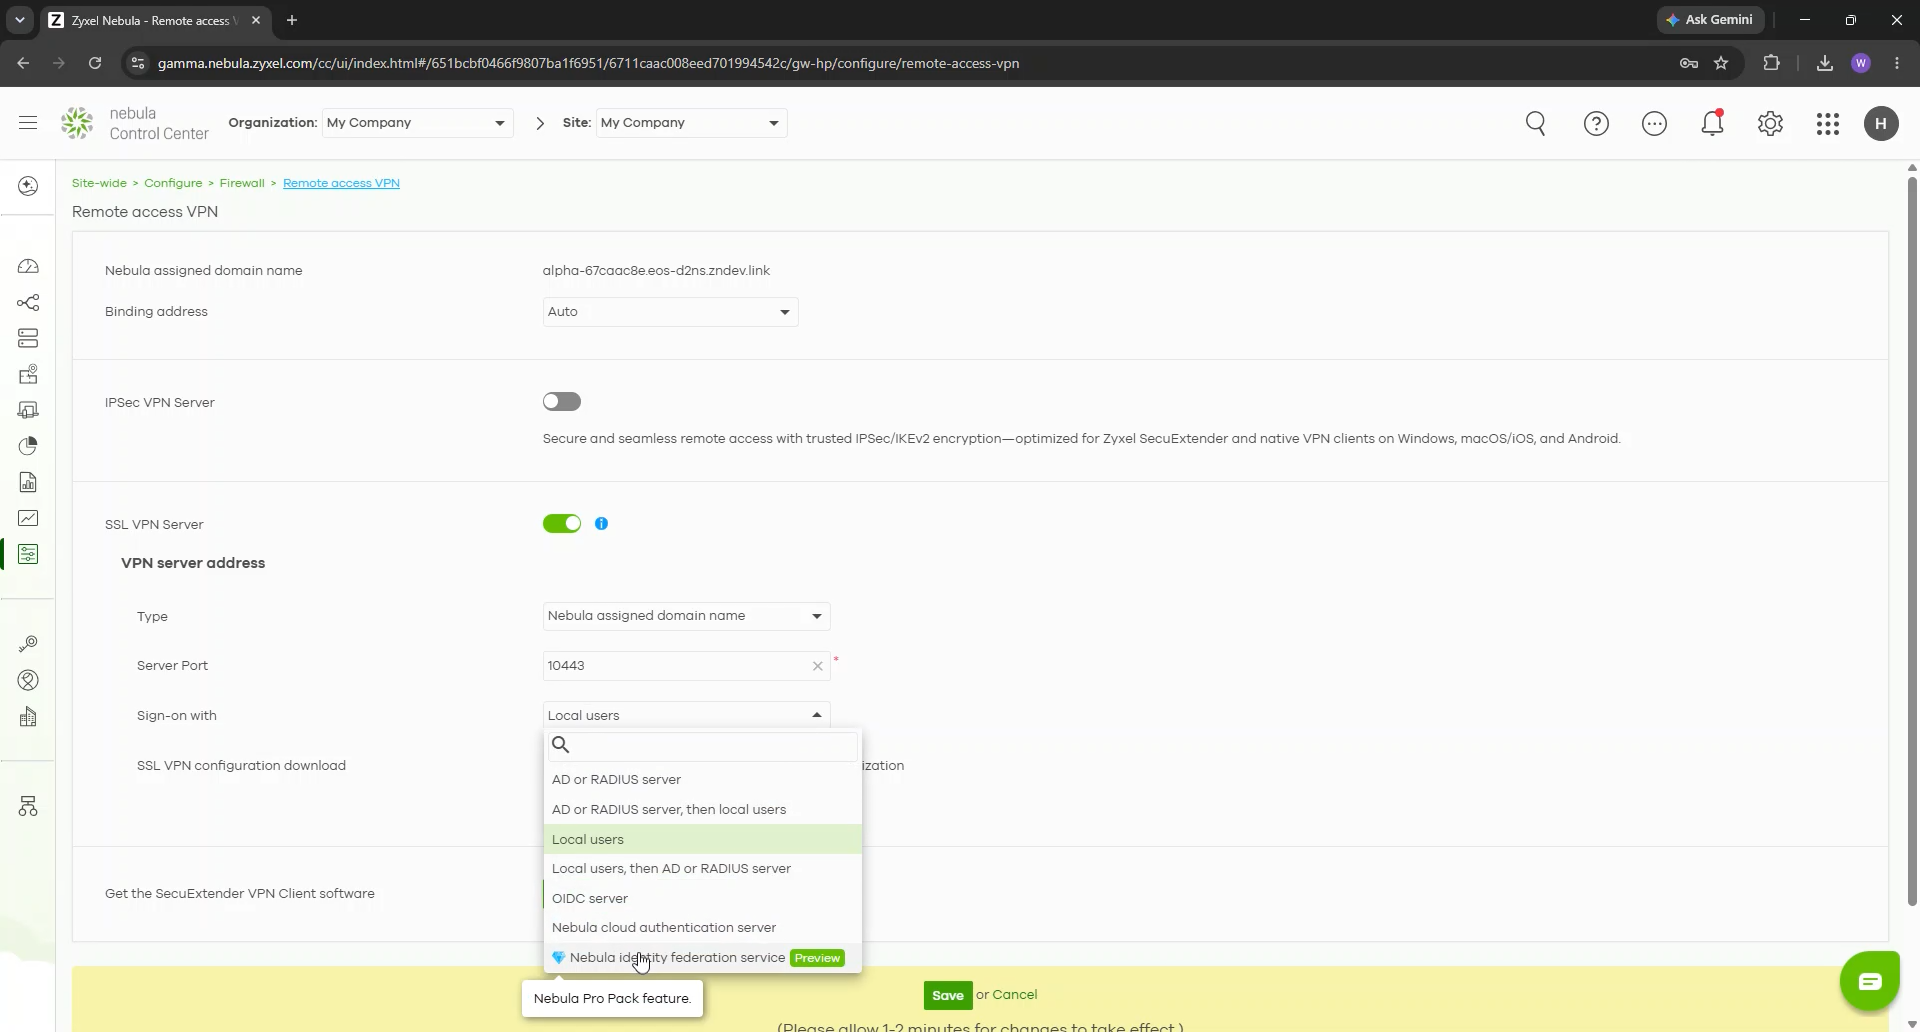
- For Sign-on with, select Nebula Identity Federation Service
- Click Save. After synchronization, download the SSL VPN configuration for the supported VPN client.
- Download the SSL VPN configuration file and provide this file to the authorized end user.
Step 4 - Authorize NCAS users for both services
Creating the identity provider is not enough by itself. A user privilege policy maps the NCAS identity source to the captive portal and SSL VPN services that NCAS users are allowed to access.
- Return to
Organization-wide > Organization-wide manage > Nebula identity federation service - Open the User privilege tab and click Add.
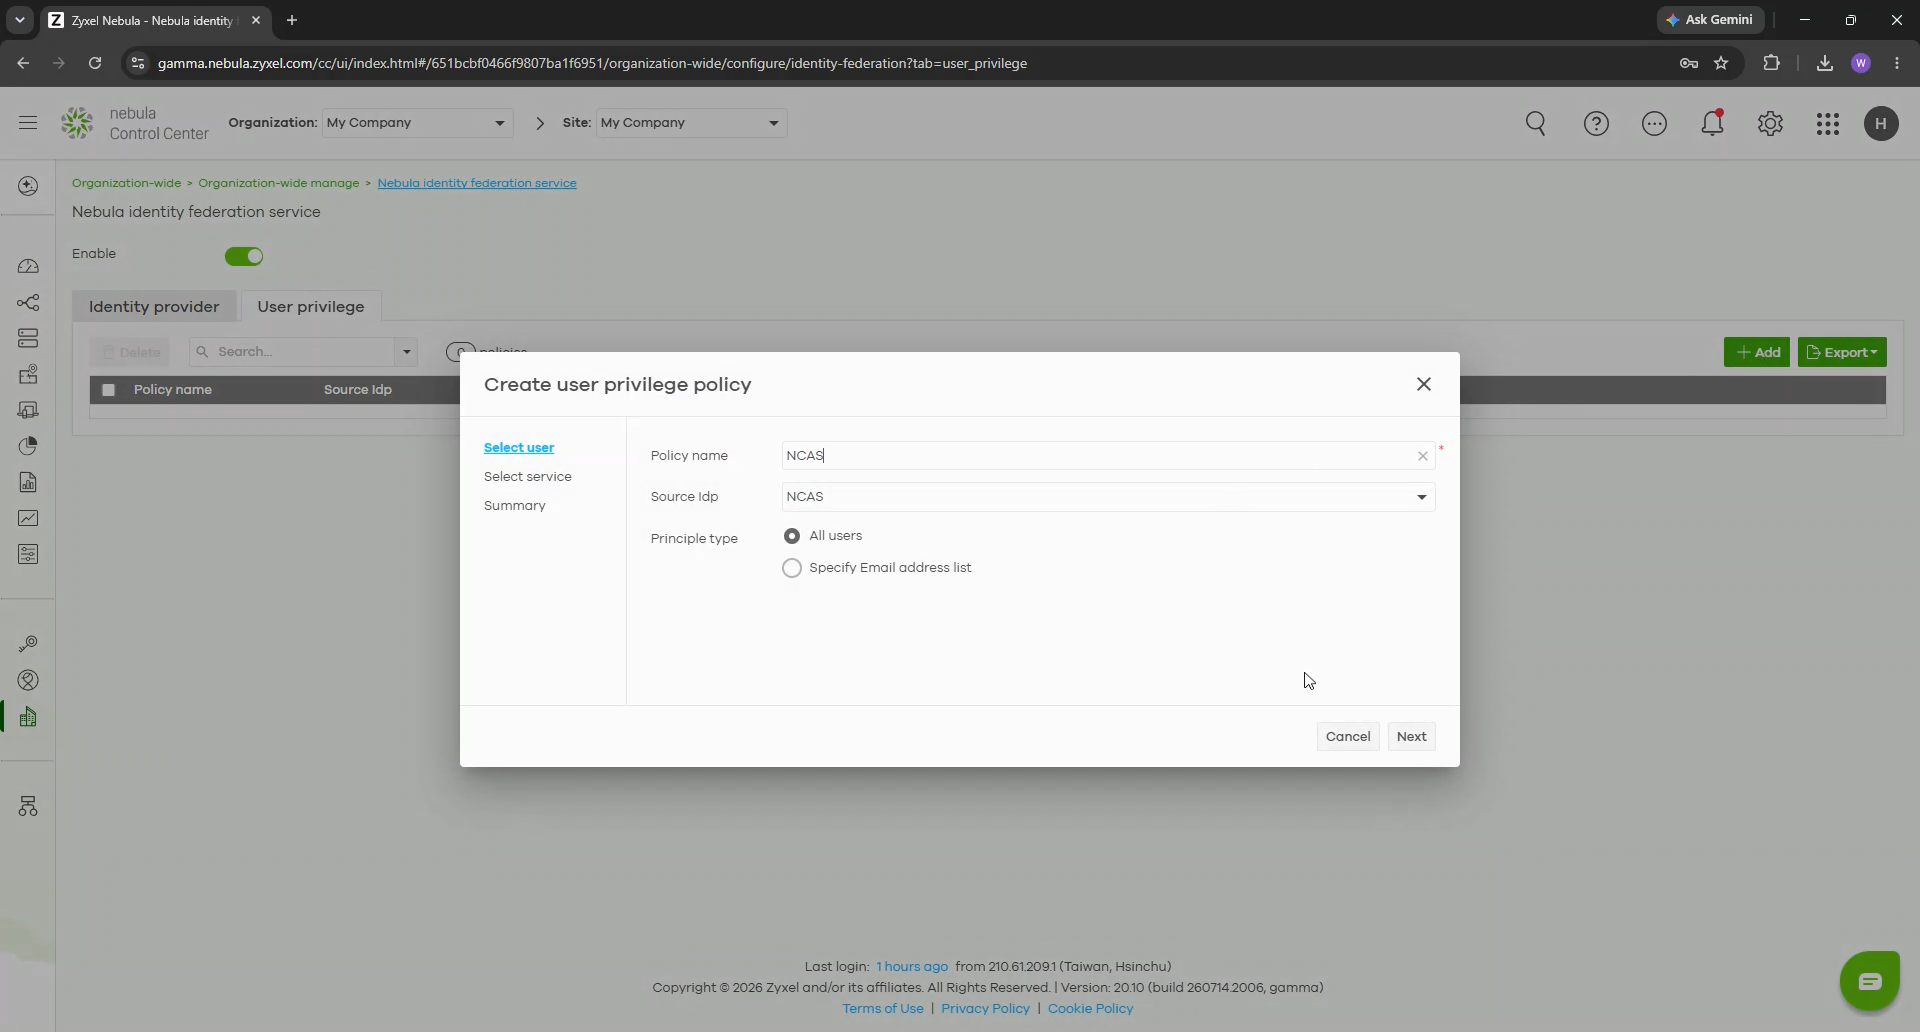
- In Select user, enter a Policy name and select NCAS as the Source IdP.
- For Principle type, choose All users, or choose the option for a specified user list if access must be limited.
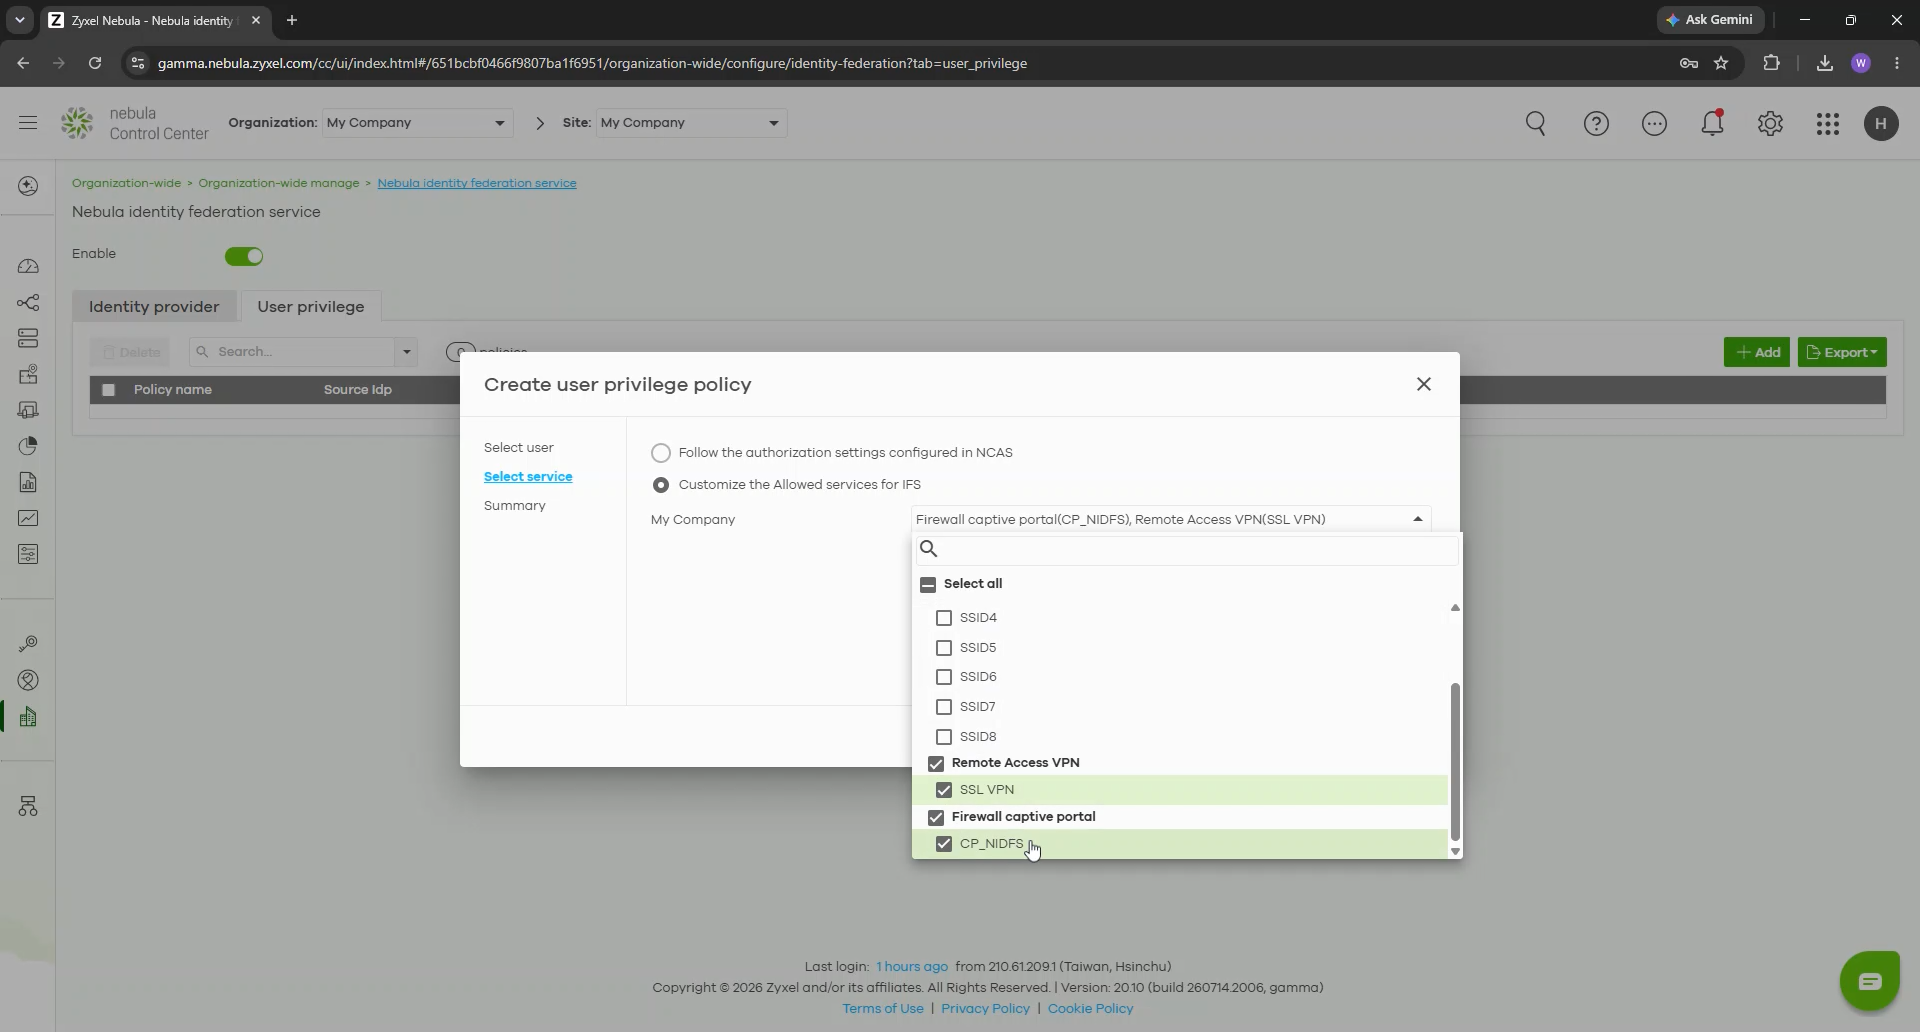
In Select service, choose Customize the allowed services for IdP. Select the target site, then select the firewall captive portal policy and the Remote Access VPN service.
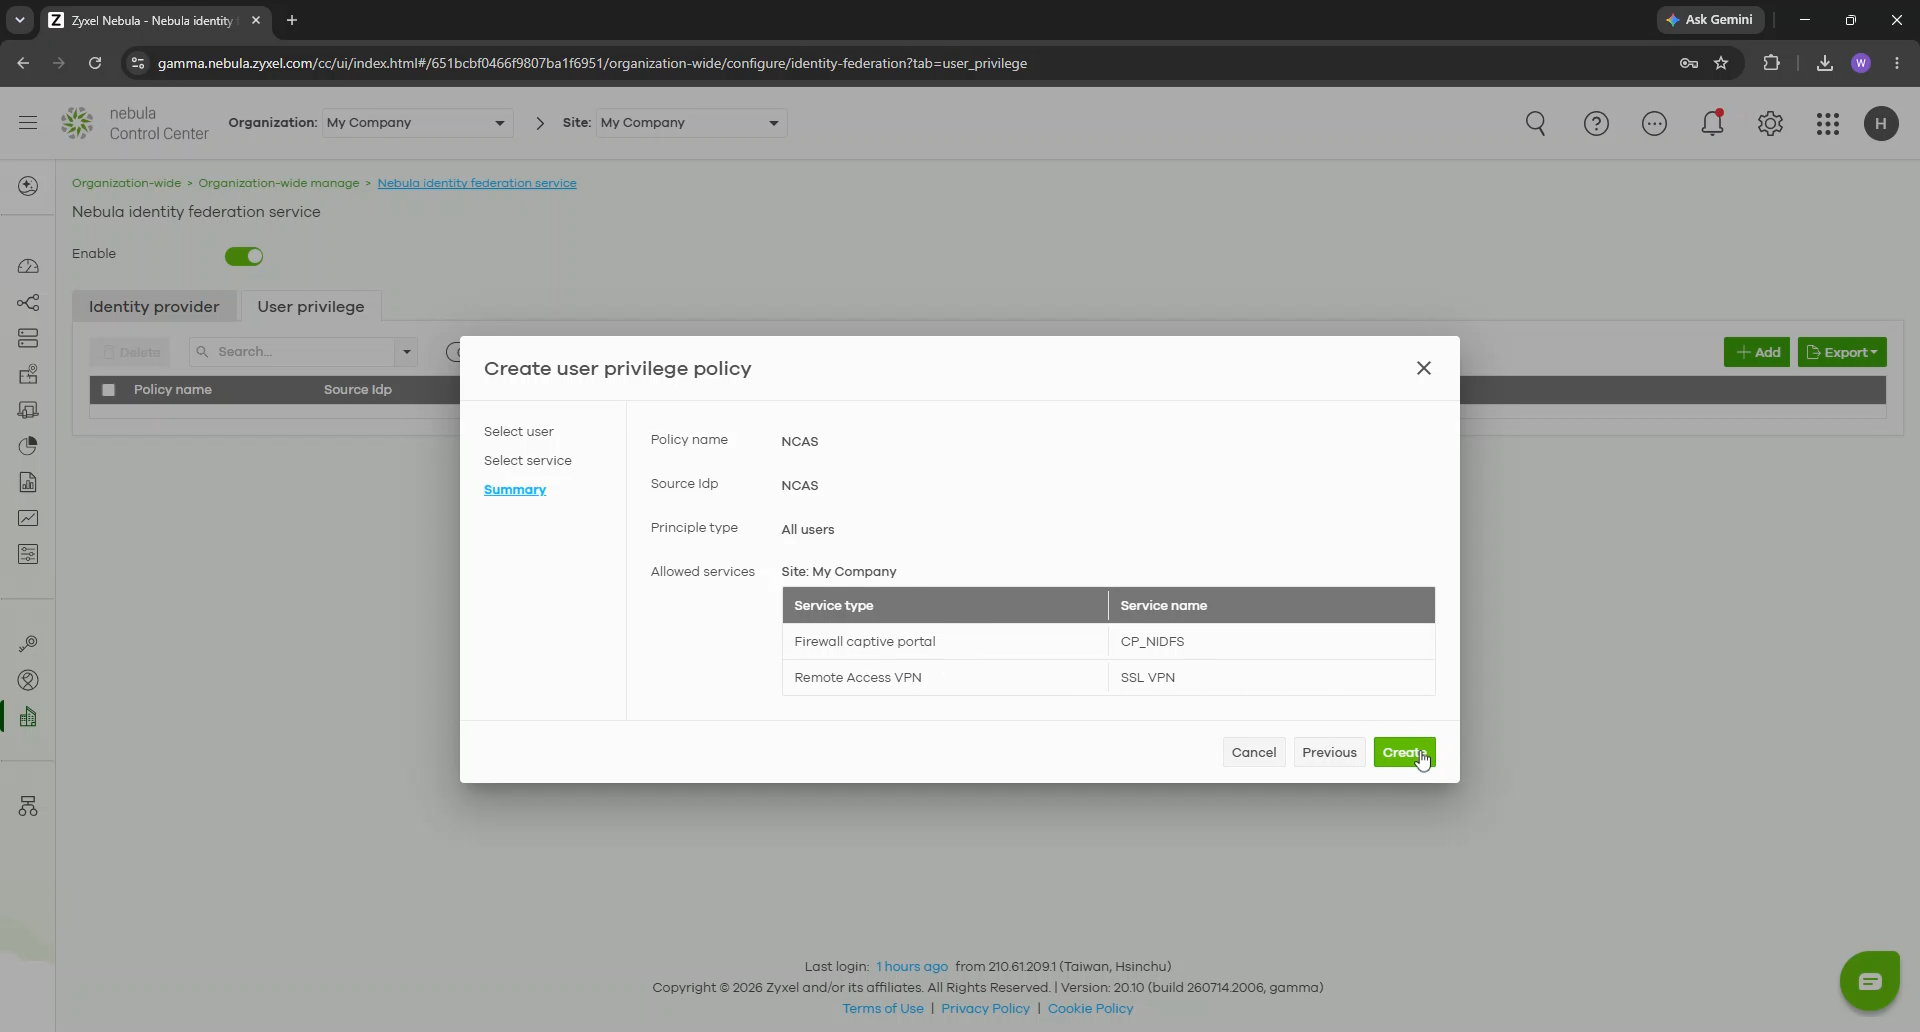
Review the Summary, click Create, and save the page.
Scope Tip
Use All users only when every NCAS user should receive the same service access. For tighter control, build a specified user list and create separate privilege policies for different roles.
Step 5 - Create an NCAS user
- Go to
Organization-wide > Organization-wide manage > Nebula cloud authentication server - On the User tab, click Add.
- Enter the user's email address, username, optional description, and a strong temporary password.
- Under Authorized, choose All sites or the specific sites that the user is allowed to access. Do not leave the account as Not authorized.
- Choose whether the user signs in with an email address, username, or both.
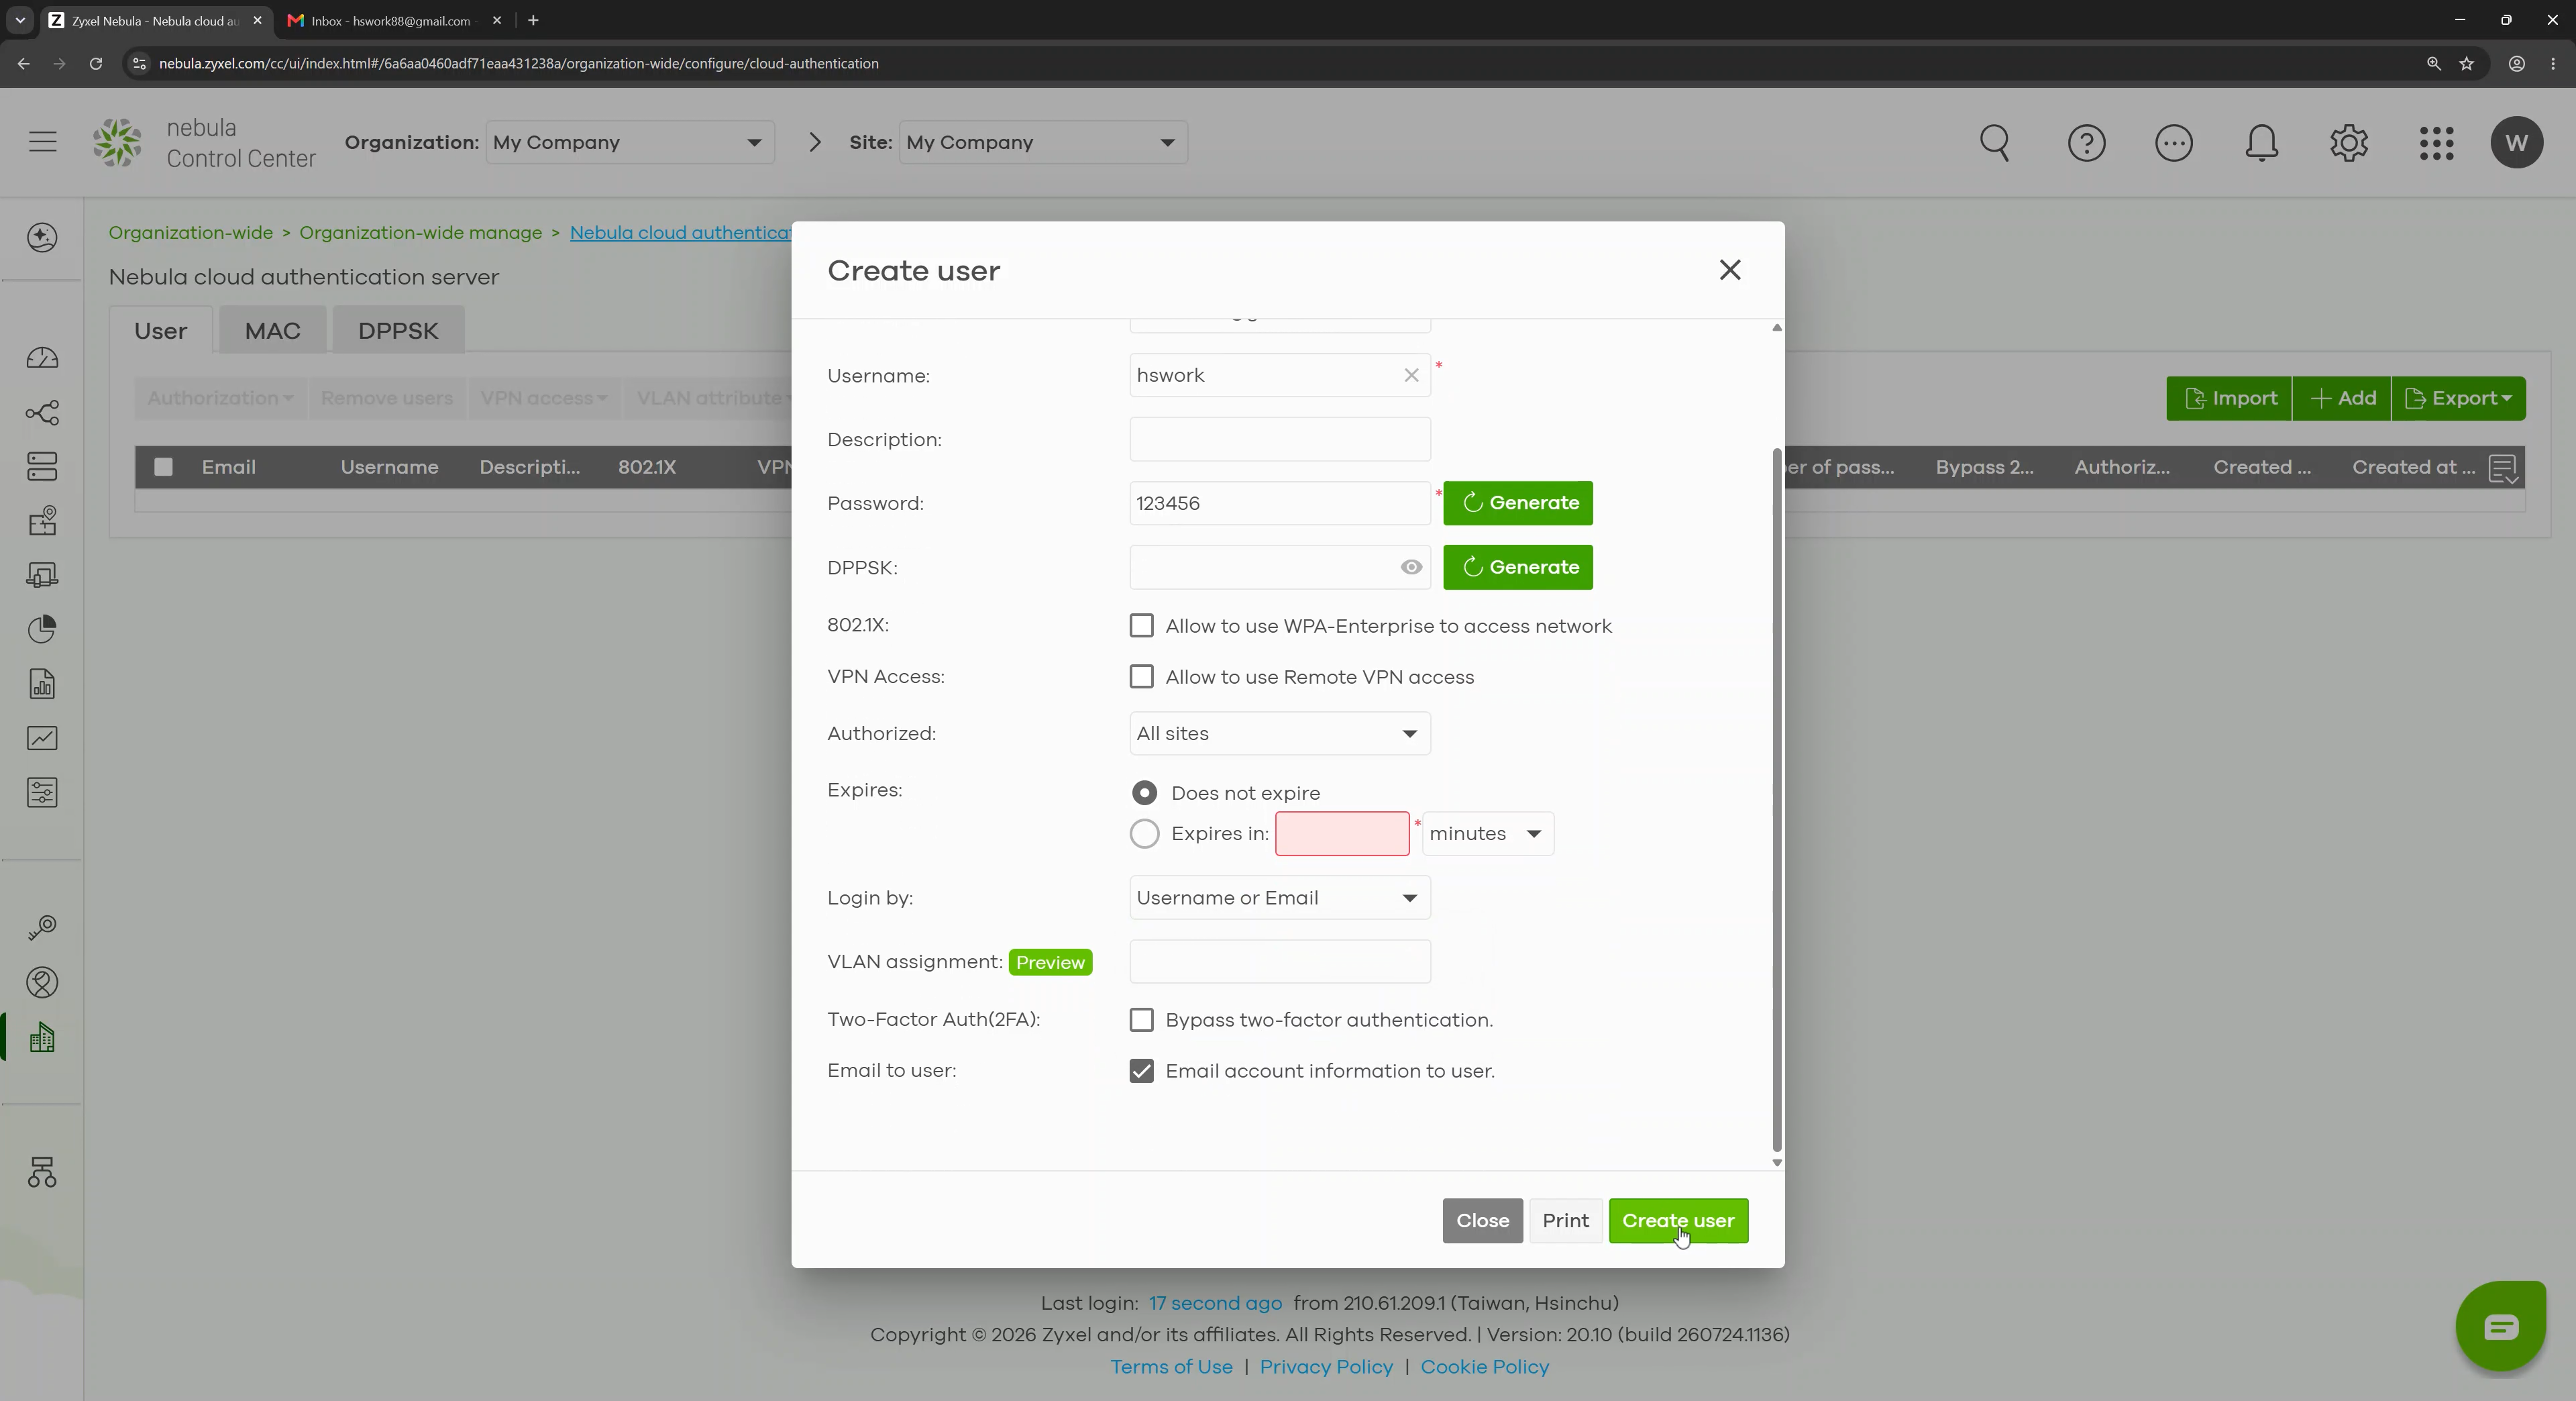
Click Create user, then save the page.
🙋♂️End-User Login Experience
The administrator configuration is now complete. The following steps show how an end user connects to the network and signs in through the NID FS Portal using an NCAS Passkey.
Step 6 - Register a passkey
The NCAS user completes the Passkey enrollment; the administrator does not create or have access to the user’s Passkey. Each NCAS user only needs to register a Passkey once. The registered Passkey can then be used to sign in to both the Firewall Captive Portal and SSL VPN. Follow the steps below to complete the registration.
Open the NCAS account email and follow the account-management link.
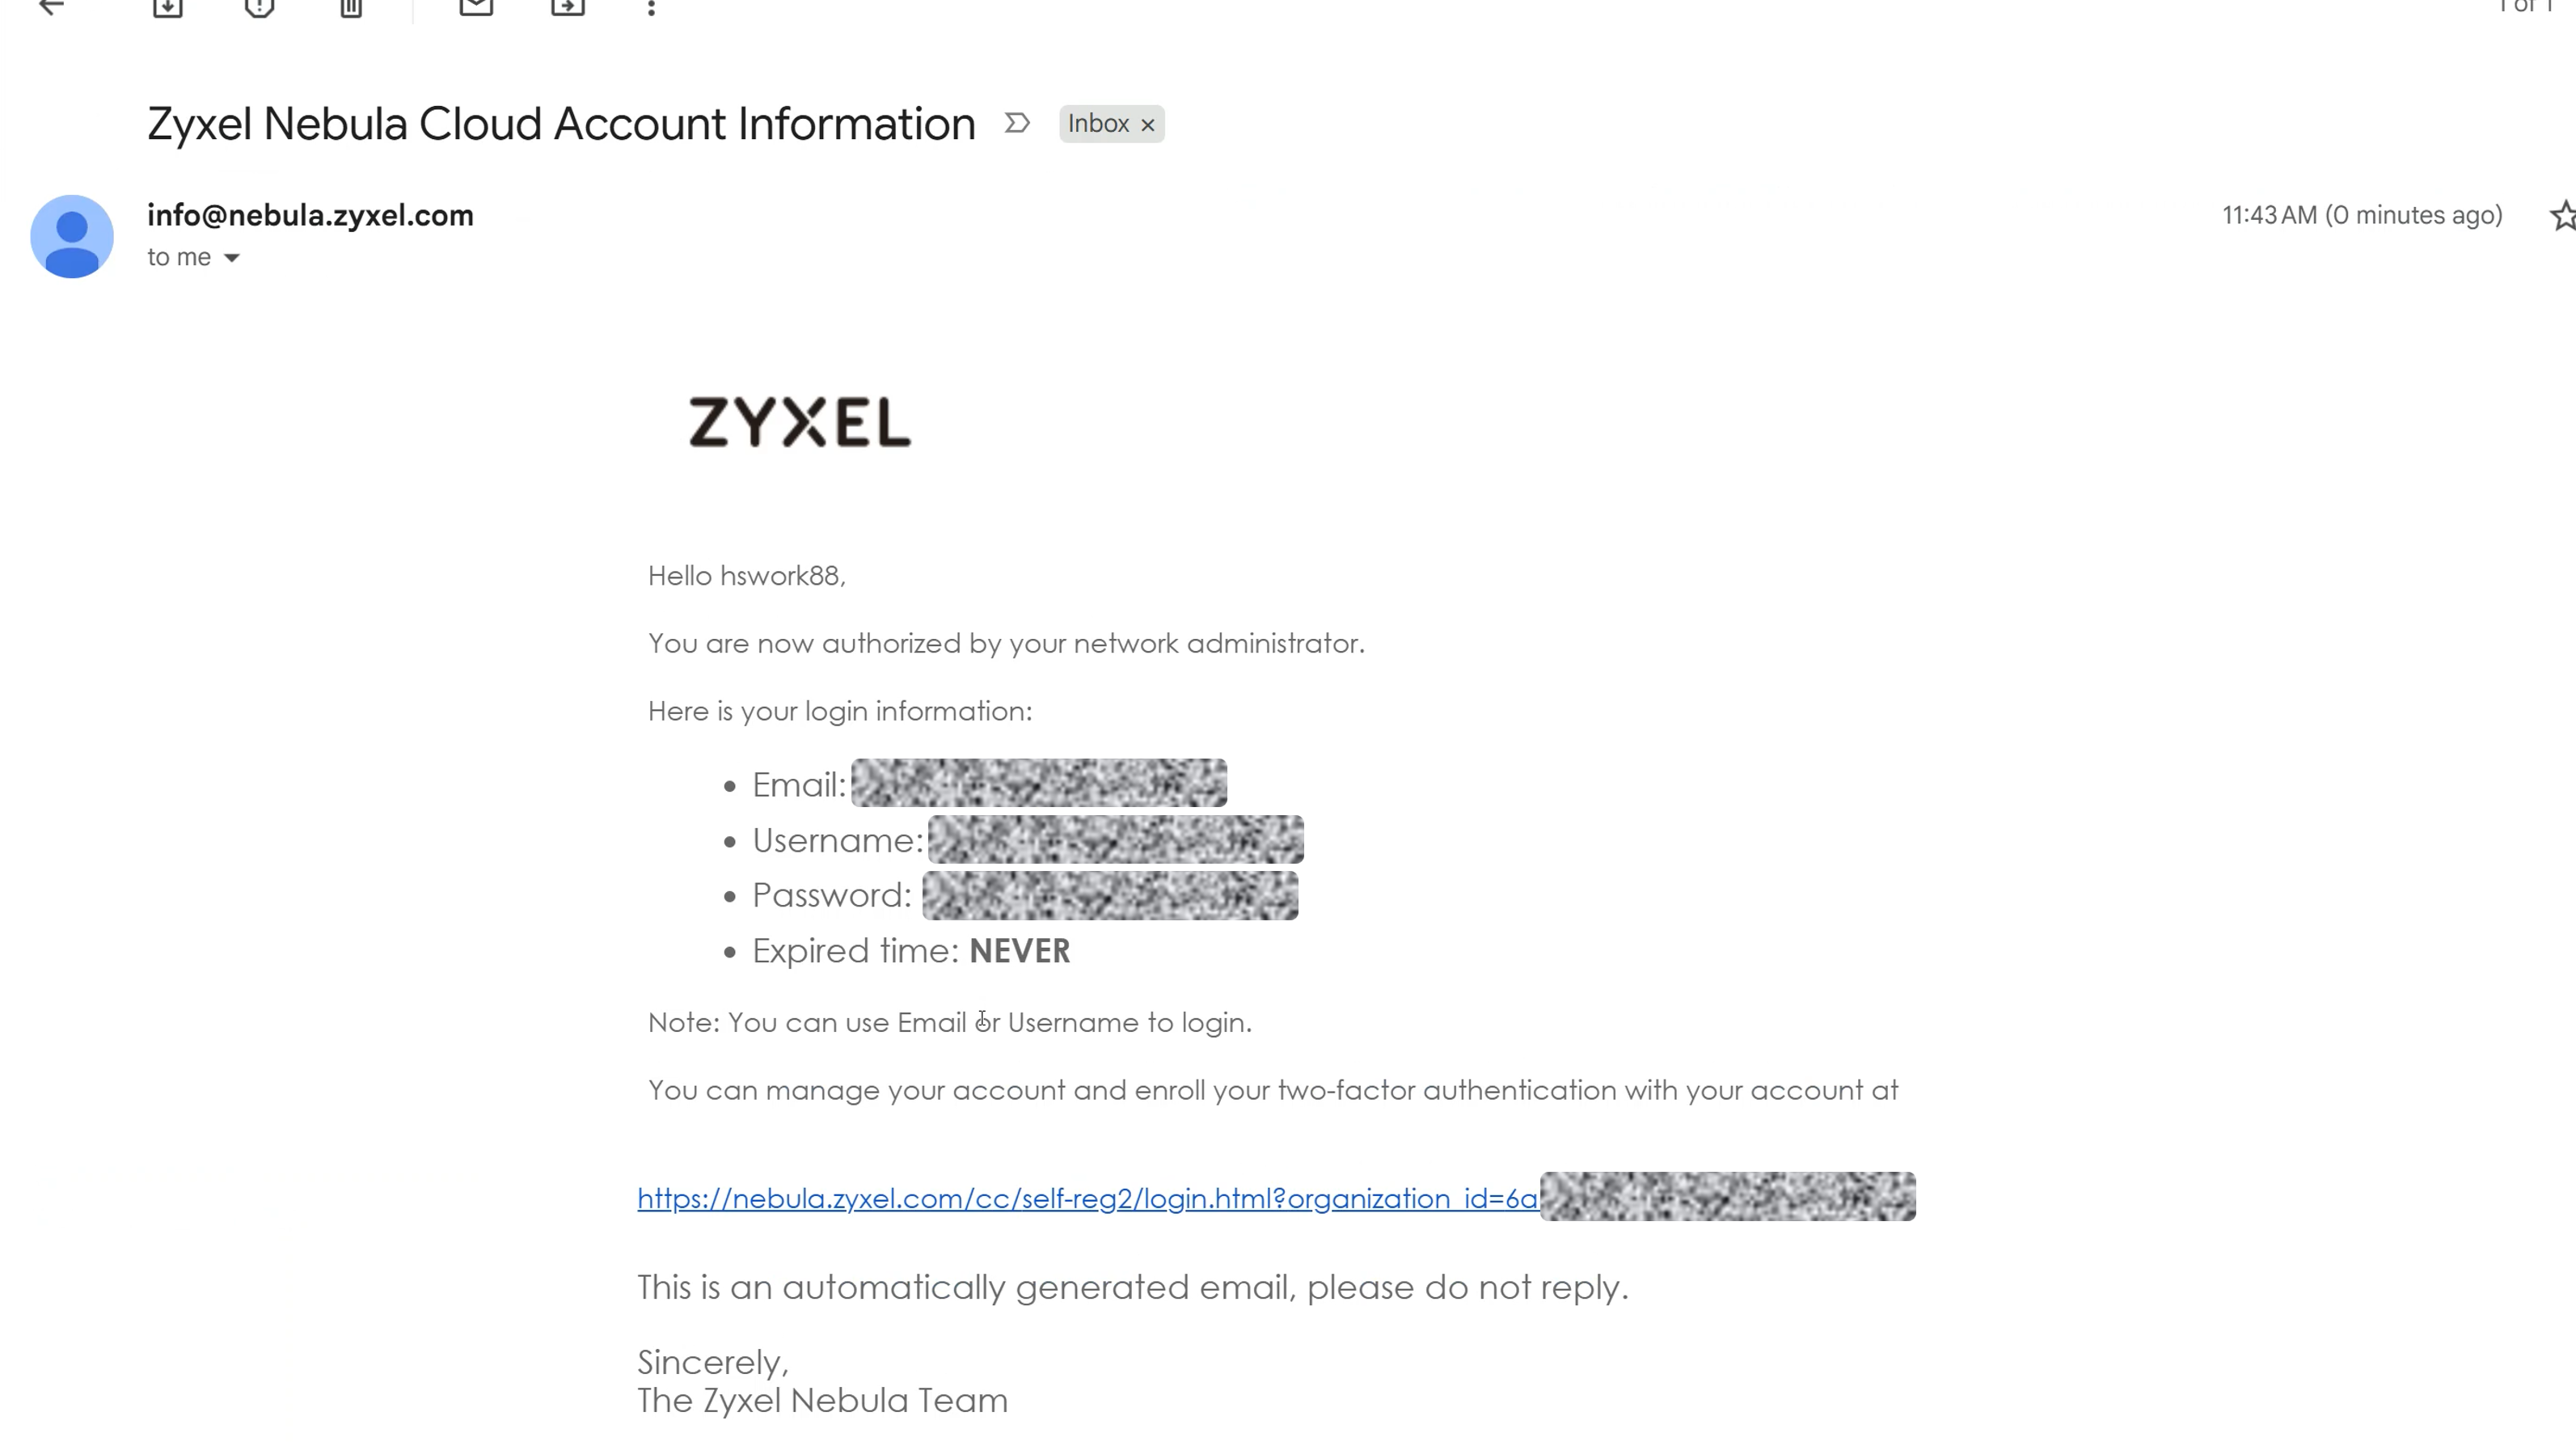
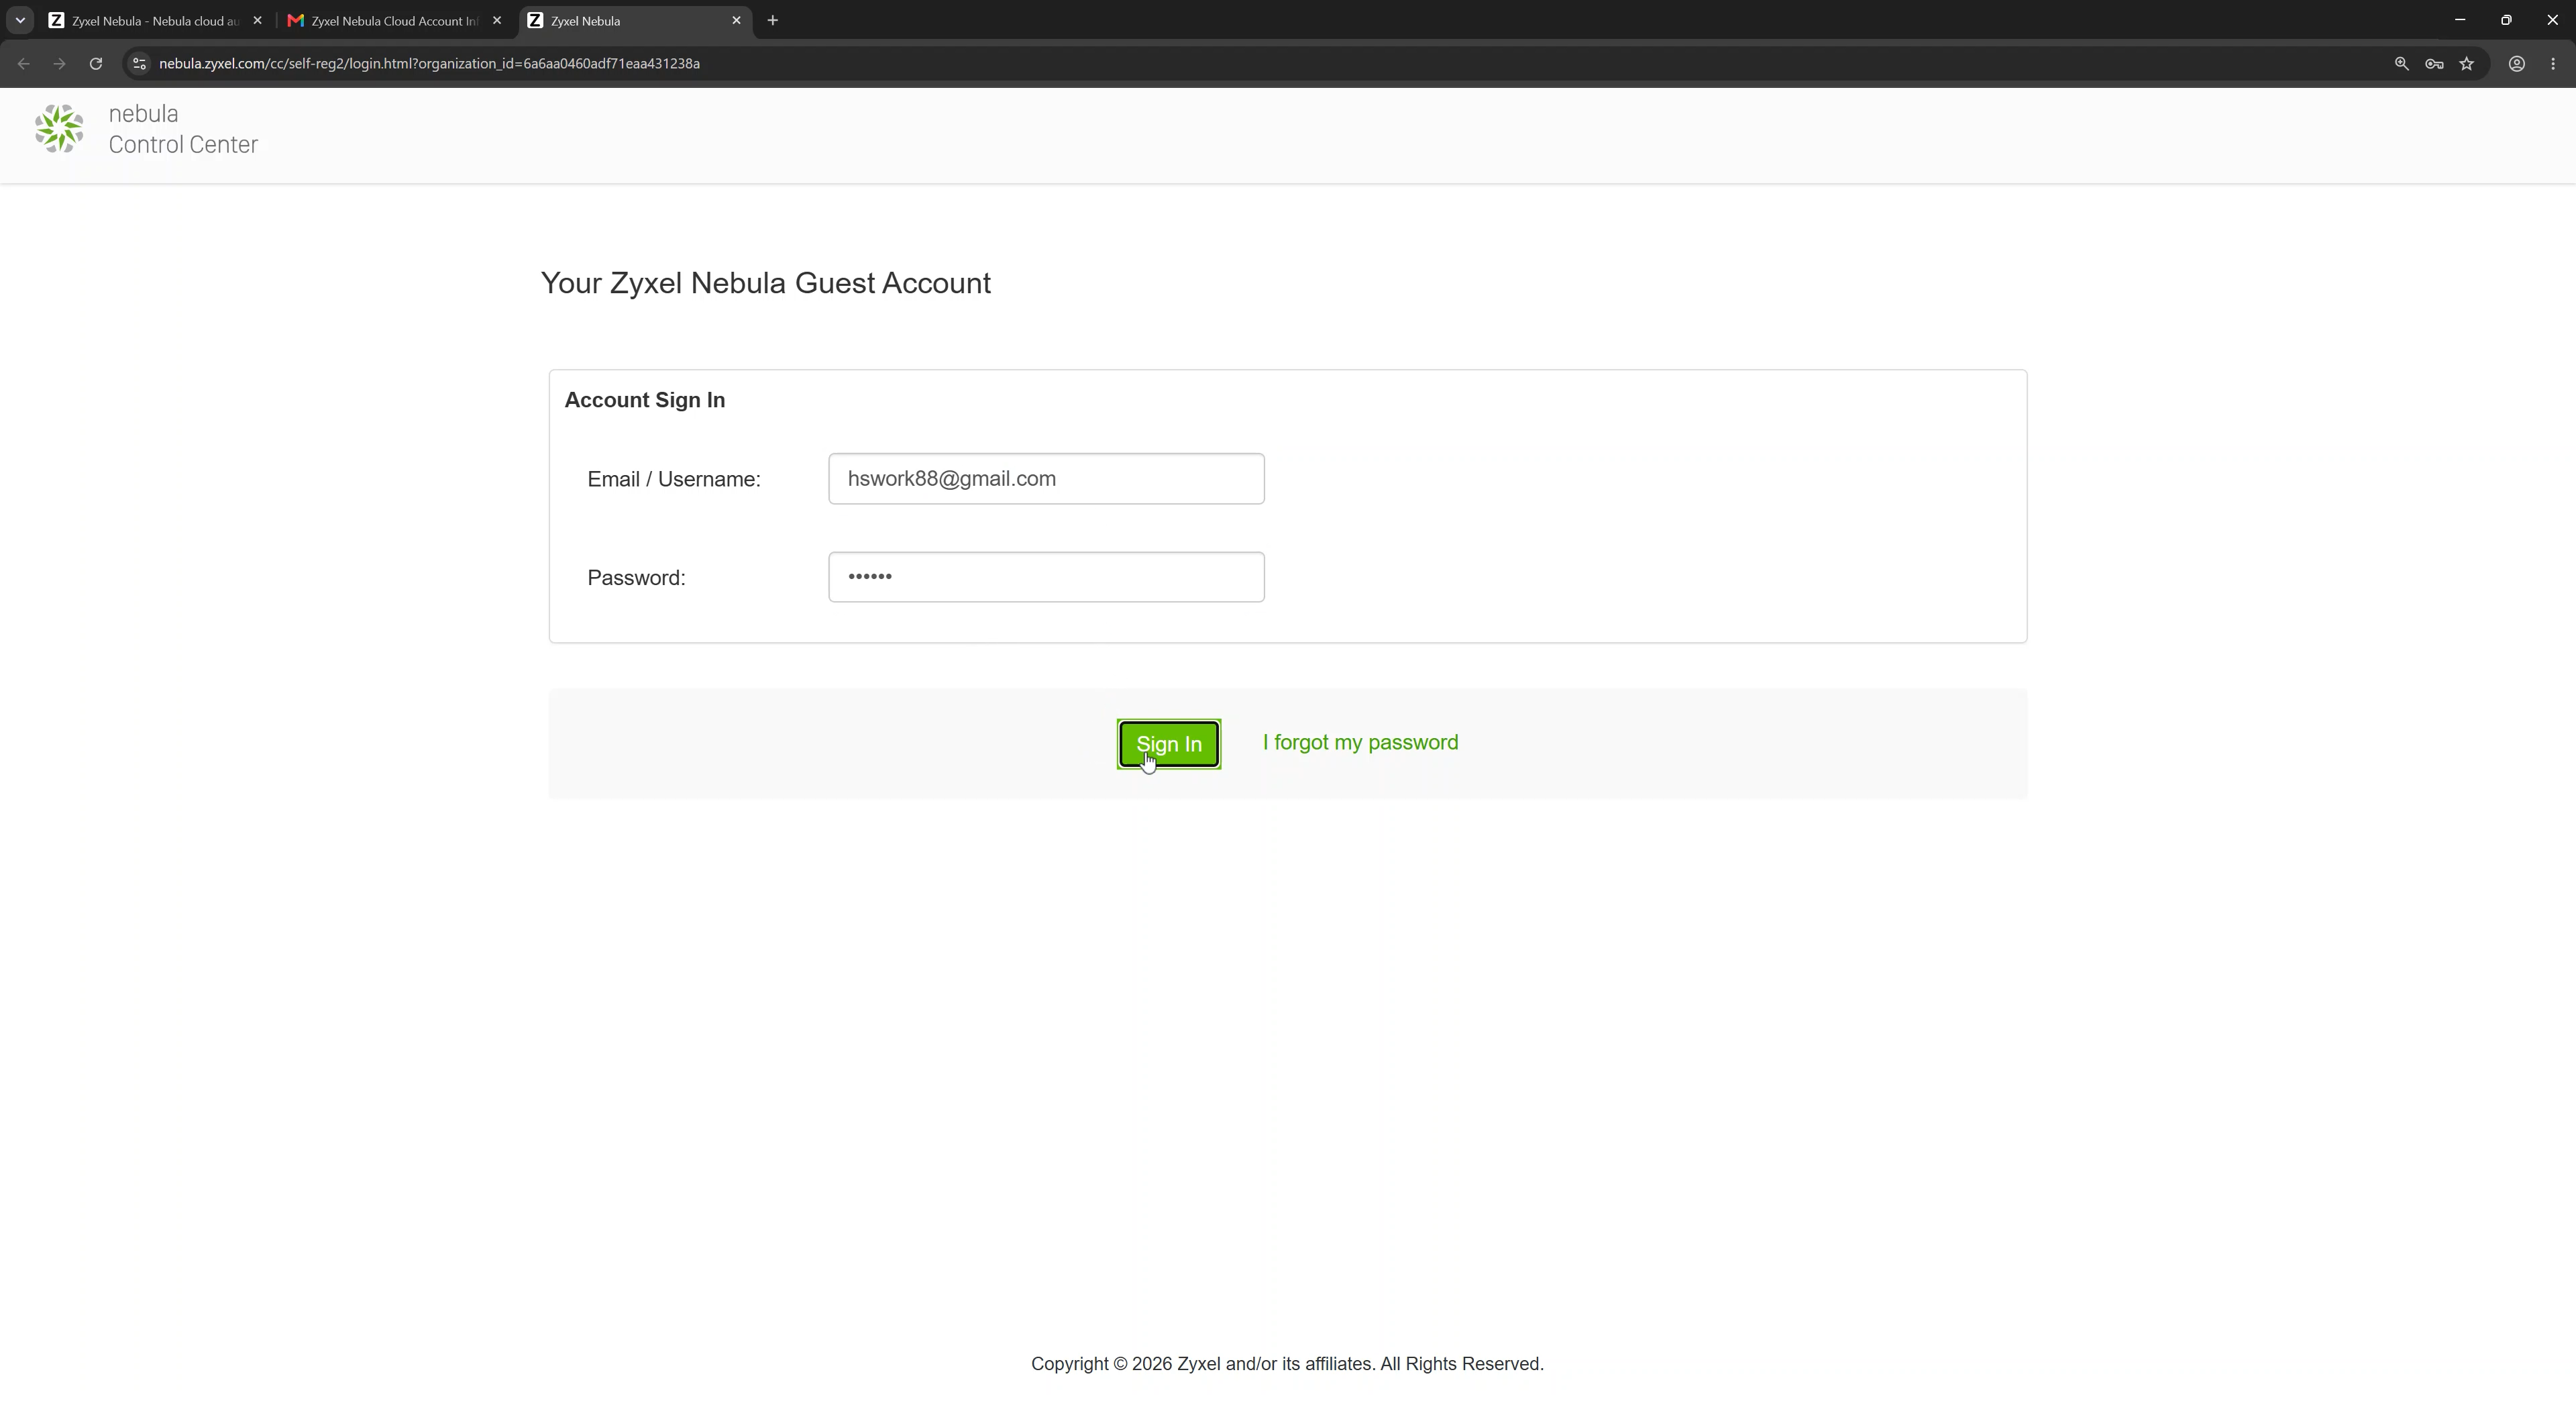
Sign in with the NCAS email address or username and the temporary password.
On the account page, scroll to Security > Set up passkeys and click Add Passkey.
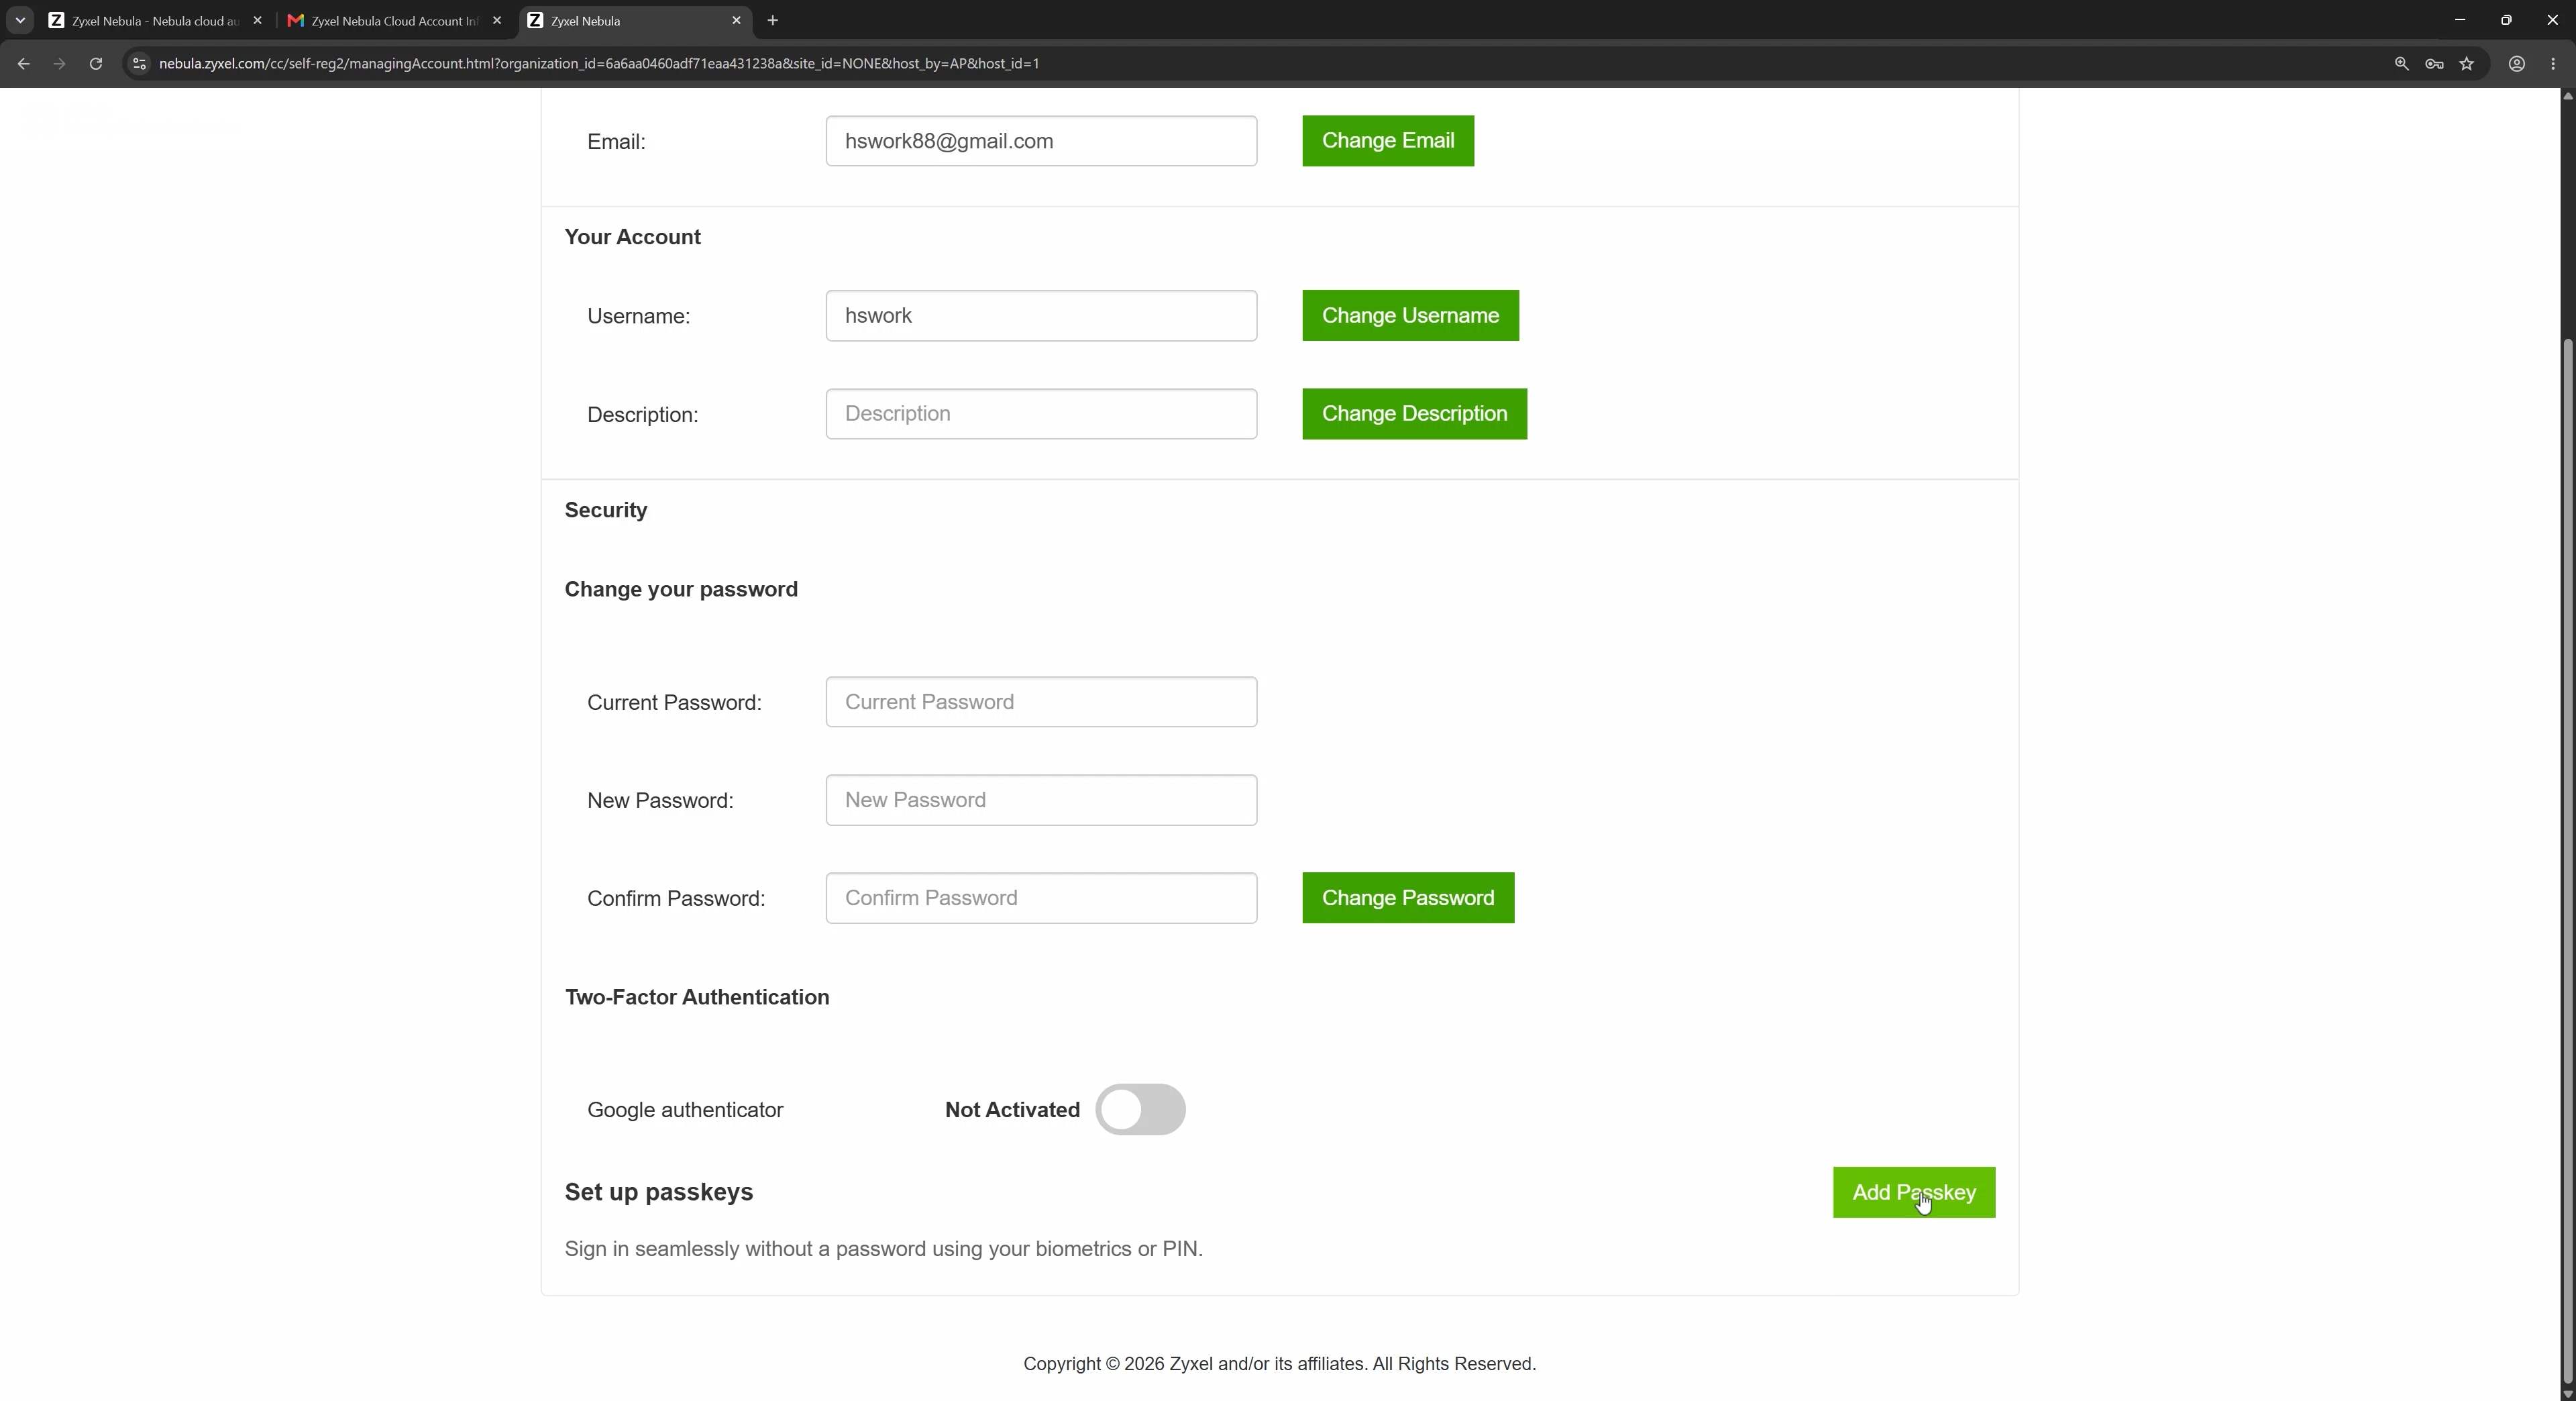
Follow the prompt. Depending on the device, confirm with a PIN, fingerprint, face recognition, security key, or a passkey provider.
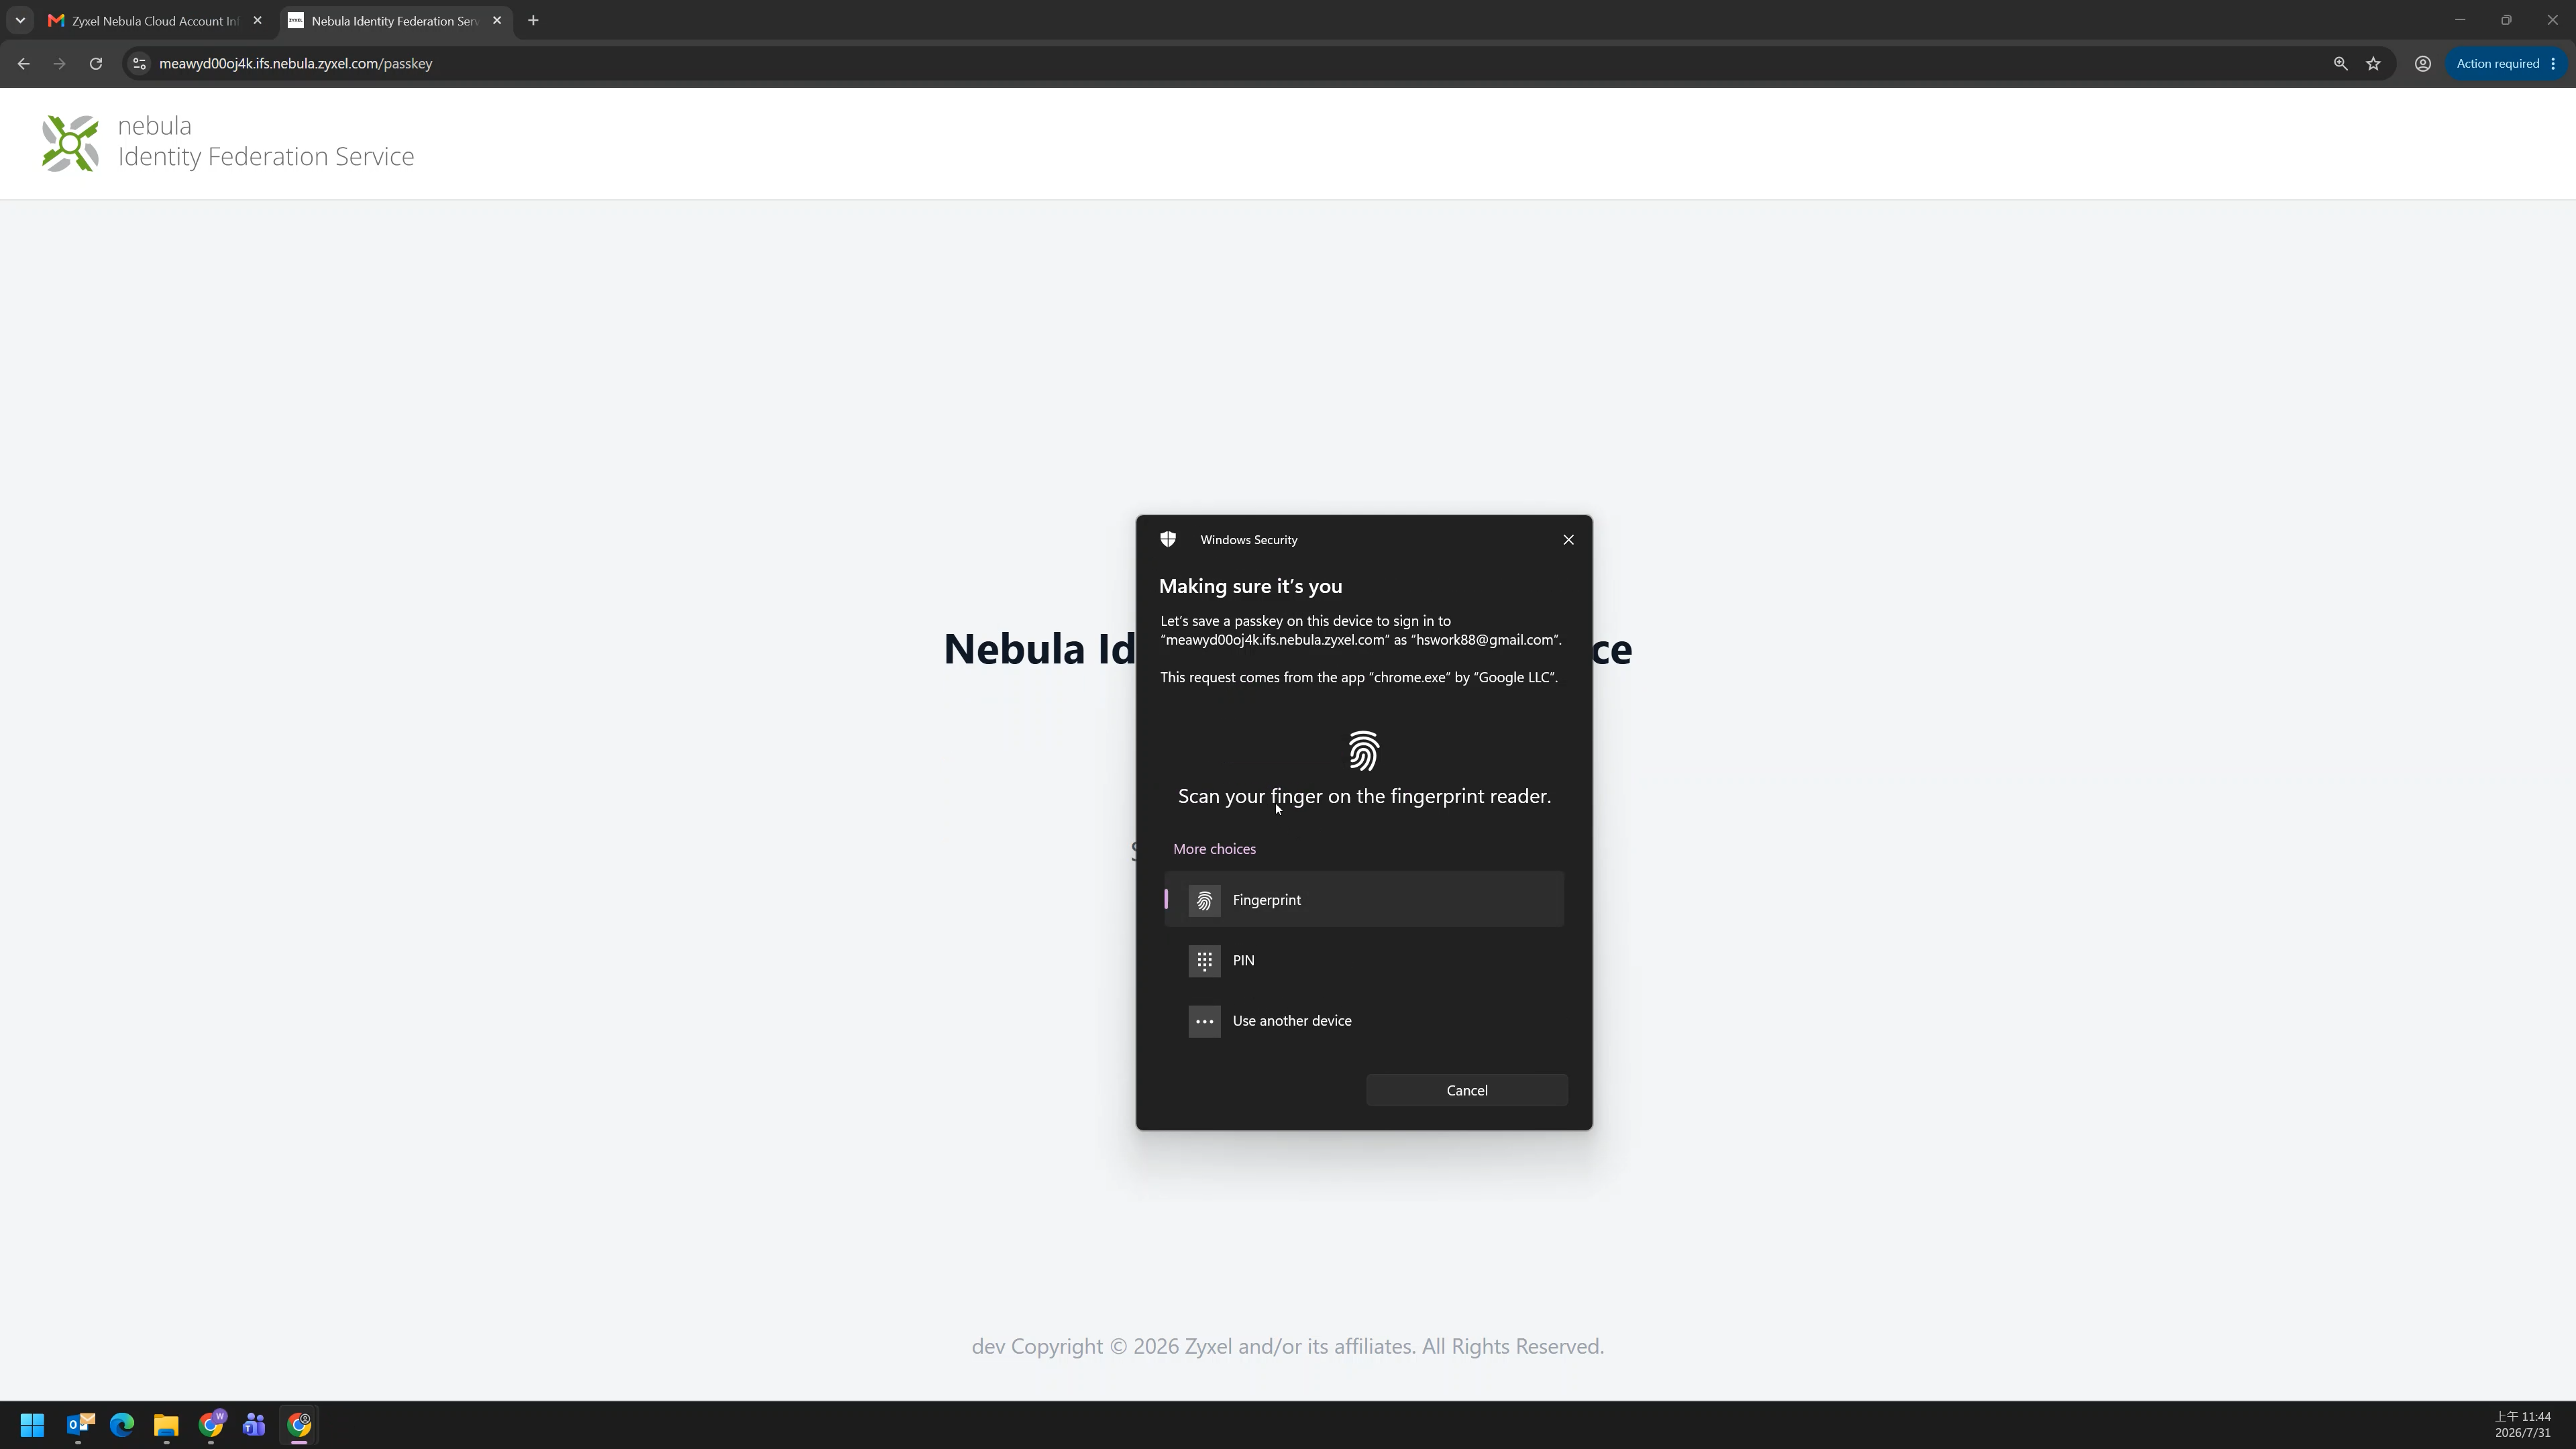
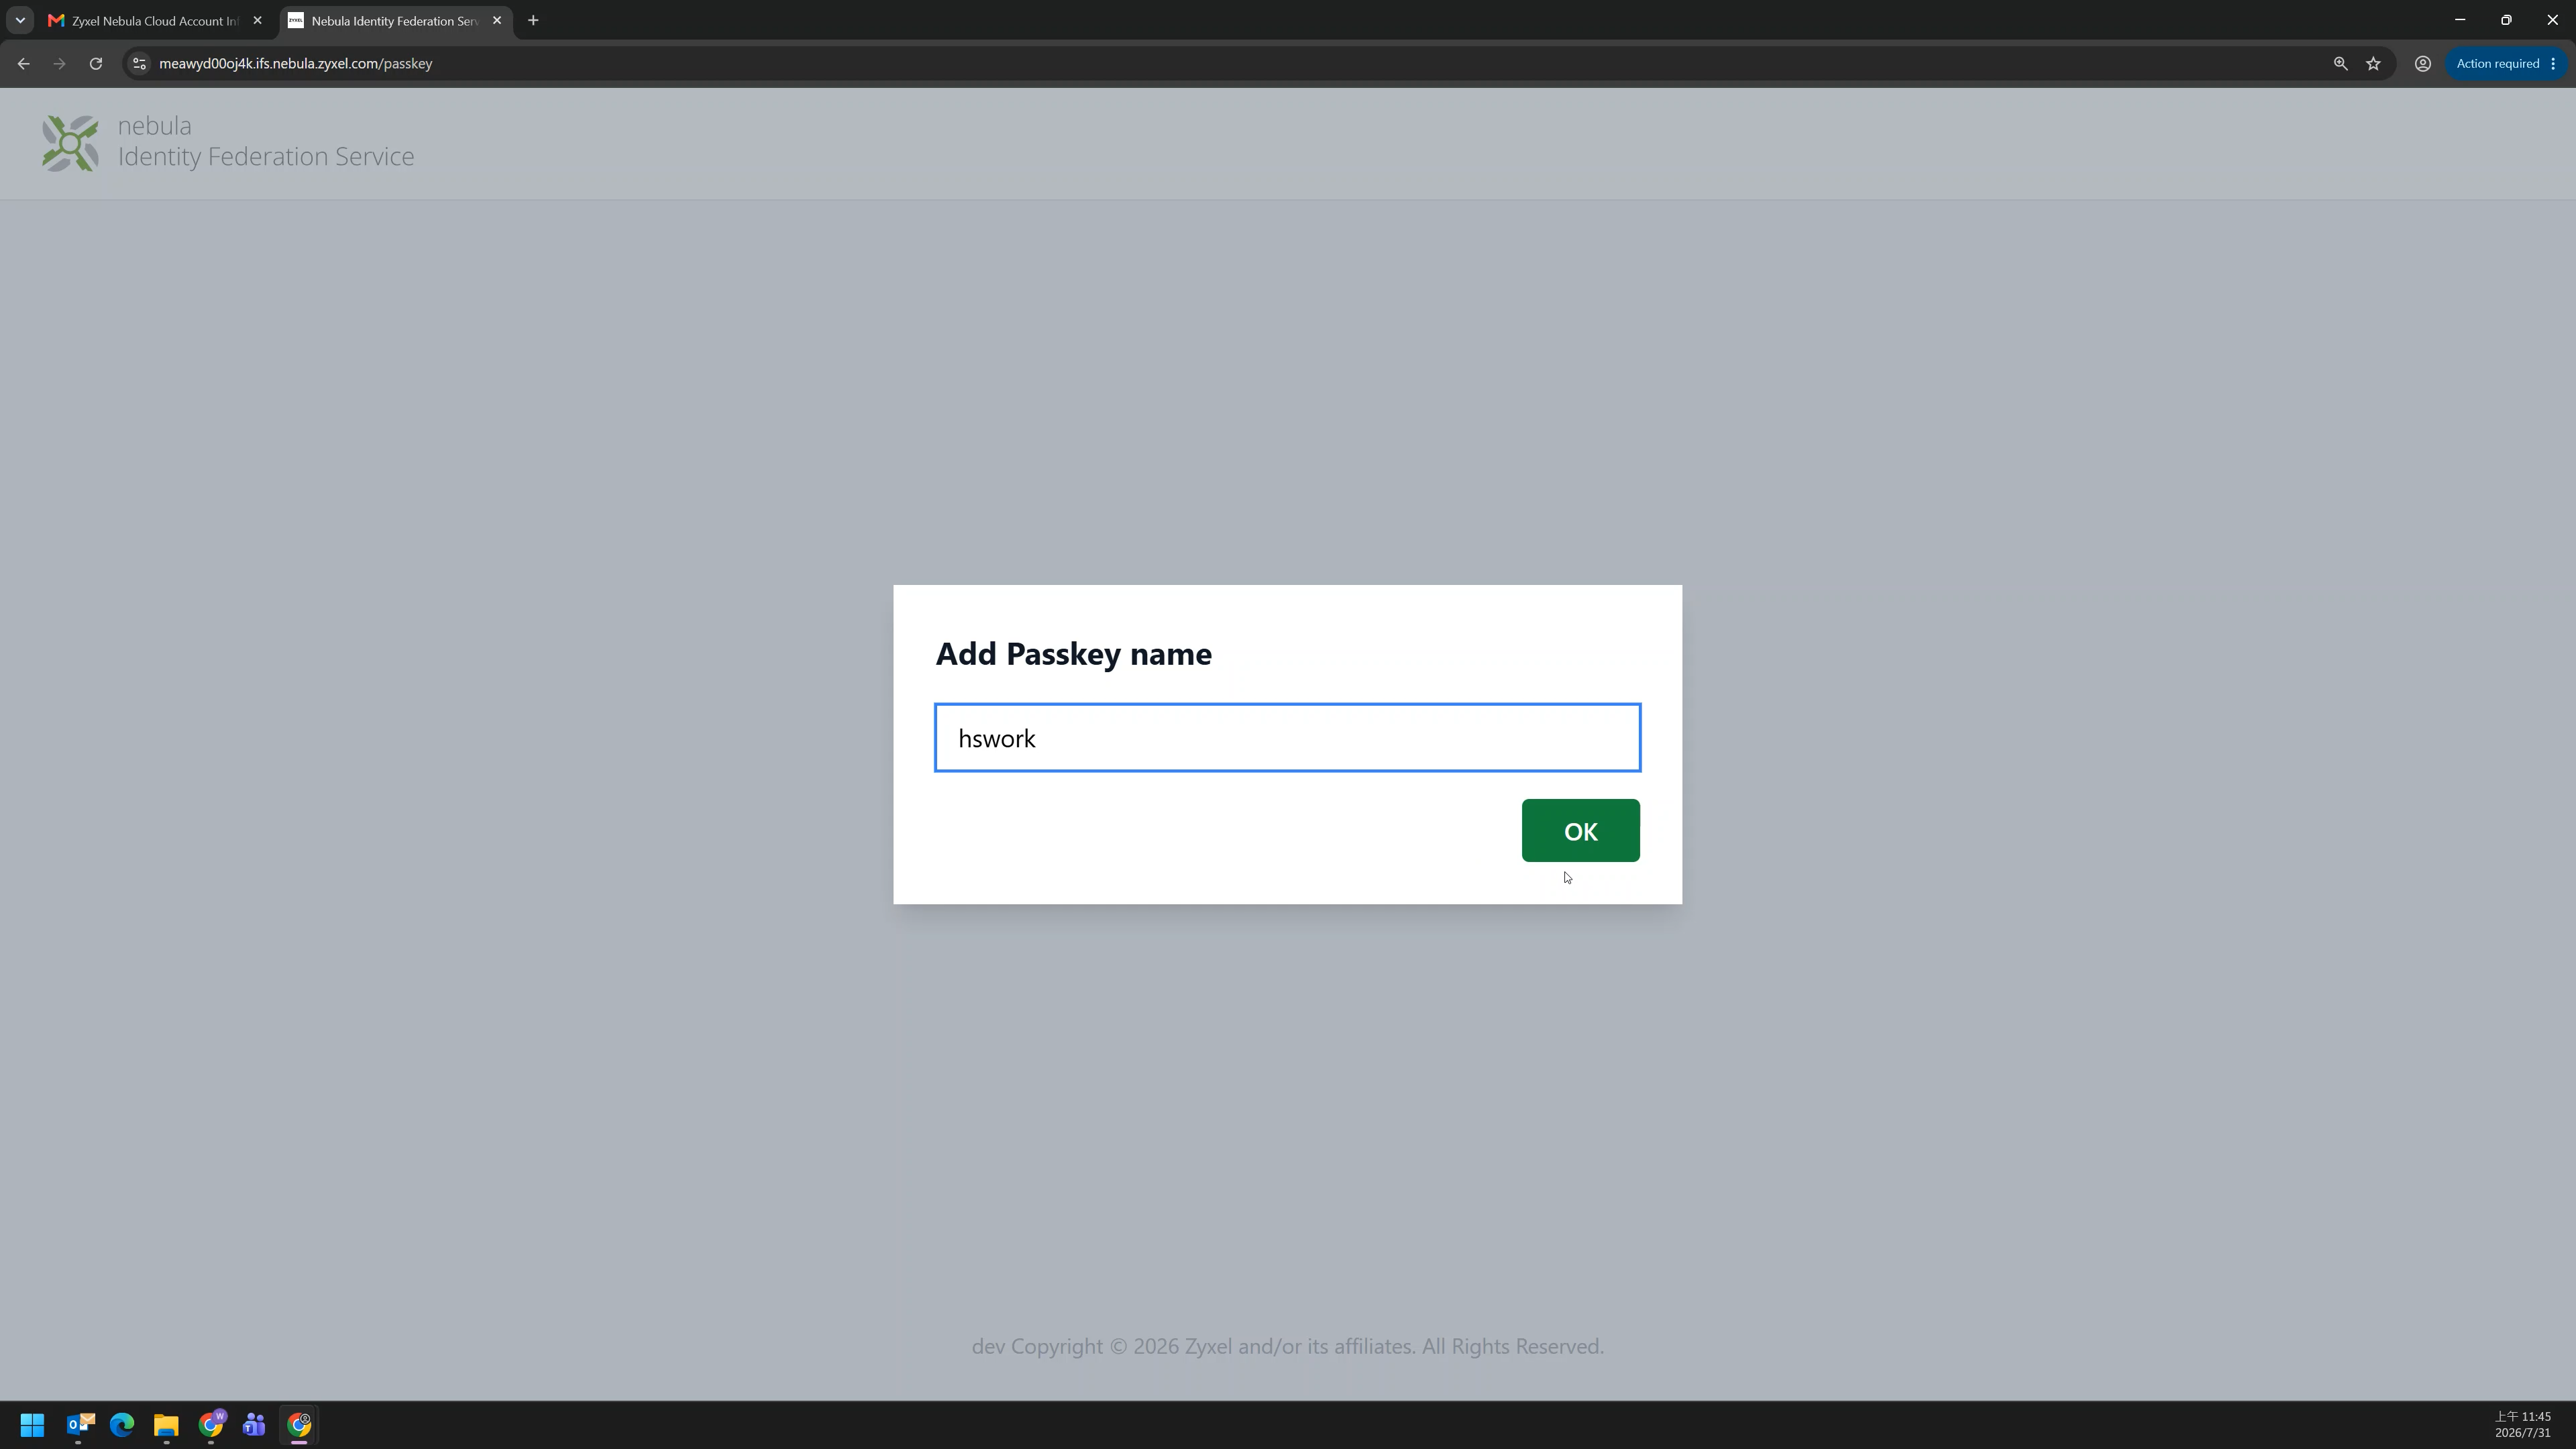
When prompted, give the passkey a recognizable name and confirm the registration.
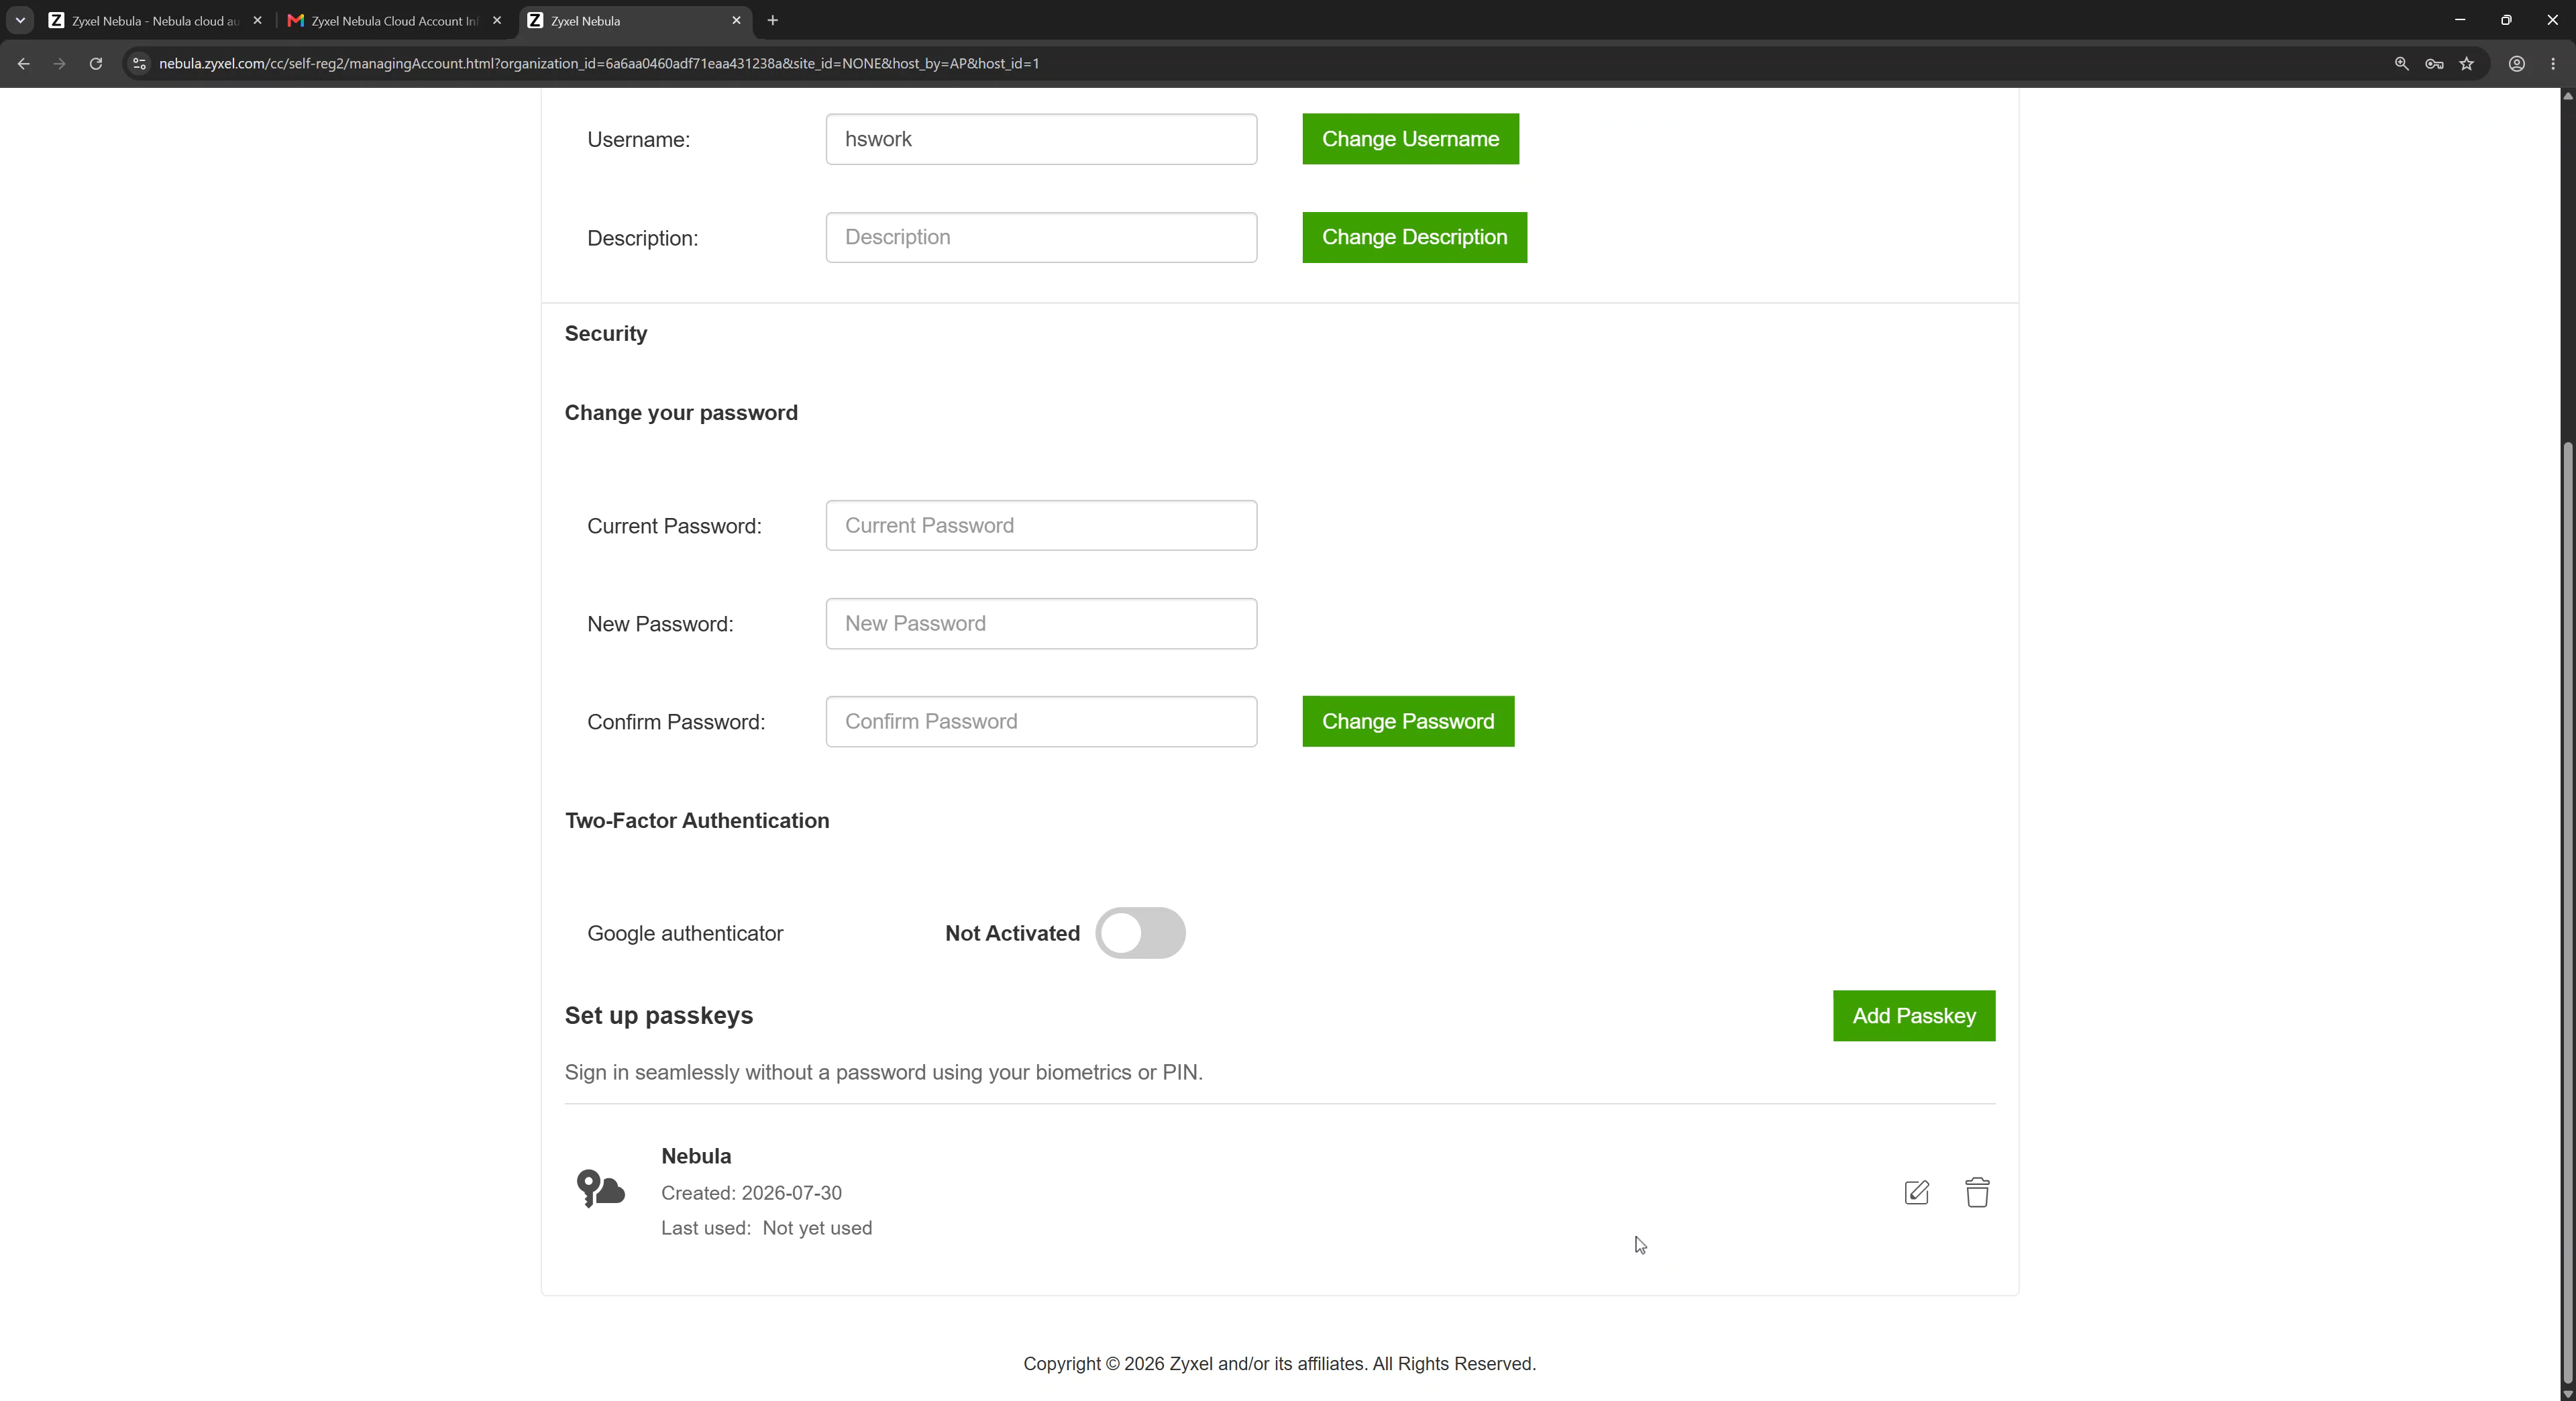
Verify that the passkey appears under Set up passkeys.
Step 7 - Sign in to the firewall captive portal with the NCAS passkey
- Connect the user's computer to the designated network by plugging in the Ethernet cable. The browser opens automatically and redirects the user to the Captive Portal.
- On the NID FS portal, select NCAS
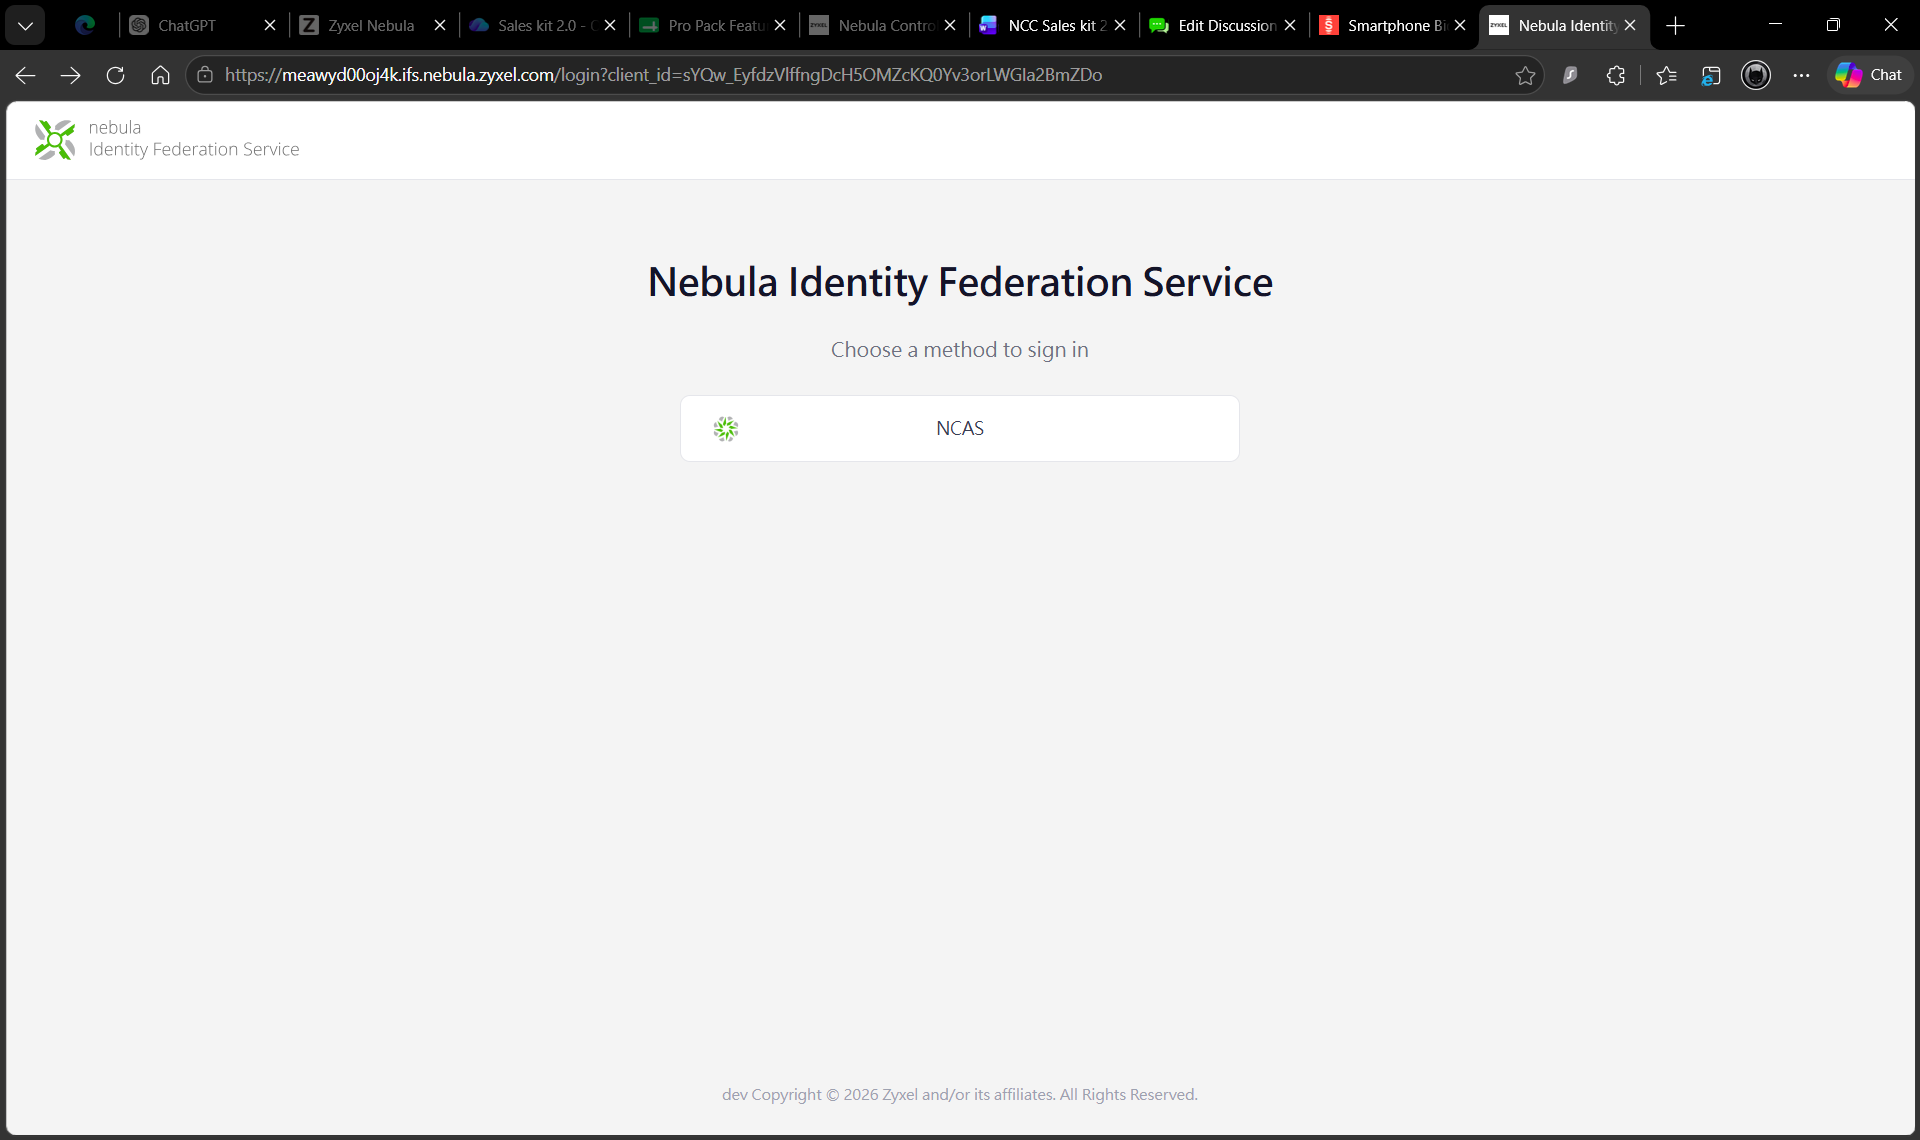
On the Nebula Cloud Authentication Service page, click Continue with Passkey.
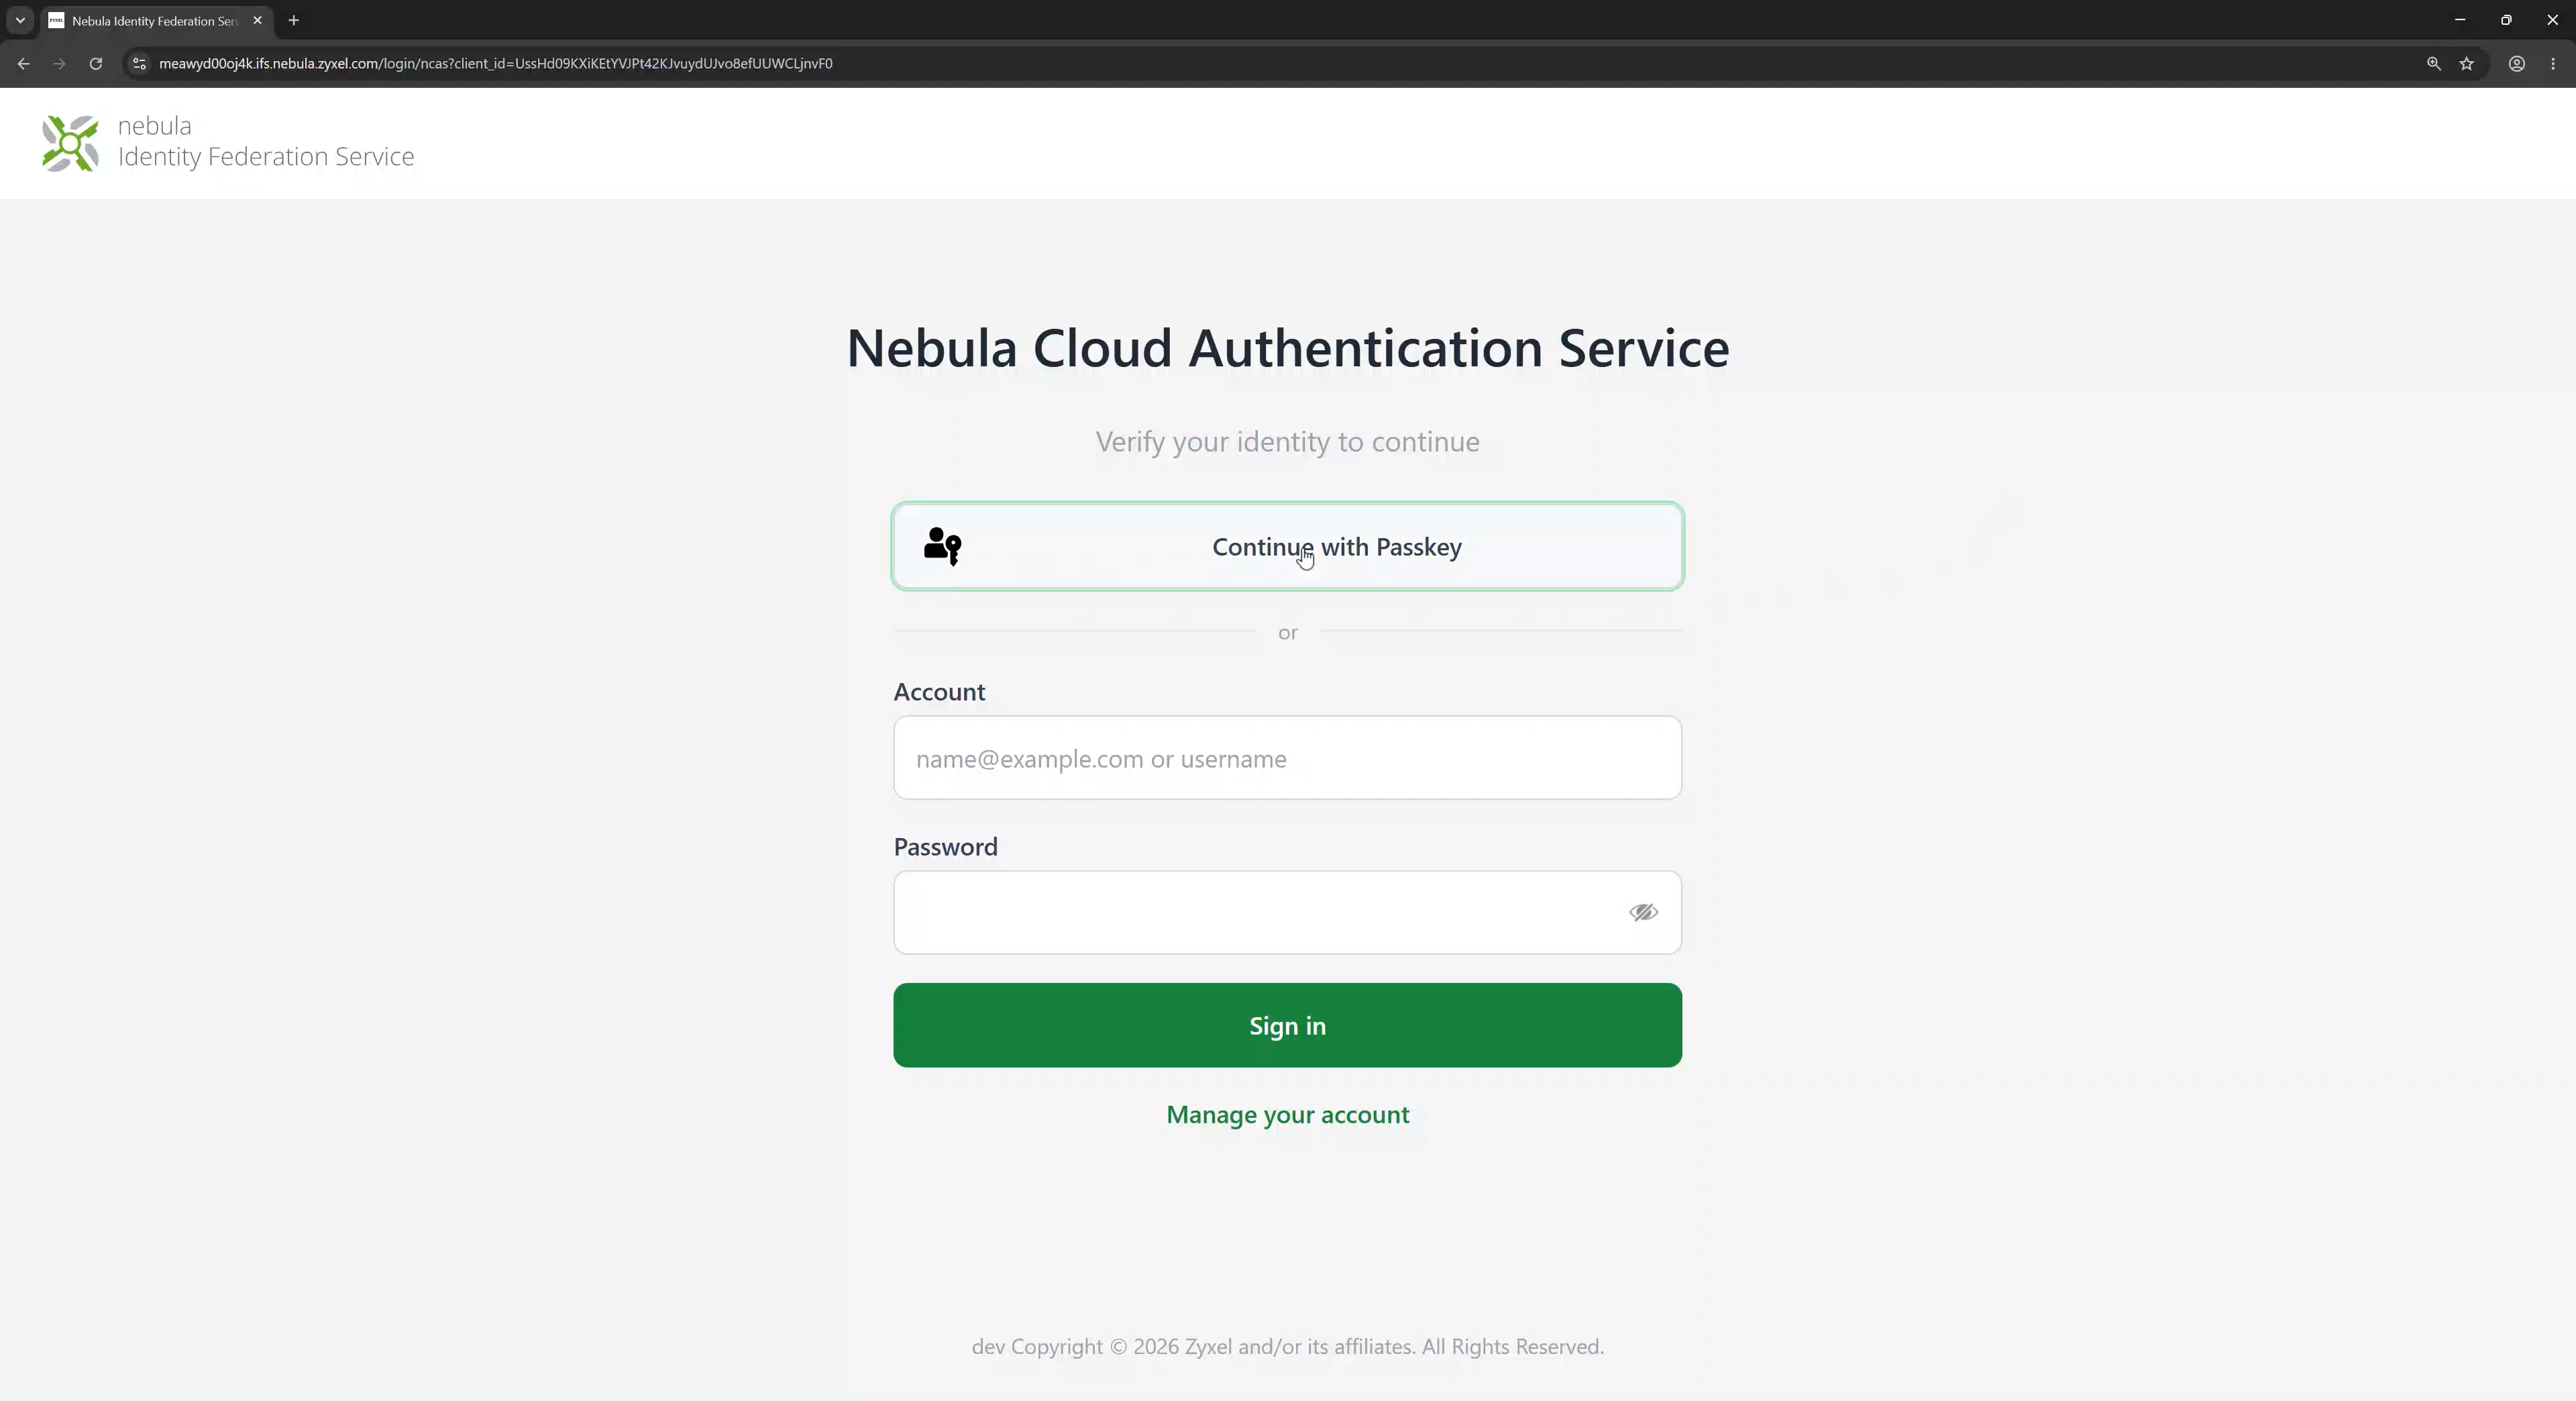
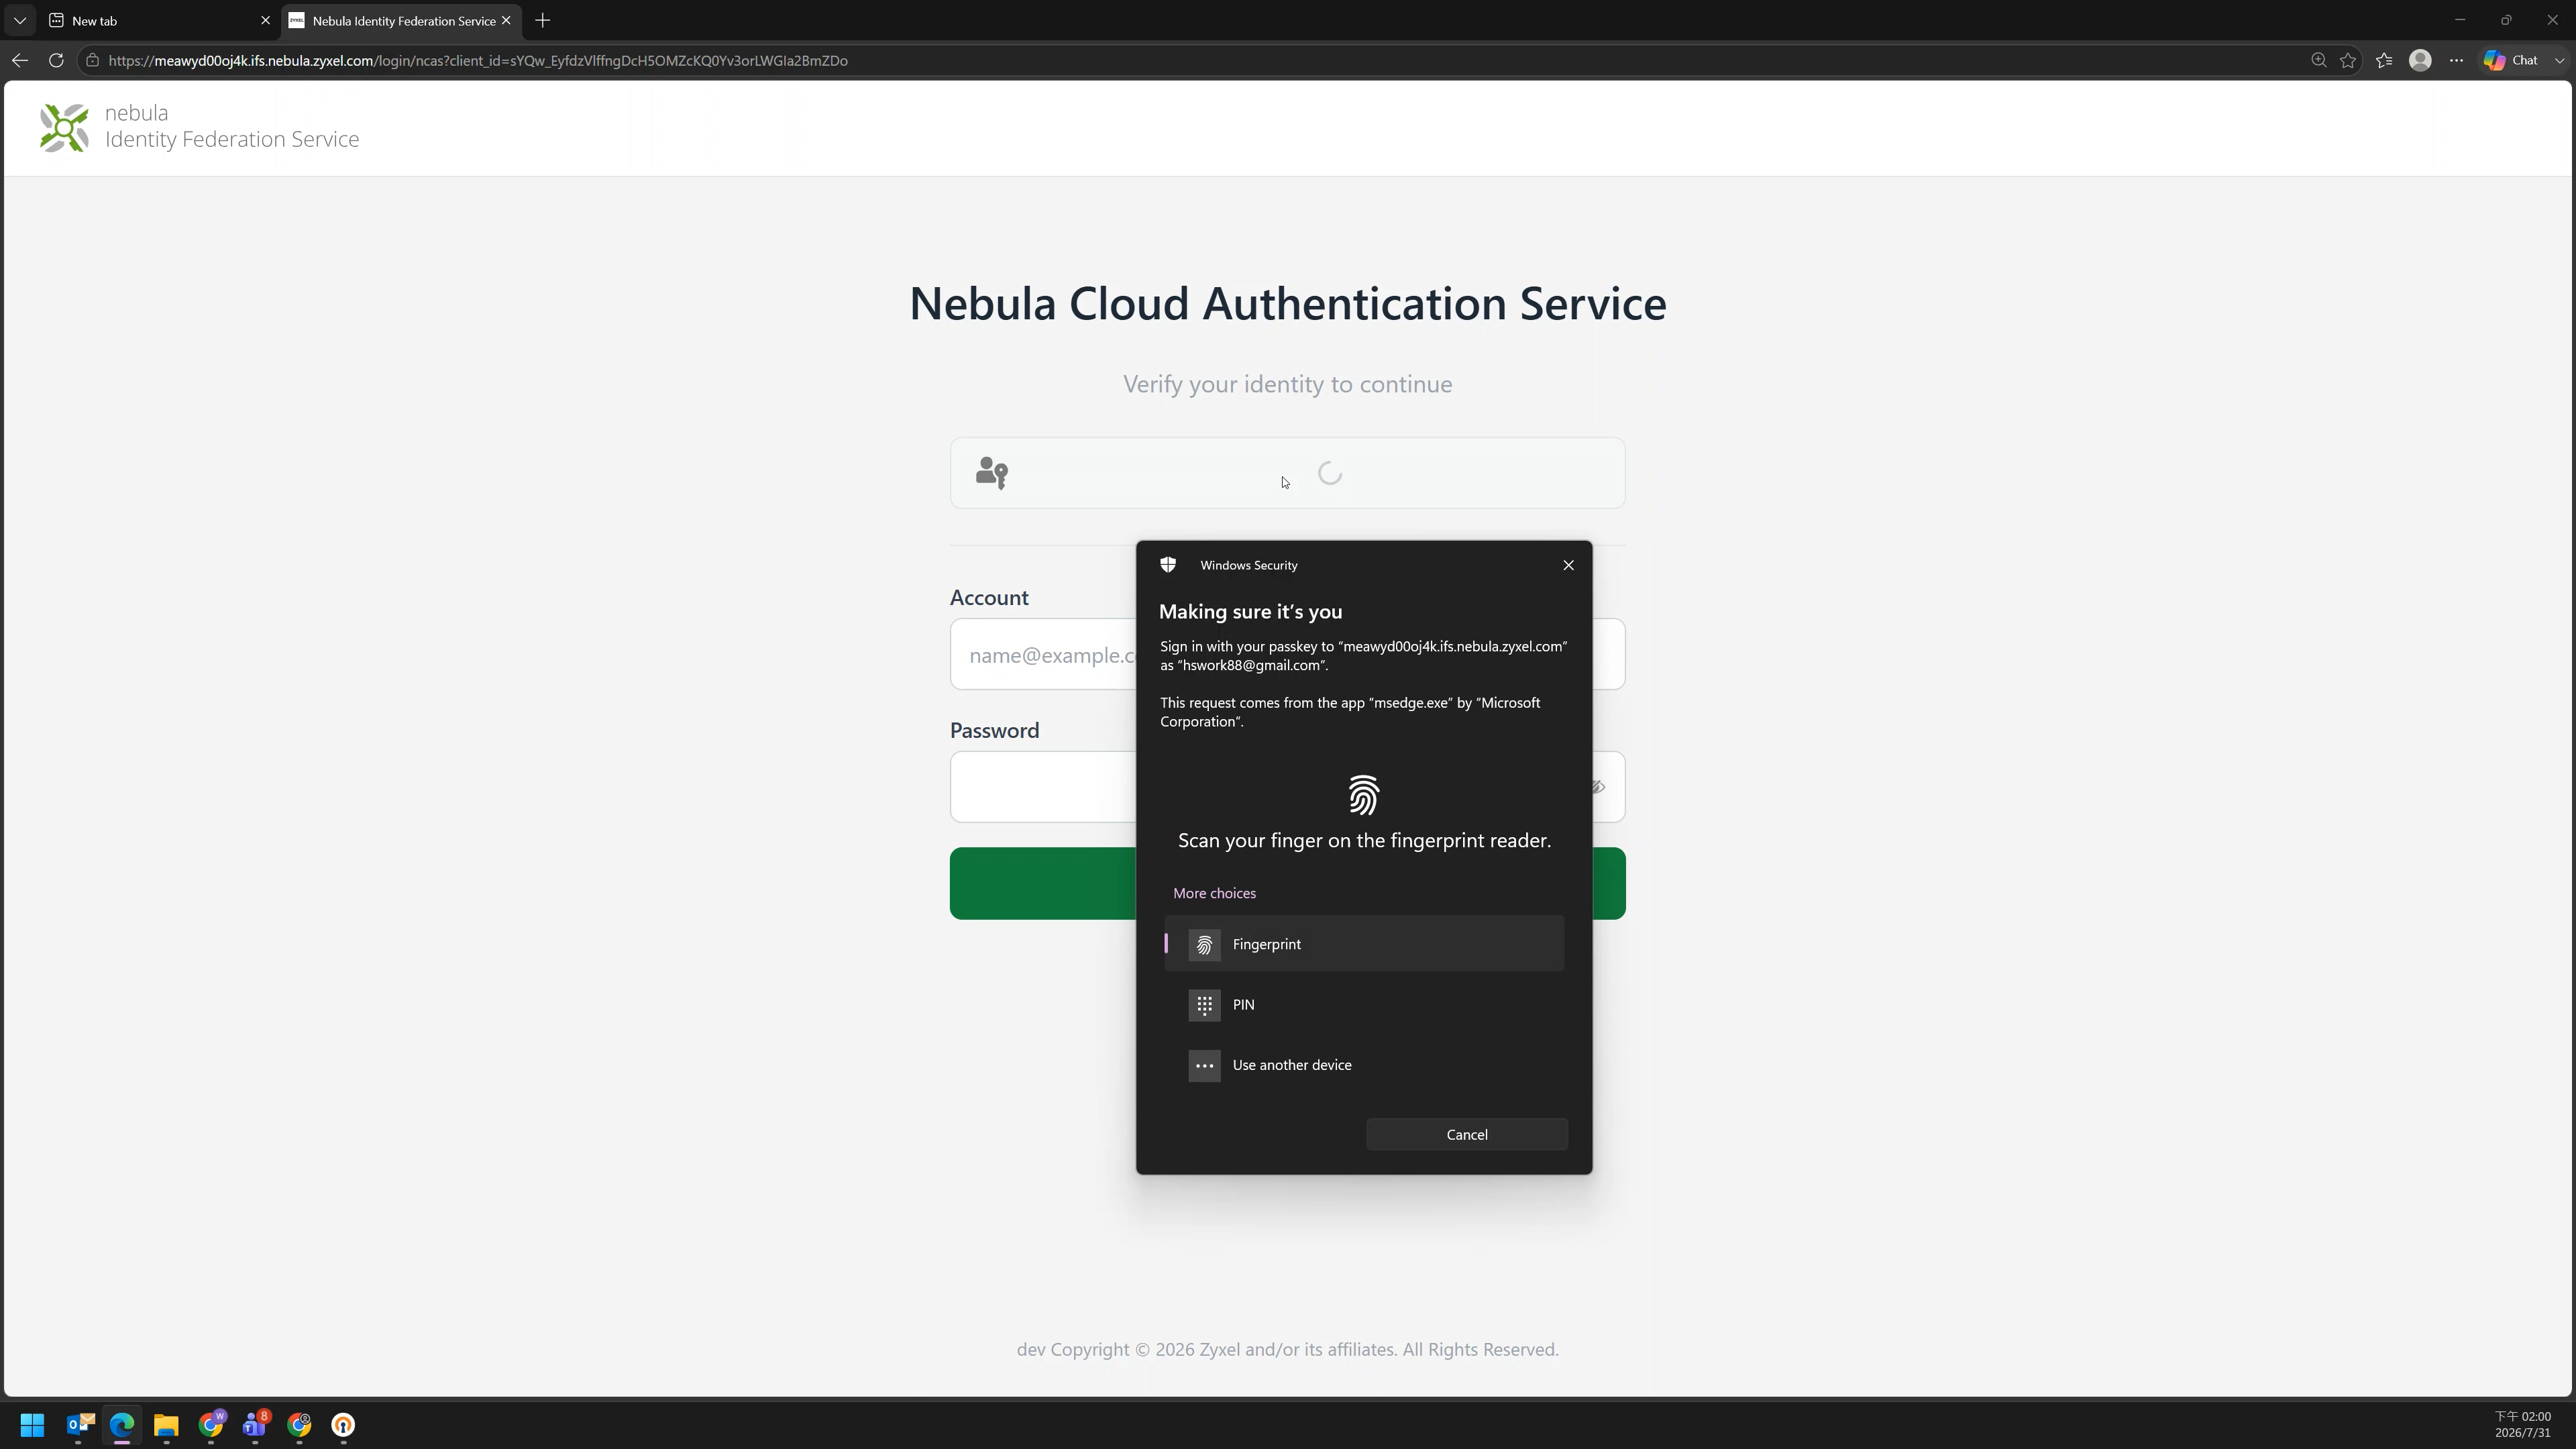
Approve the browser or operating-system passkey prompt.
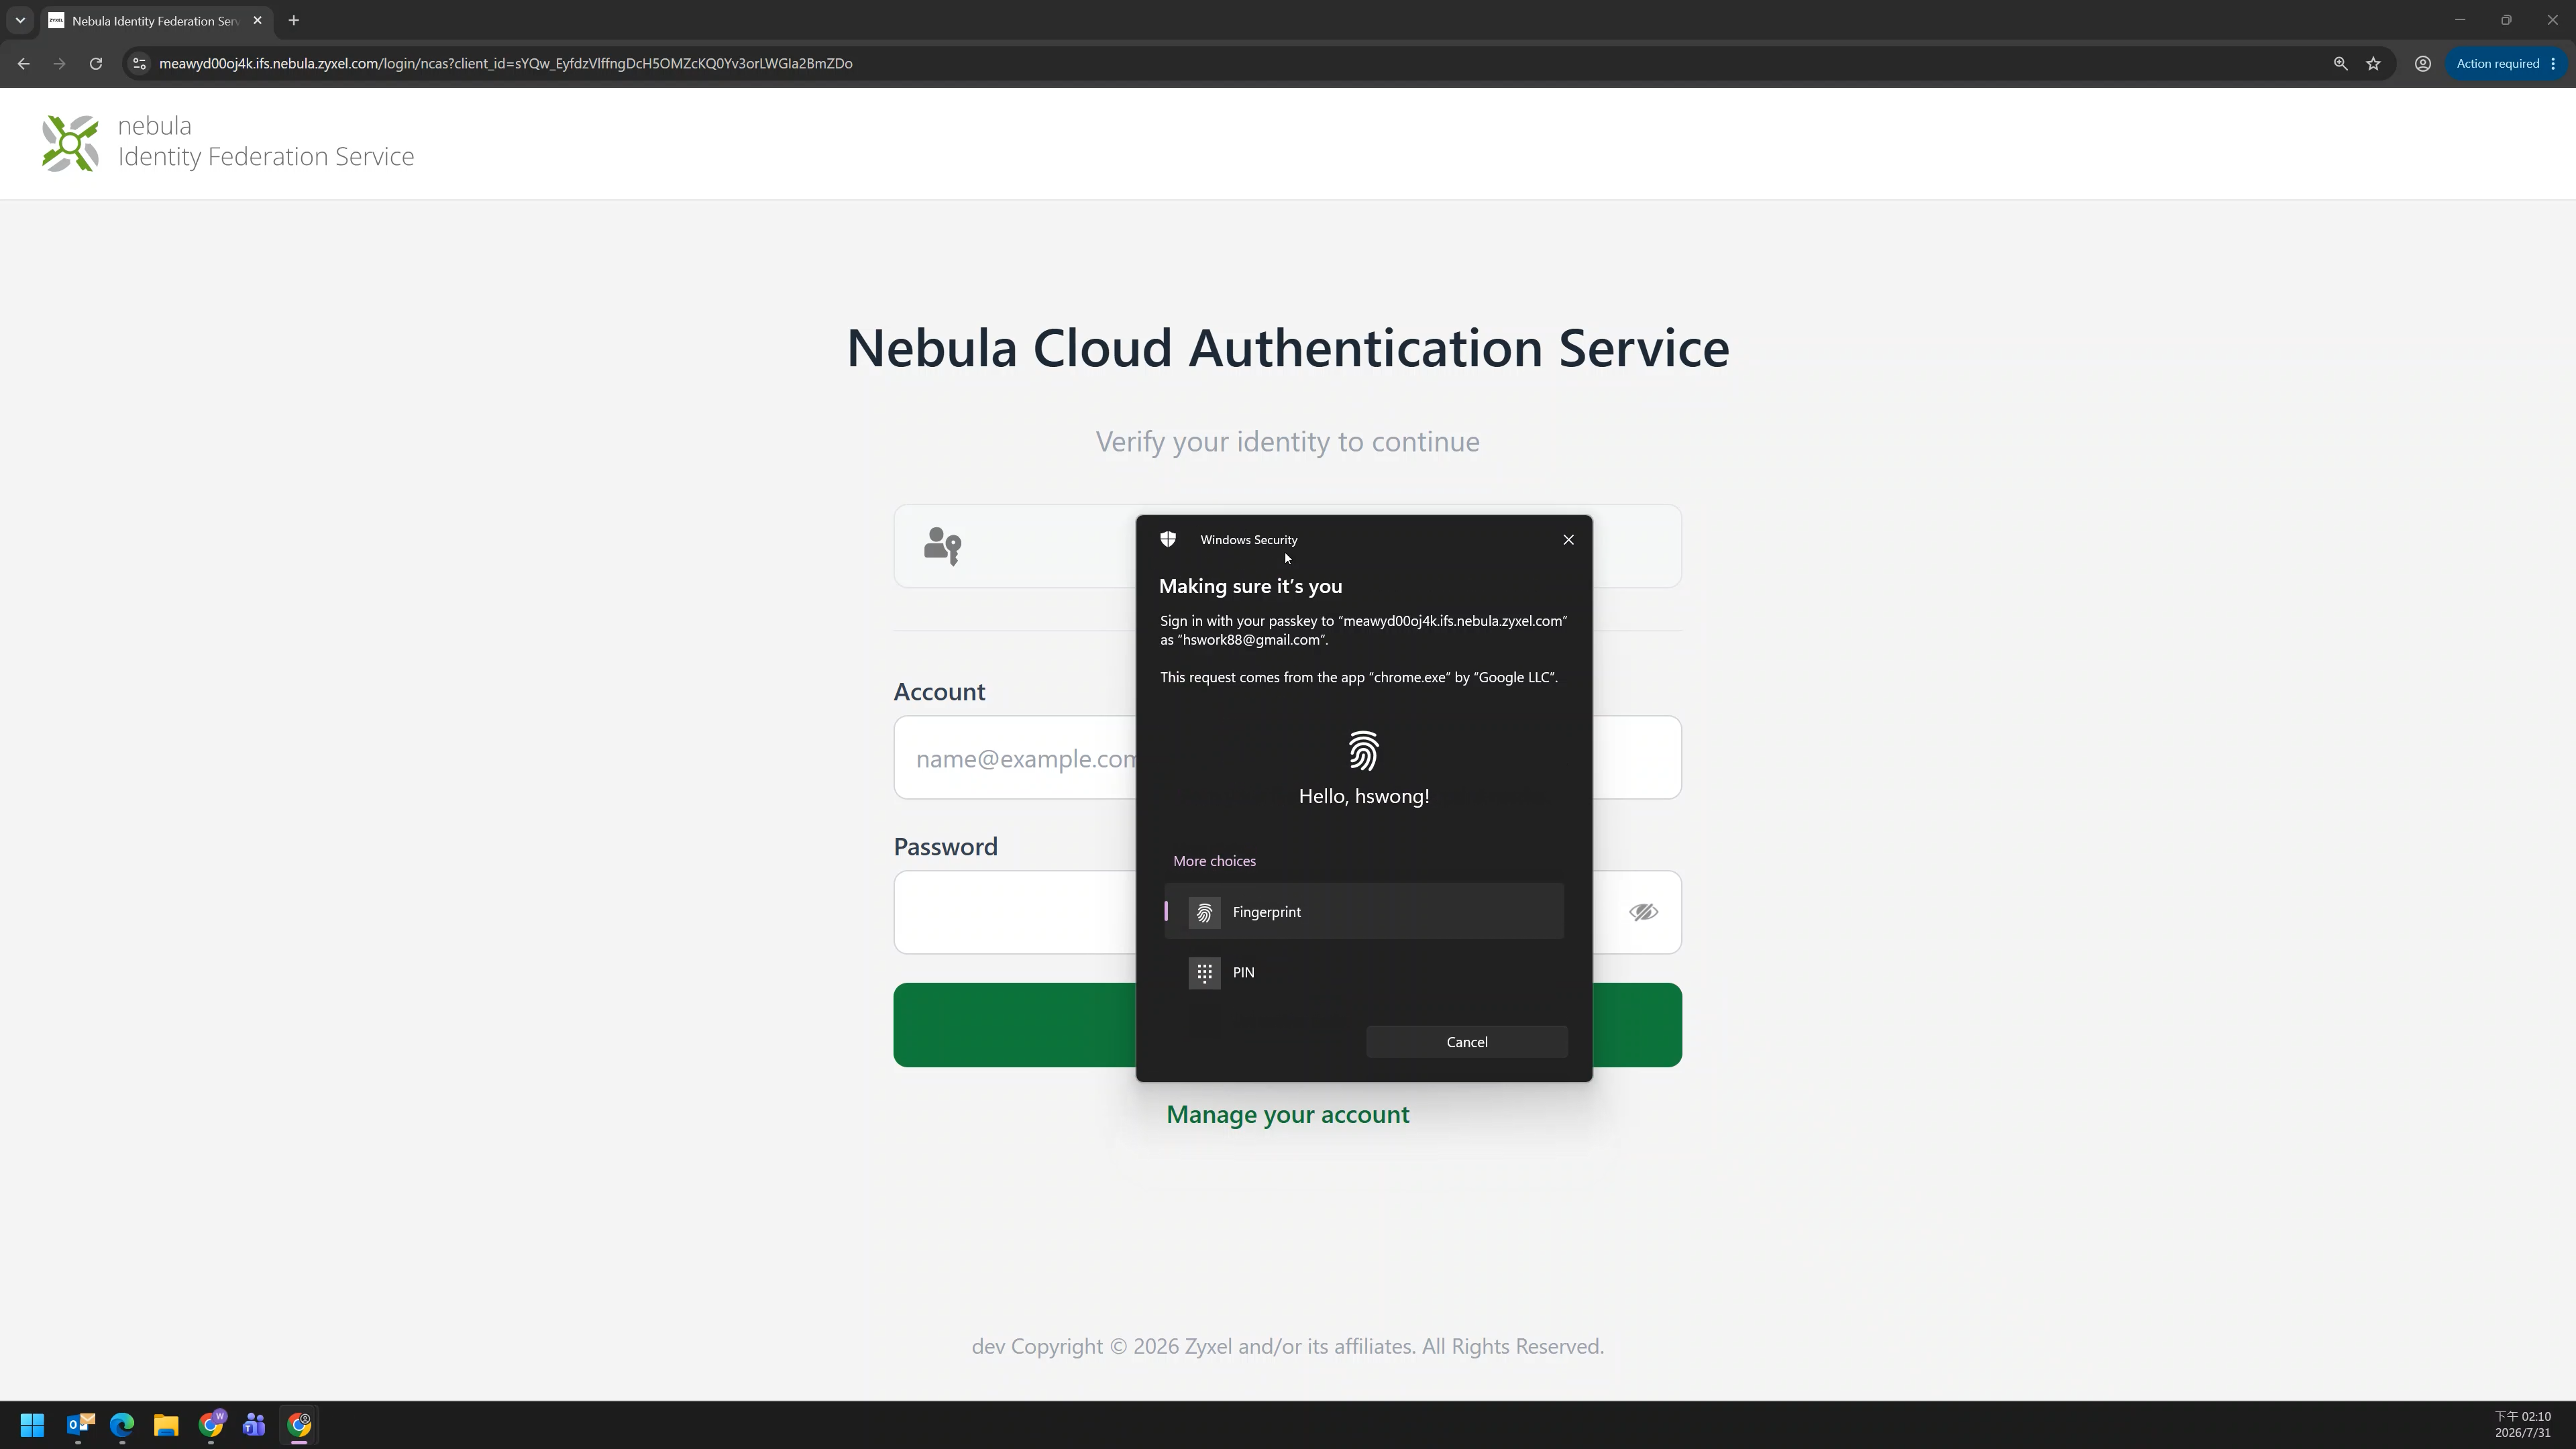
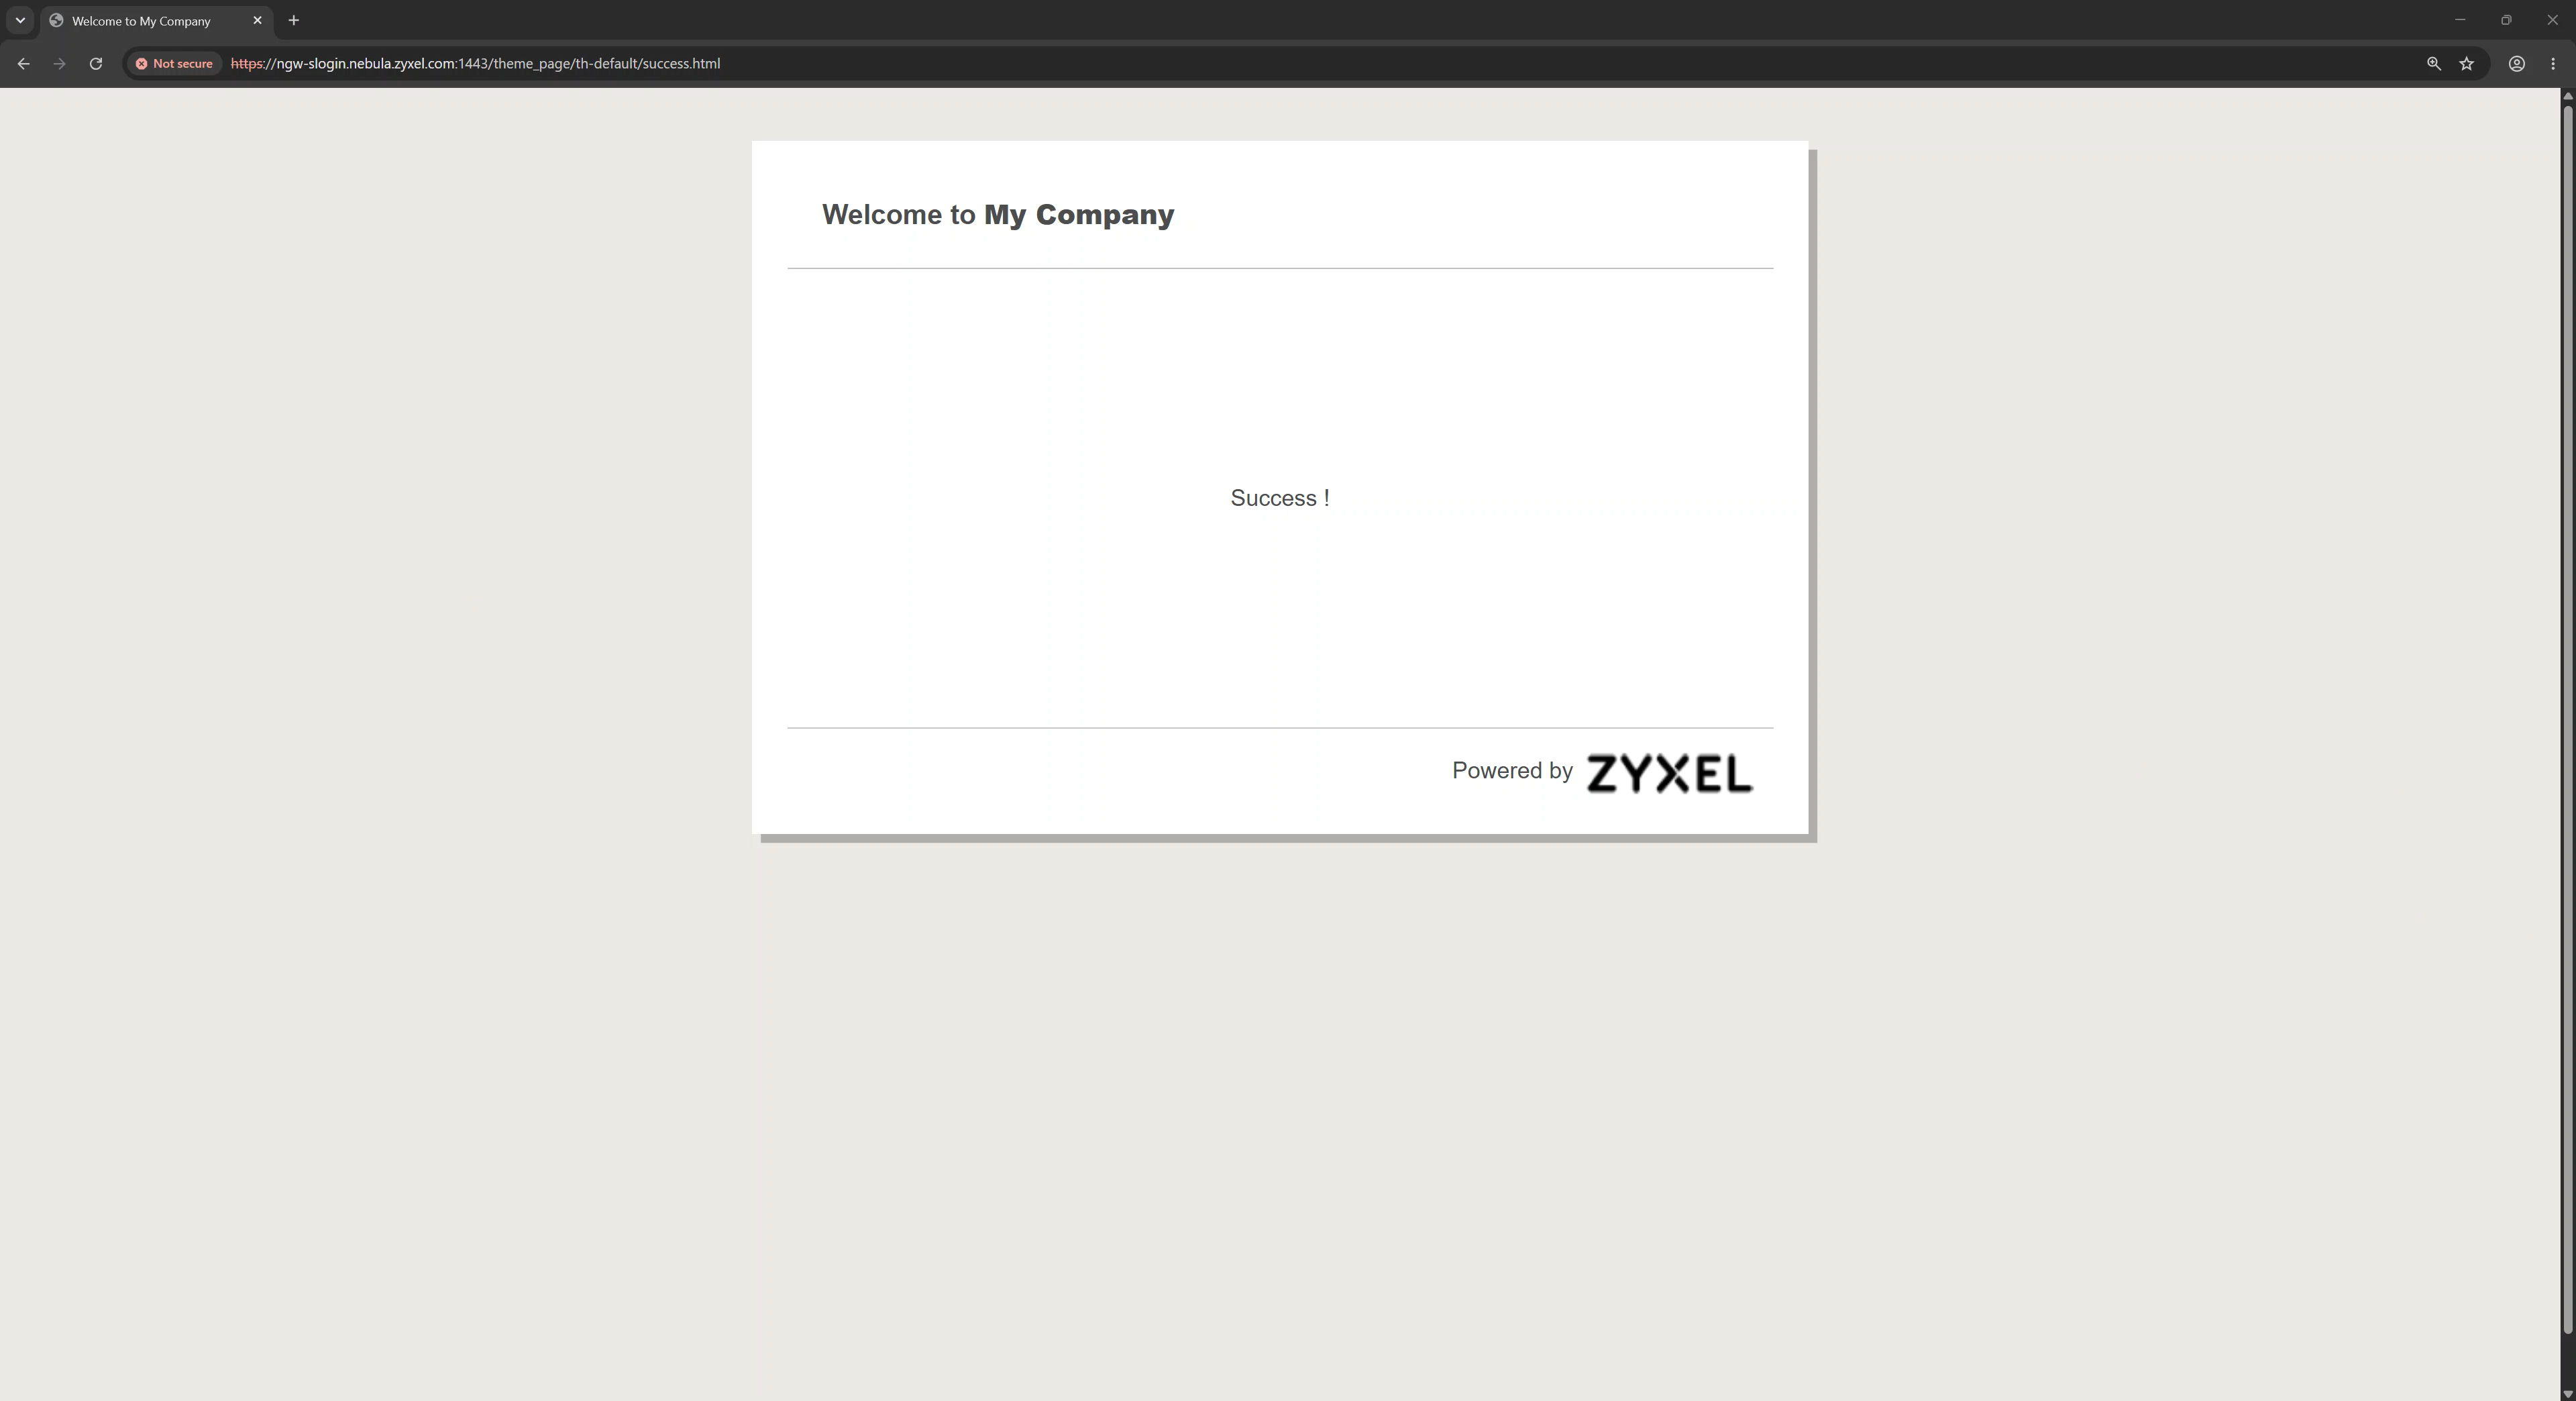
After successful verification, the firewall captive portal displays the success page and applies.
Step 8 - Sign in to SSL VPN with the NCAS passkey
Before you begin, install OpenVPN Connect and import the SSL VPN configuration file provided by your IT administrator.
Open OpenVPN Connect and click Connect.
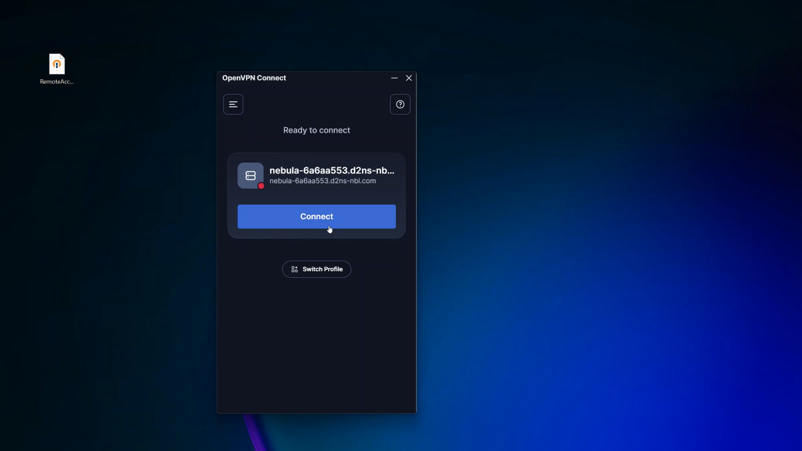
When Authentication required appears, continue in the system browser. If the browser does not open automatically, use the displayed URL or click Retry. On the Nebula Identity Federation Service portal, select NCAS.
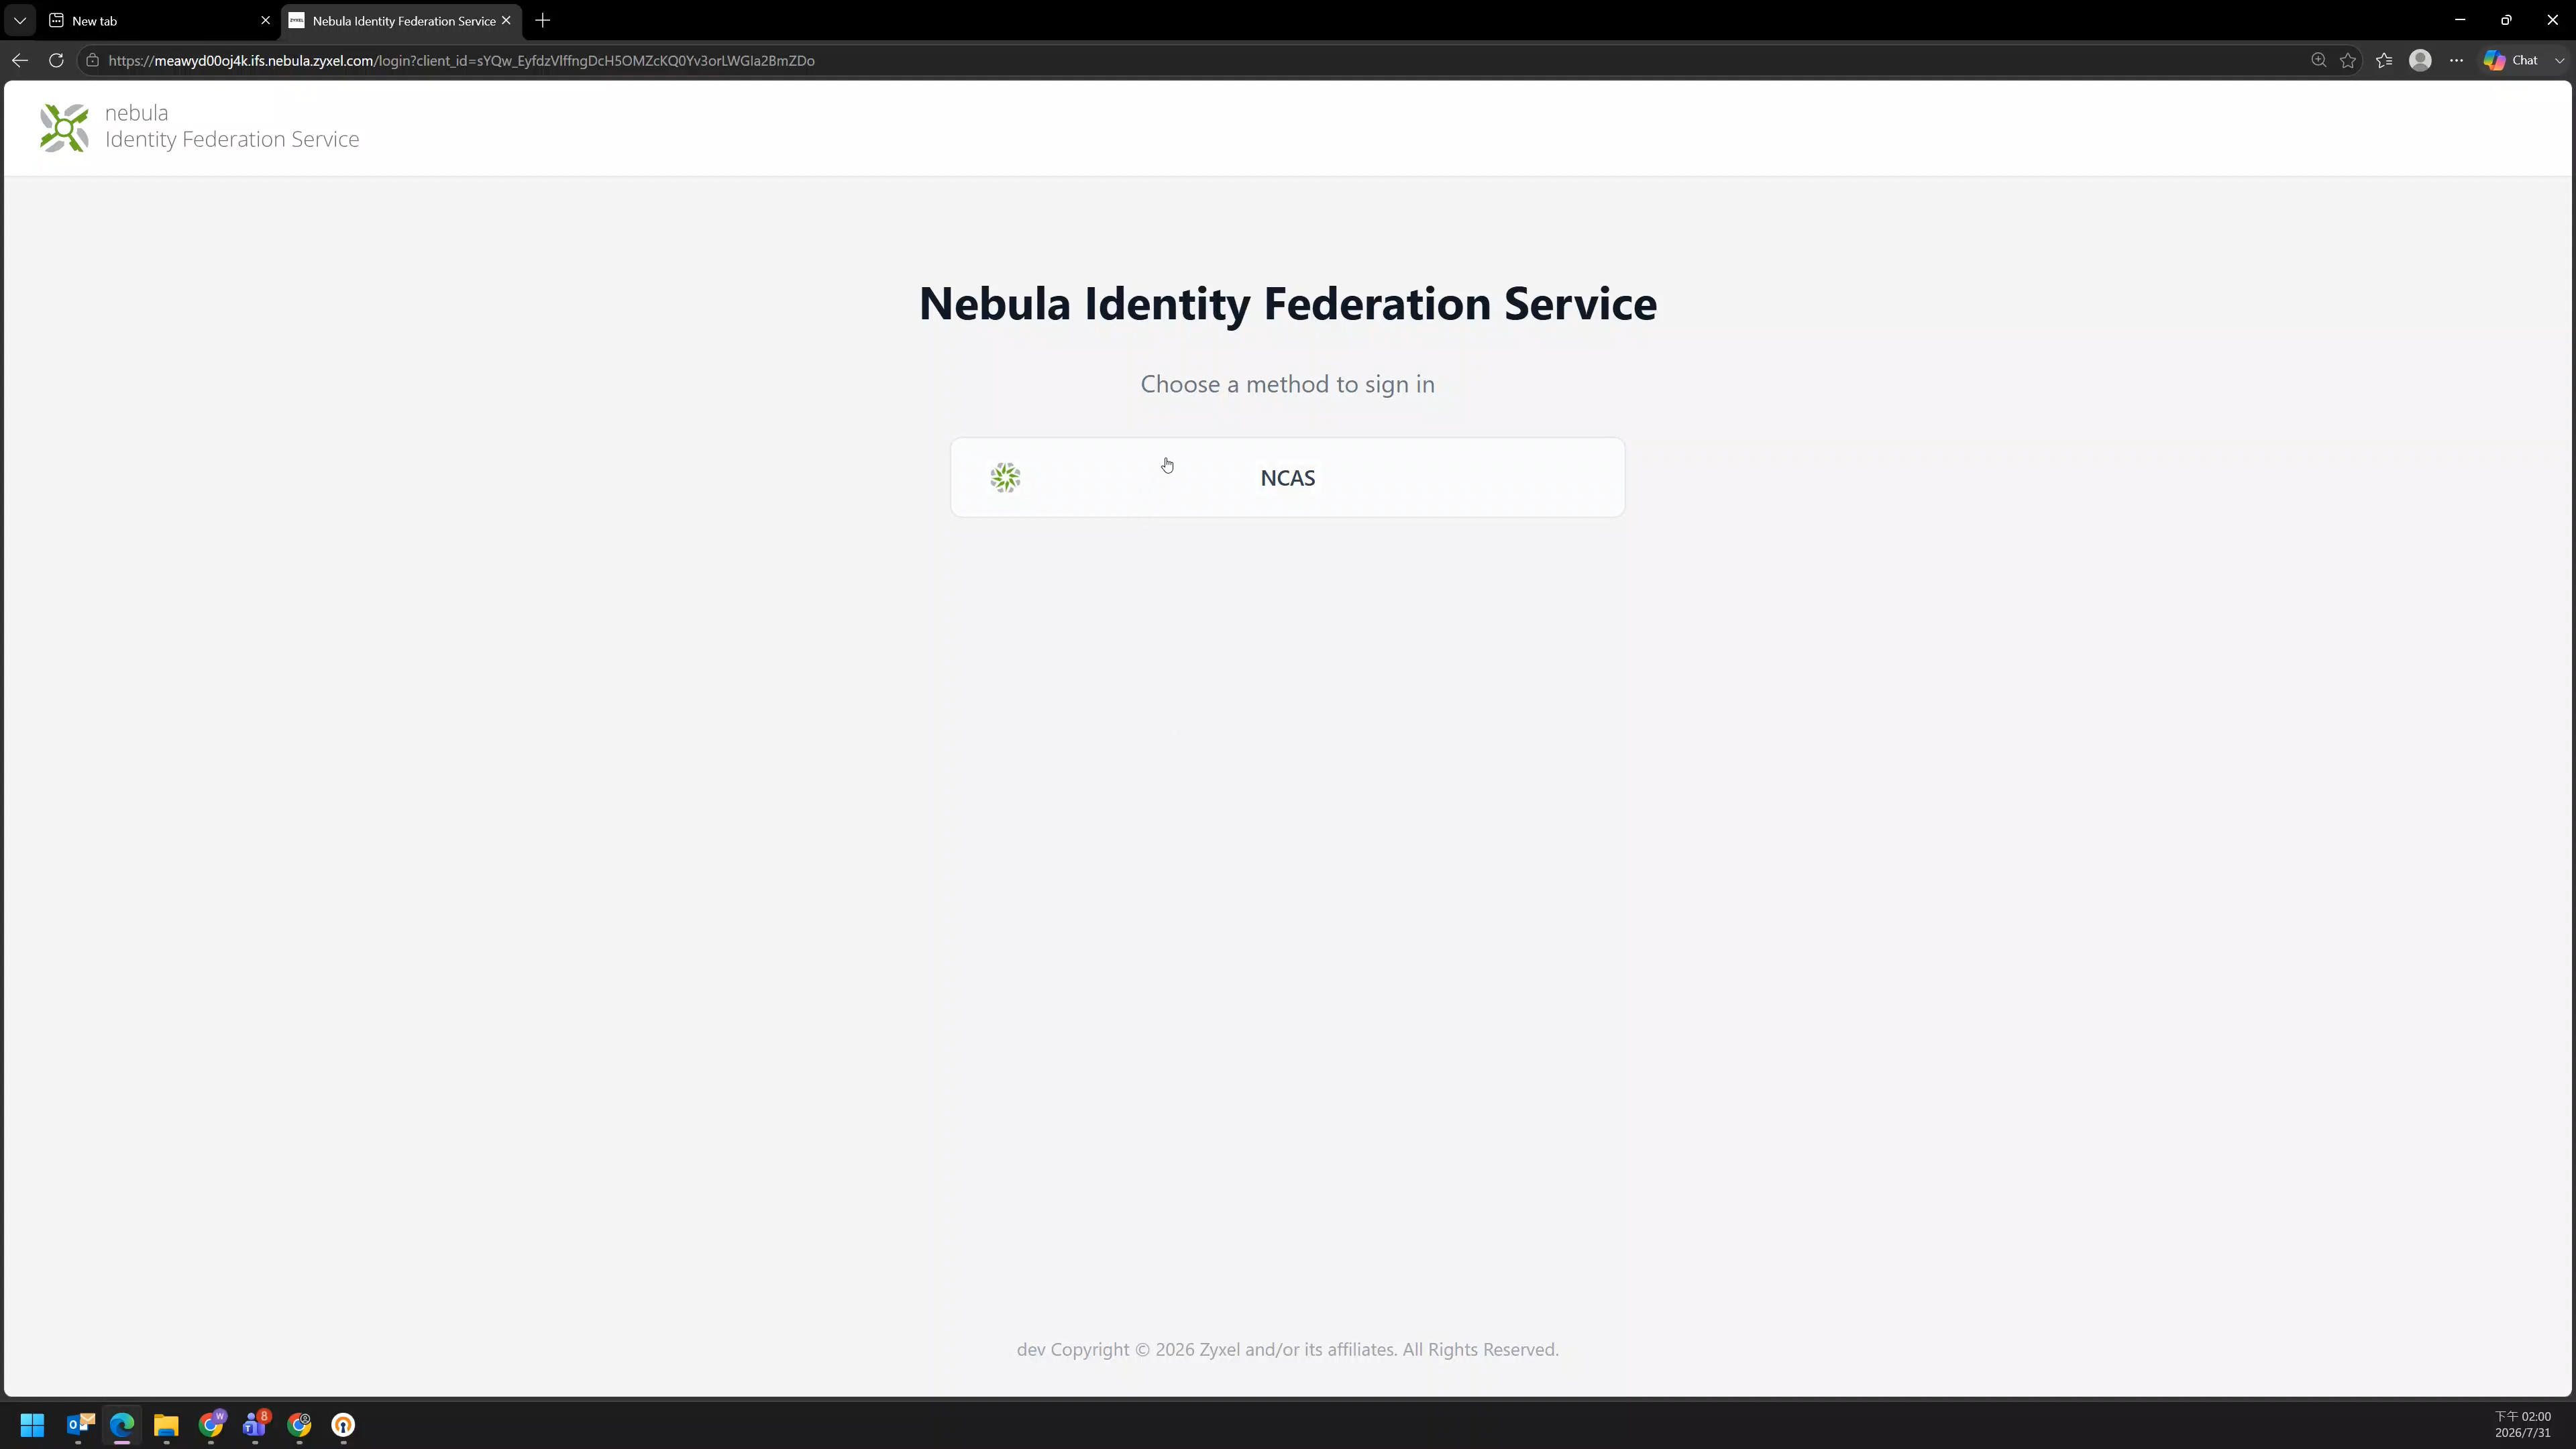
On the Nebula Cloud Authentication Service page, click Continue with Passkey.
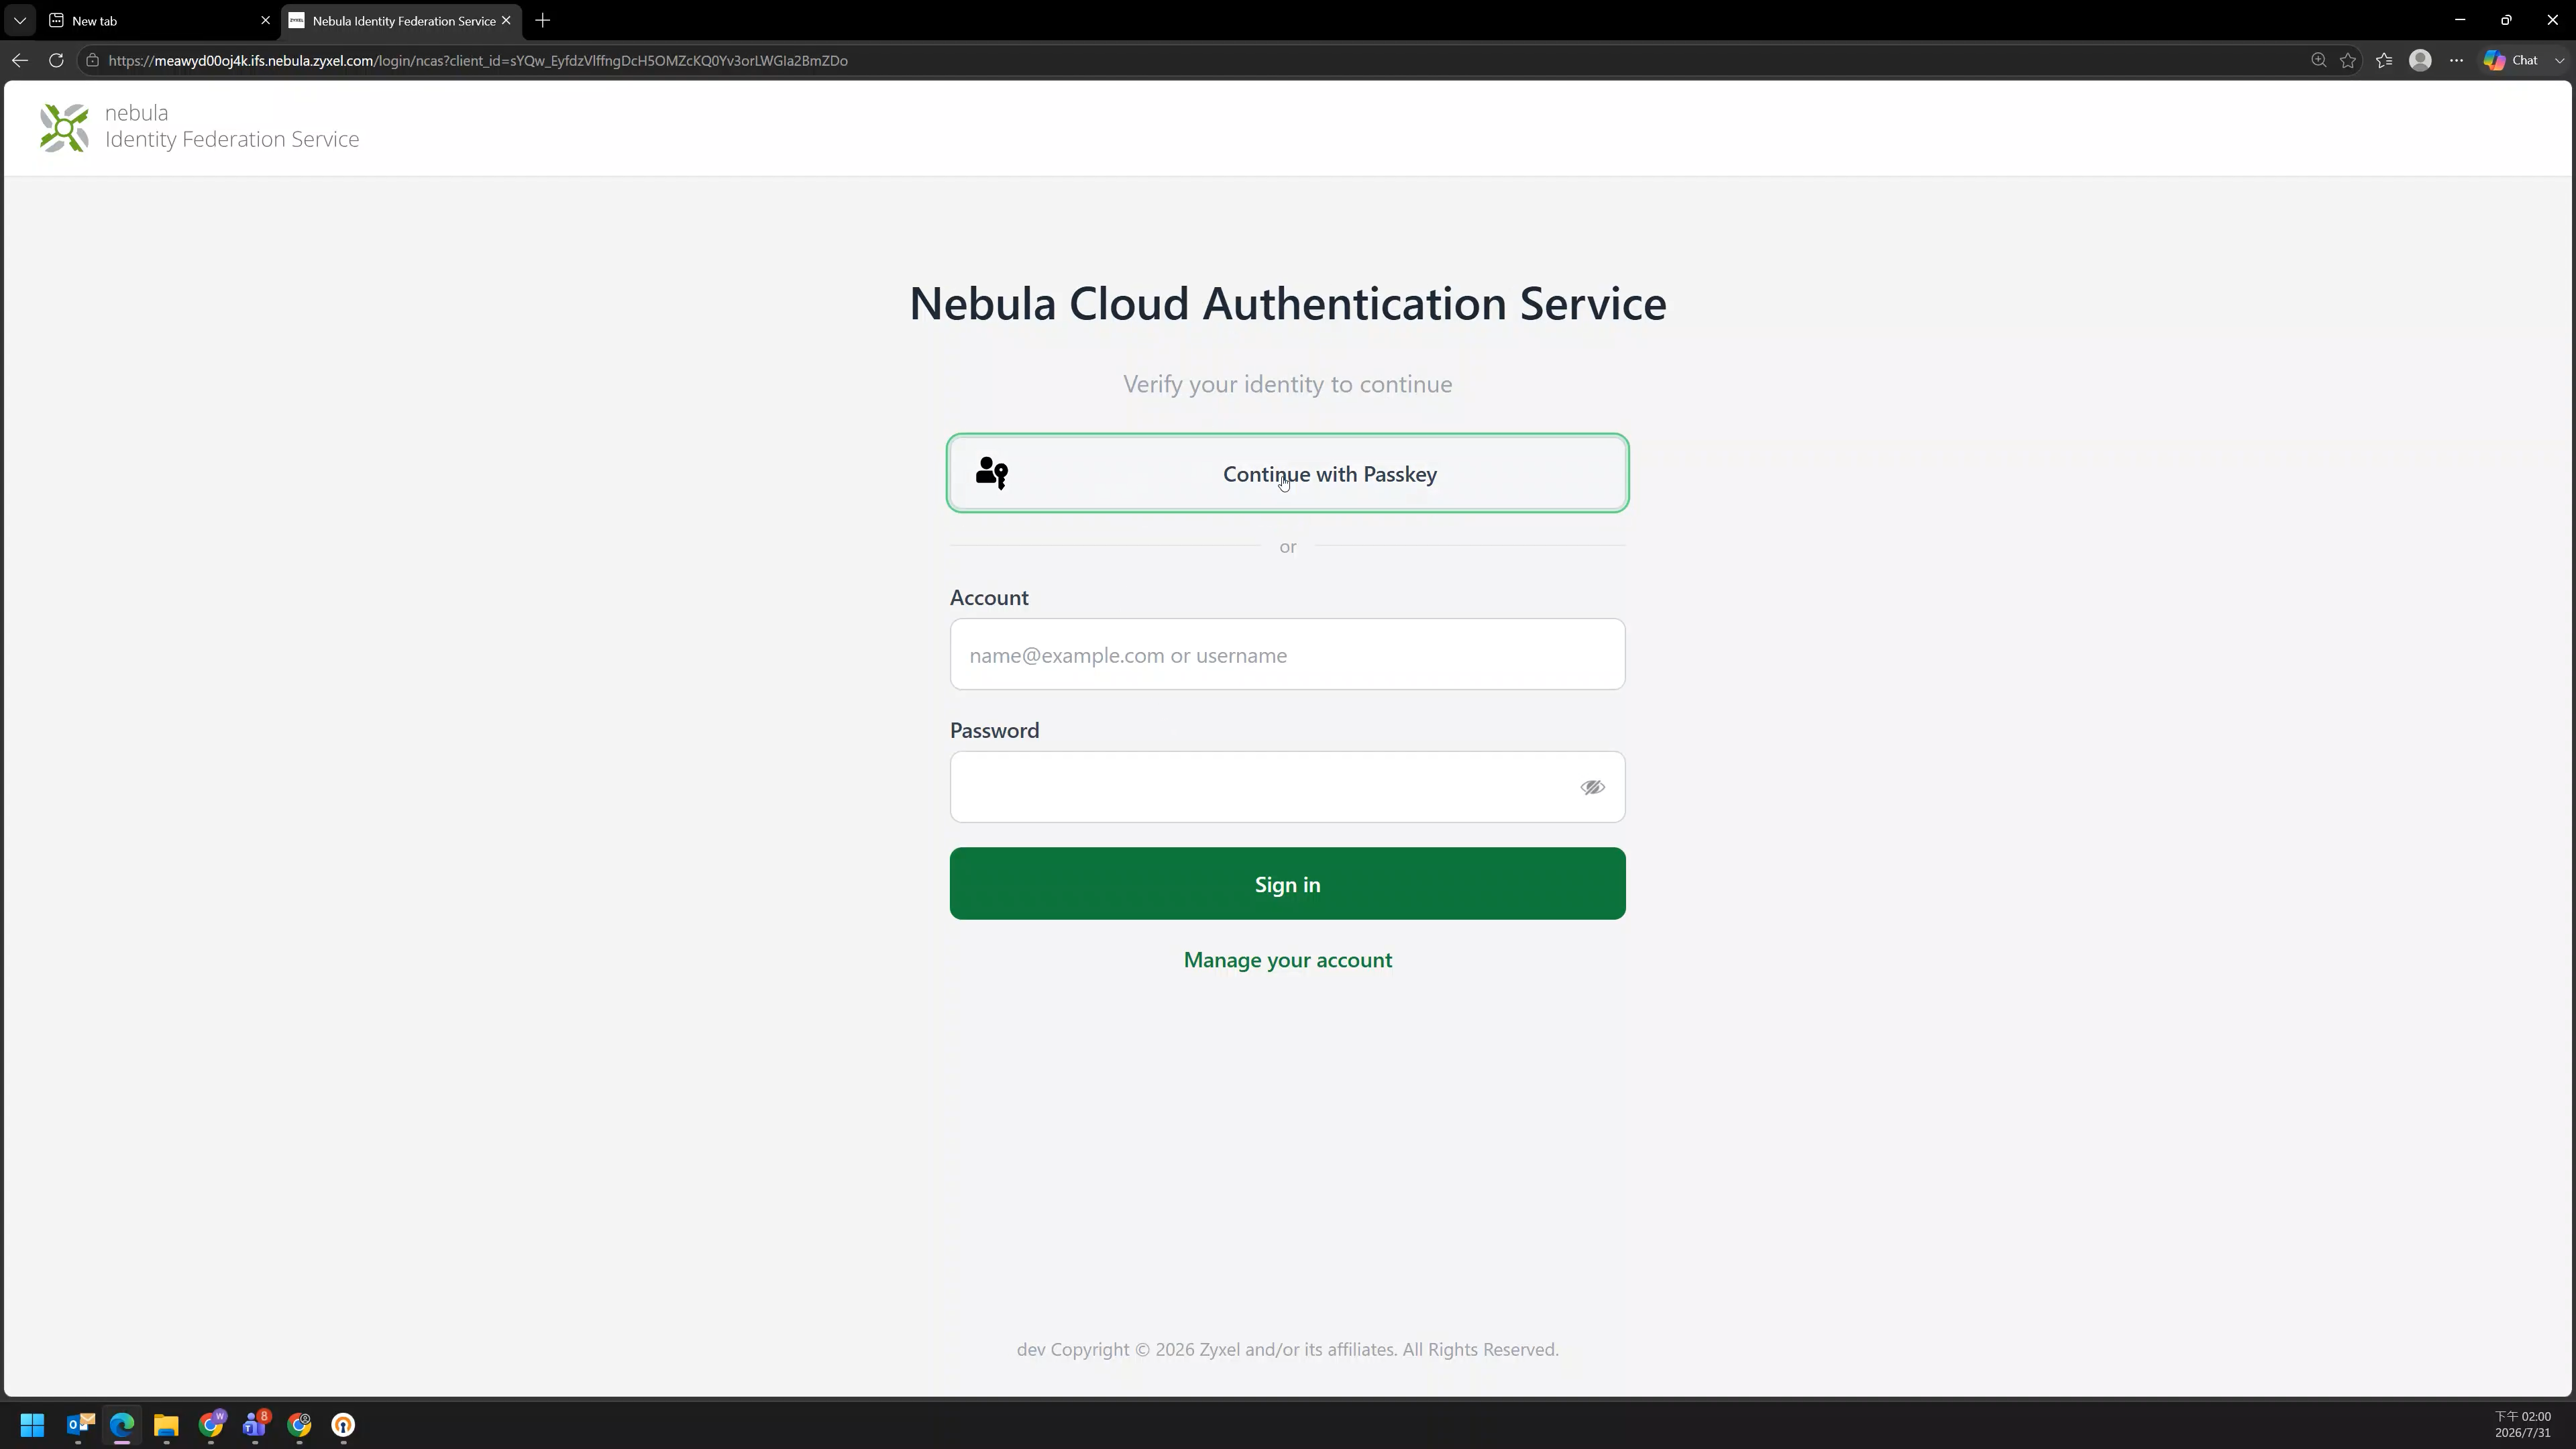
Approve the browser or operating-system passkey prompt.
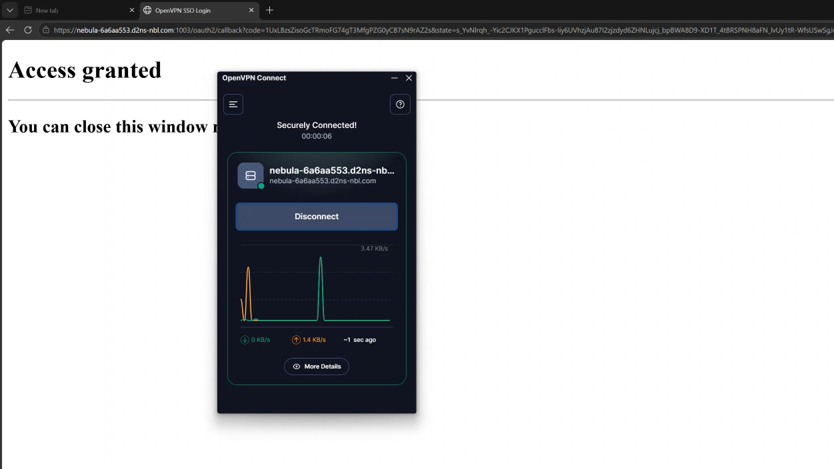
When the browser displays "Access granted," verify that OpenVPN Connect shows as connected.
✅Validation checklist
- NID FS is enabled, and NCAS appears on the Identity provider tab.
- The captive portal policy uses Nebula identity federation service as its sign-on method.
- SSL VPN Server is enabled, and its Sign-on with field is set to Nebula identity federation service.
- The user privilege policy includes the intended captive portal policy and Remote Access VPN service.
- The NCAS user is authorized for the correct site
- The passkey is listed in the user's NCAS account and can be used to complete the browser or device verification prompt.
- The captive portal flow reaches the success page after passkey authentication.
- The VPN client reaches Connected after browser-based passkey authentication.
🗨️We’d Love Your Feedback
Try it out and let us know how it goes. Share your questions, feedback, or suggestions in the comments below.
Categories
- All Categories
- 442 Beta Program
- 3.1K Nebula
- 243 Nebula Ideas
- 6.8K Security
- 782 USG FLEX H Series
- 388 Security Ideas
- 1.8K Switch
- 87 Switch Ideas
- 1.5K Wireless
- 58 Wireless Ideas
- 7.2K Consumer Product
- 324 Service & License
- 527 News and Release
- 101 Security Advisories
- 31 Education Center
- 10 [Campaign] Zyxel Network Detective
- 5.3K FAQ
- 34 Documents
- 91 About Community
- 121 Security Highlight