Streamlining process for purchasing licenses and upgrading your Nebula organization in NCC

 Zyxel Employee


In Nebula P12, we’ve made a significant improvement to the license purchasing progress; users now are able to use the calculator to estimate how many licenses he/she needs and exports the purchasing list. Also, Nebula Control Center (NCC) are linked to Zyxel’s online store – Marketplace now, users are able to buy the licenses directly online.
In this article we’ll show you how to purchase and assign the licenses to the devices, then upgrade the organization status from Base Pack to the Professional or Plus Pack.
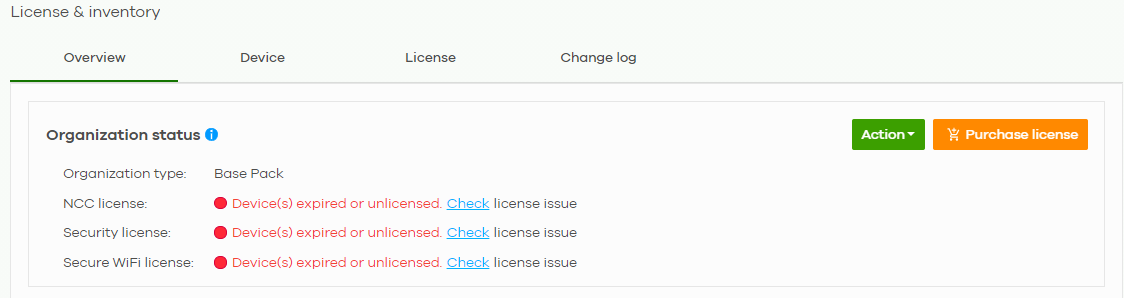
This article will guide you on how to purchase the licenses and activate them. First, in NCC, check the organization status in the license & inventory tab.
Working flow:

In this scenario, we will take one switch, one AP and one USG FLEX, and the initial organization status is Base Pack.
In Organization-wide > License & Inventory
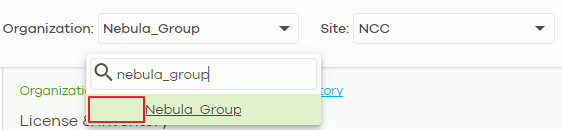
The initial organization status is Base Pack, as you can see in the License & inventory, Overview tab. In addition, you can also check the organization search bar. The blank space in front of the organization name indicates that the organization is Base.

Purchase License:
In this case, we will need 3 NCC licenses and 1 Nebula Security Service license, and then upgrade the organization from Base Pack to Professional Pack.
Next, click the “Purchase license” button and it will lead you to the license calculator. On this page, select the Nebula Professional Pack and the UTM Security Pack, choose the target expiration date, and hit Next.

Figure 2: Selecting license type
It will lead you to the “Orderable suggestion” page. In this
case, we’ll take one year from now as the target expiration date. Here, you can also decide on the
quantity of the licenses you would like to order.

Figure 3: Orderable suggestion
Hit Next to go to the Summary
page. On this page, you can view the final list and export the list if you’d like. After confirming the
list, click “Go to marketplace and buy”.

Figure 4: Summary page
Link to Marketplace:
Choose Manual-Activation for NCC license and Nebula Security Pack purchase.
Figure 5: Link to the marketplace
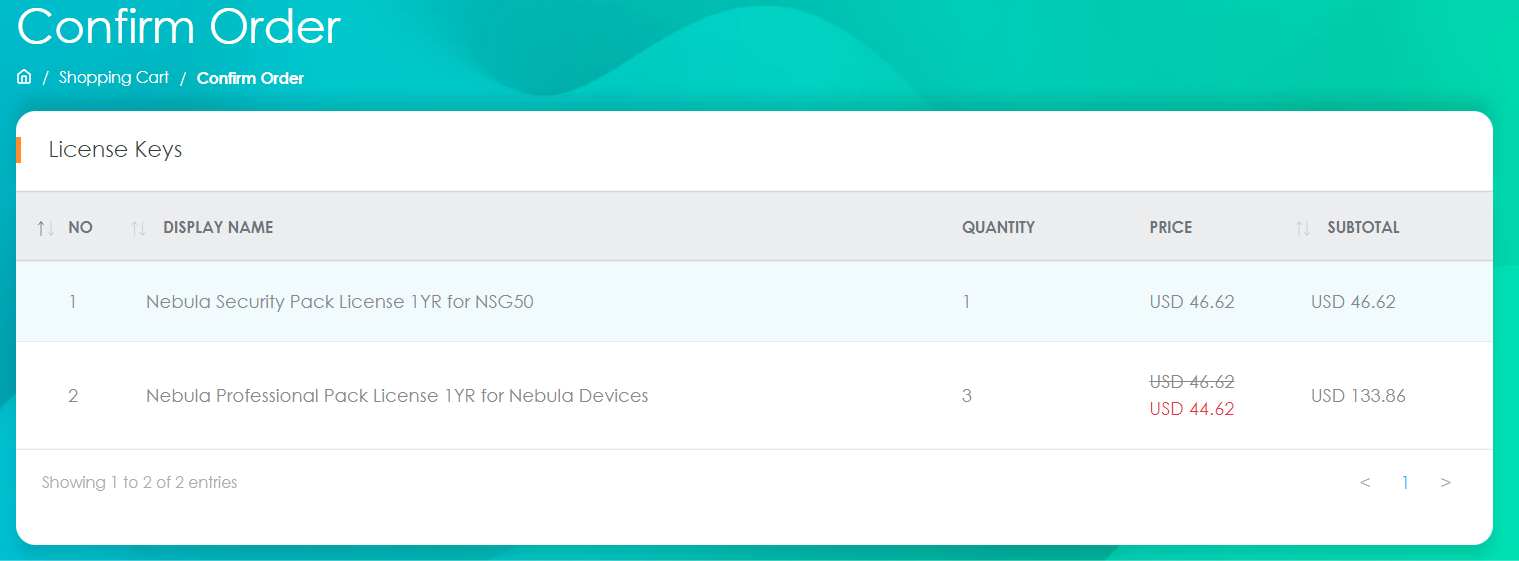
Figure 6: Confirm the order
After the purchase, Marketplace will send an email to you, containing the license list you have just bought.

Import your License to the organization:
Go back to Nebula and add licenses in the License & inventory> License tab; you can use the template to import the licenses for bulk upload.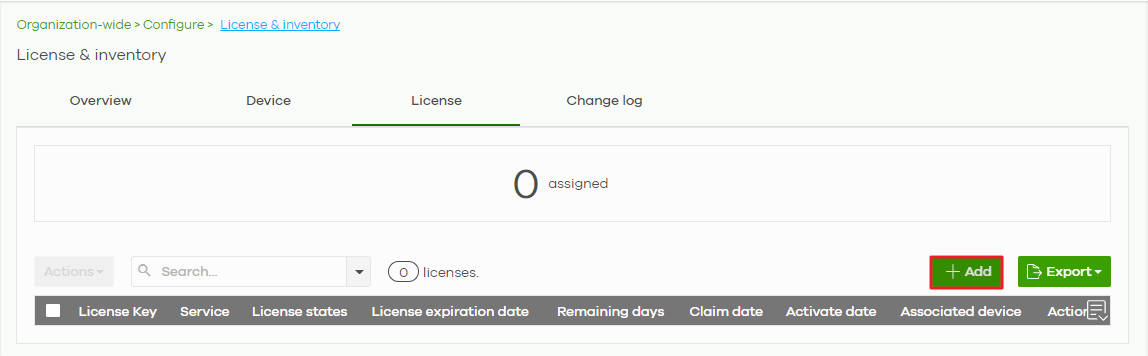
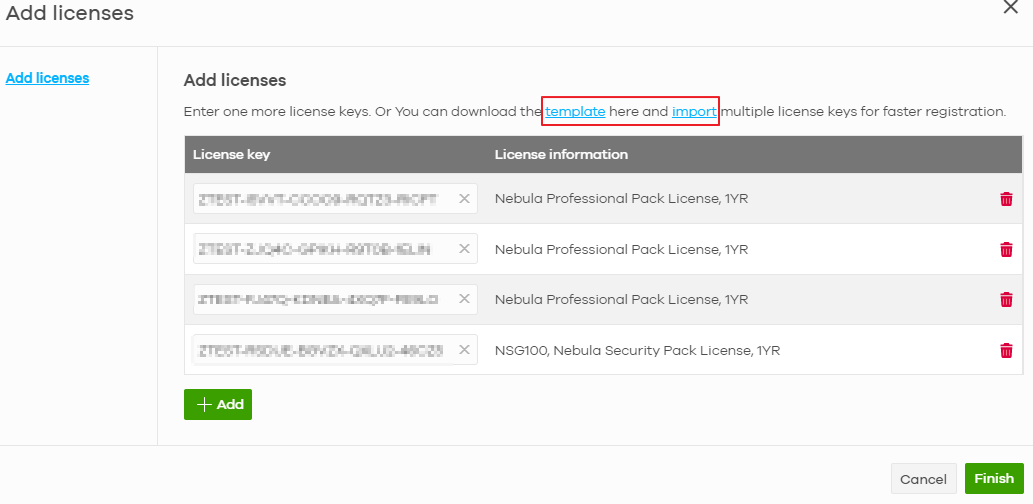
Figure 8: Import the license
Assign the license and Upgrade:
Select the license(s) and click “Action” button to assign.

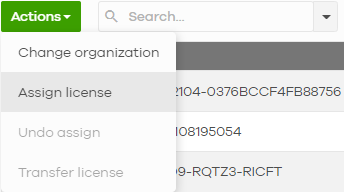
You can cancel the specific license assignment by clicking the “x” as in the following figure.


Figure 10: Assign license
For the license assignment mode, here is the definition of each action:
- Assign min. period: The licenses with the minimized period will be auto-assigned first.
- Assign all: Assign all selected licenses to the devices.
- Target expiration date: Auto-assign the licenses to the devices by target expiration date.
- Custom assignment: Customize each license assignment to the device manually.
Next, if the organization is eligible to upgrade, you will see the checkbox, as shown in below. However, if the organization status is in the grace period, you won’t see this checkbox; instead, the system will upgrade your organization directly after the assignment.
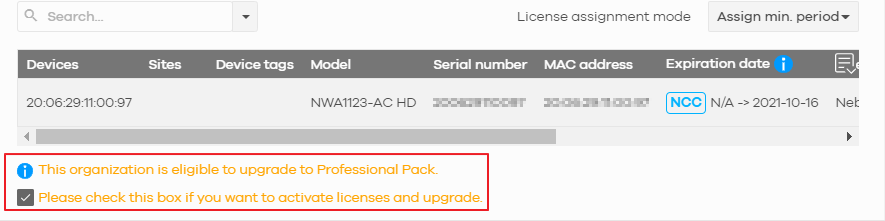
Figure 11: Upgrade after assignment


If you choose to upgrade later then you will find the Upgrade button in “Overview” tab, as shown in the following figure.

Categories
- All Categories
- 442 Beta Program
- 3K Nebula
- 234 Nebula Ideas
- 6.7K Security
- 693 USG FLEX H Series
- 365 Security Ideas
- 1.8K Switch
- 87 Switch Ideas
- 1.4K Wireless
- 56 Wireless Ideas
- 7.1K Consumer Product
- 312 Service & License
- 508 News and Release
- 97 Security Advisories
- 31 Education Center
- 10 [Campaign] Zyxel Network Detective
- 5.1K FAQ
- 34 Documents
- 89 About Community
- 114 Security Highlight

