[ATP/FLEX] How to Set Up Captive Portal on Nebula

 Zyxel Employee


Before accessing network, clients have to pass the identity verification. All web page requests can initially be redirected to a login page that requires users to authenticate their sessions. Once authentication is successful, users can then access the Internet.
You can use captive portal to ensure that everyone using the network is trusted.
There are the progresses for captive portal.
1) Client open the browser and try to search the web.
2) Redirect to the captive portal automatically.
3) The client must pass the identify verification to access the Internet

Set up Captive Portal
Configure > Cloud authentication
Create users and password for authentication.
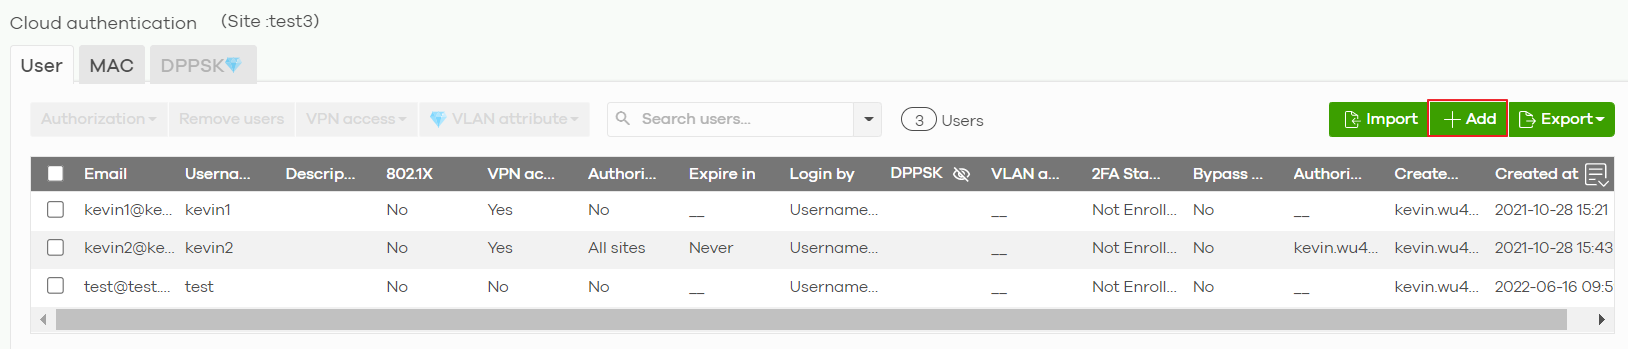
In “Login by” field, you can choose to log in
with email/username or both.

Firewall > Configure > Authentication Method
Choose Sign-on-with: Nebula Cloud Authentication

In “Interfaces” field, Select the Nebula Device’s interface (network) to which the settings you configure here is applied.
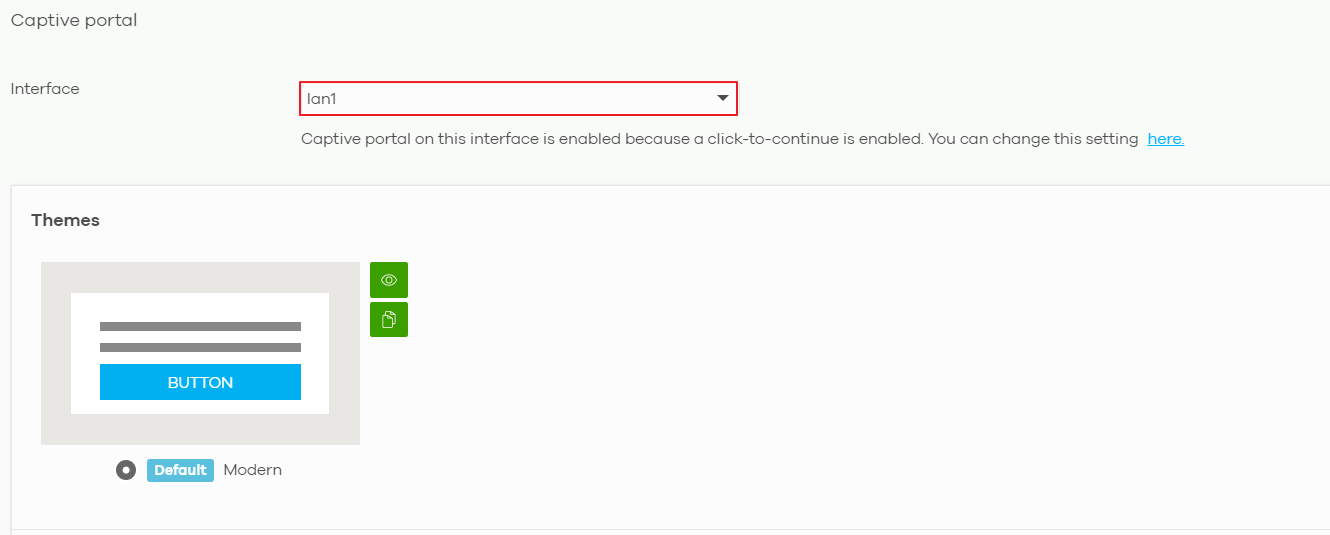
Firewall > Configure > Captive Portal
Select the interface which the captive portal is applied.
Test result
When opening the browser and trying to surf the internet, you will be redirected to the following login page and must verify the authentication to use internet services.

After verification, the following picture will display

Categories
- All Categories
- 442 Beta Program
- 3K Nebula
- 232 Nebula Ideas
- 132 Nebula Status and Incidents
- 6.7K Security
- 691 USG FLEX H Series
- 365 Security Ideas
- 1.8K Switch
- 87 Switch Ideas
- 1.4K Wireless
- 56 Wireless Ideas
- 7.1K Consumer Product
- 312 Service & License
- 505 News and Release
- 97 Security Advisories
- 31 Education Center
- 10 [Campaign] Zyxel Network Detective
- 5.1K FAQ
- 34 Documents
- 89 About Community
- 112 Security Highlight