How to register Access Point to Nebula
 Zyxel Employee

This article will show you the methods to register any Nebula-enabled Access Point (AP) into the Nebula Cloud platform by Nebula Mobile APP and Nebula Control Center (website). You can refer to the steps to add APs to your Nebula Control Center.
Note: * By the method, you can add all Nebula devices, not only APs.
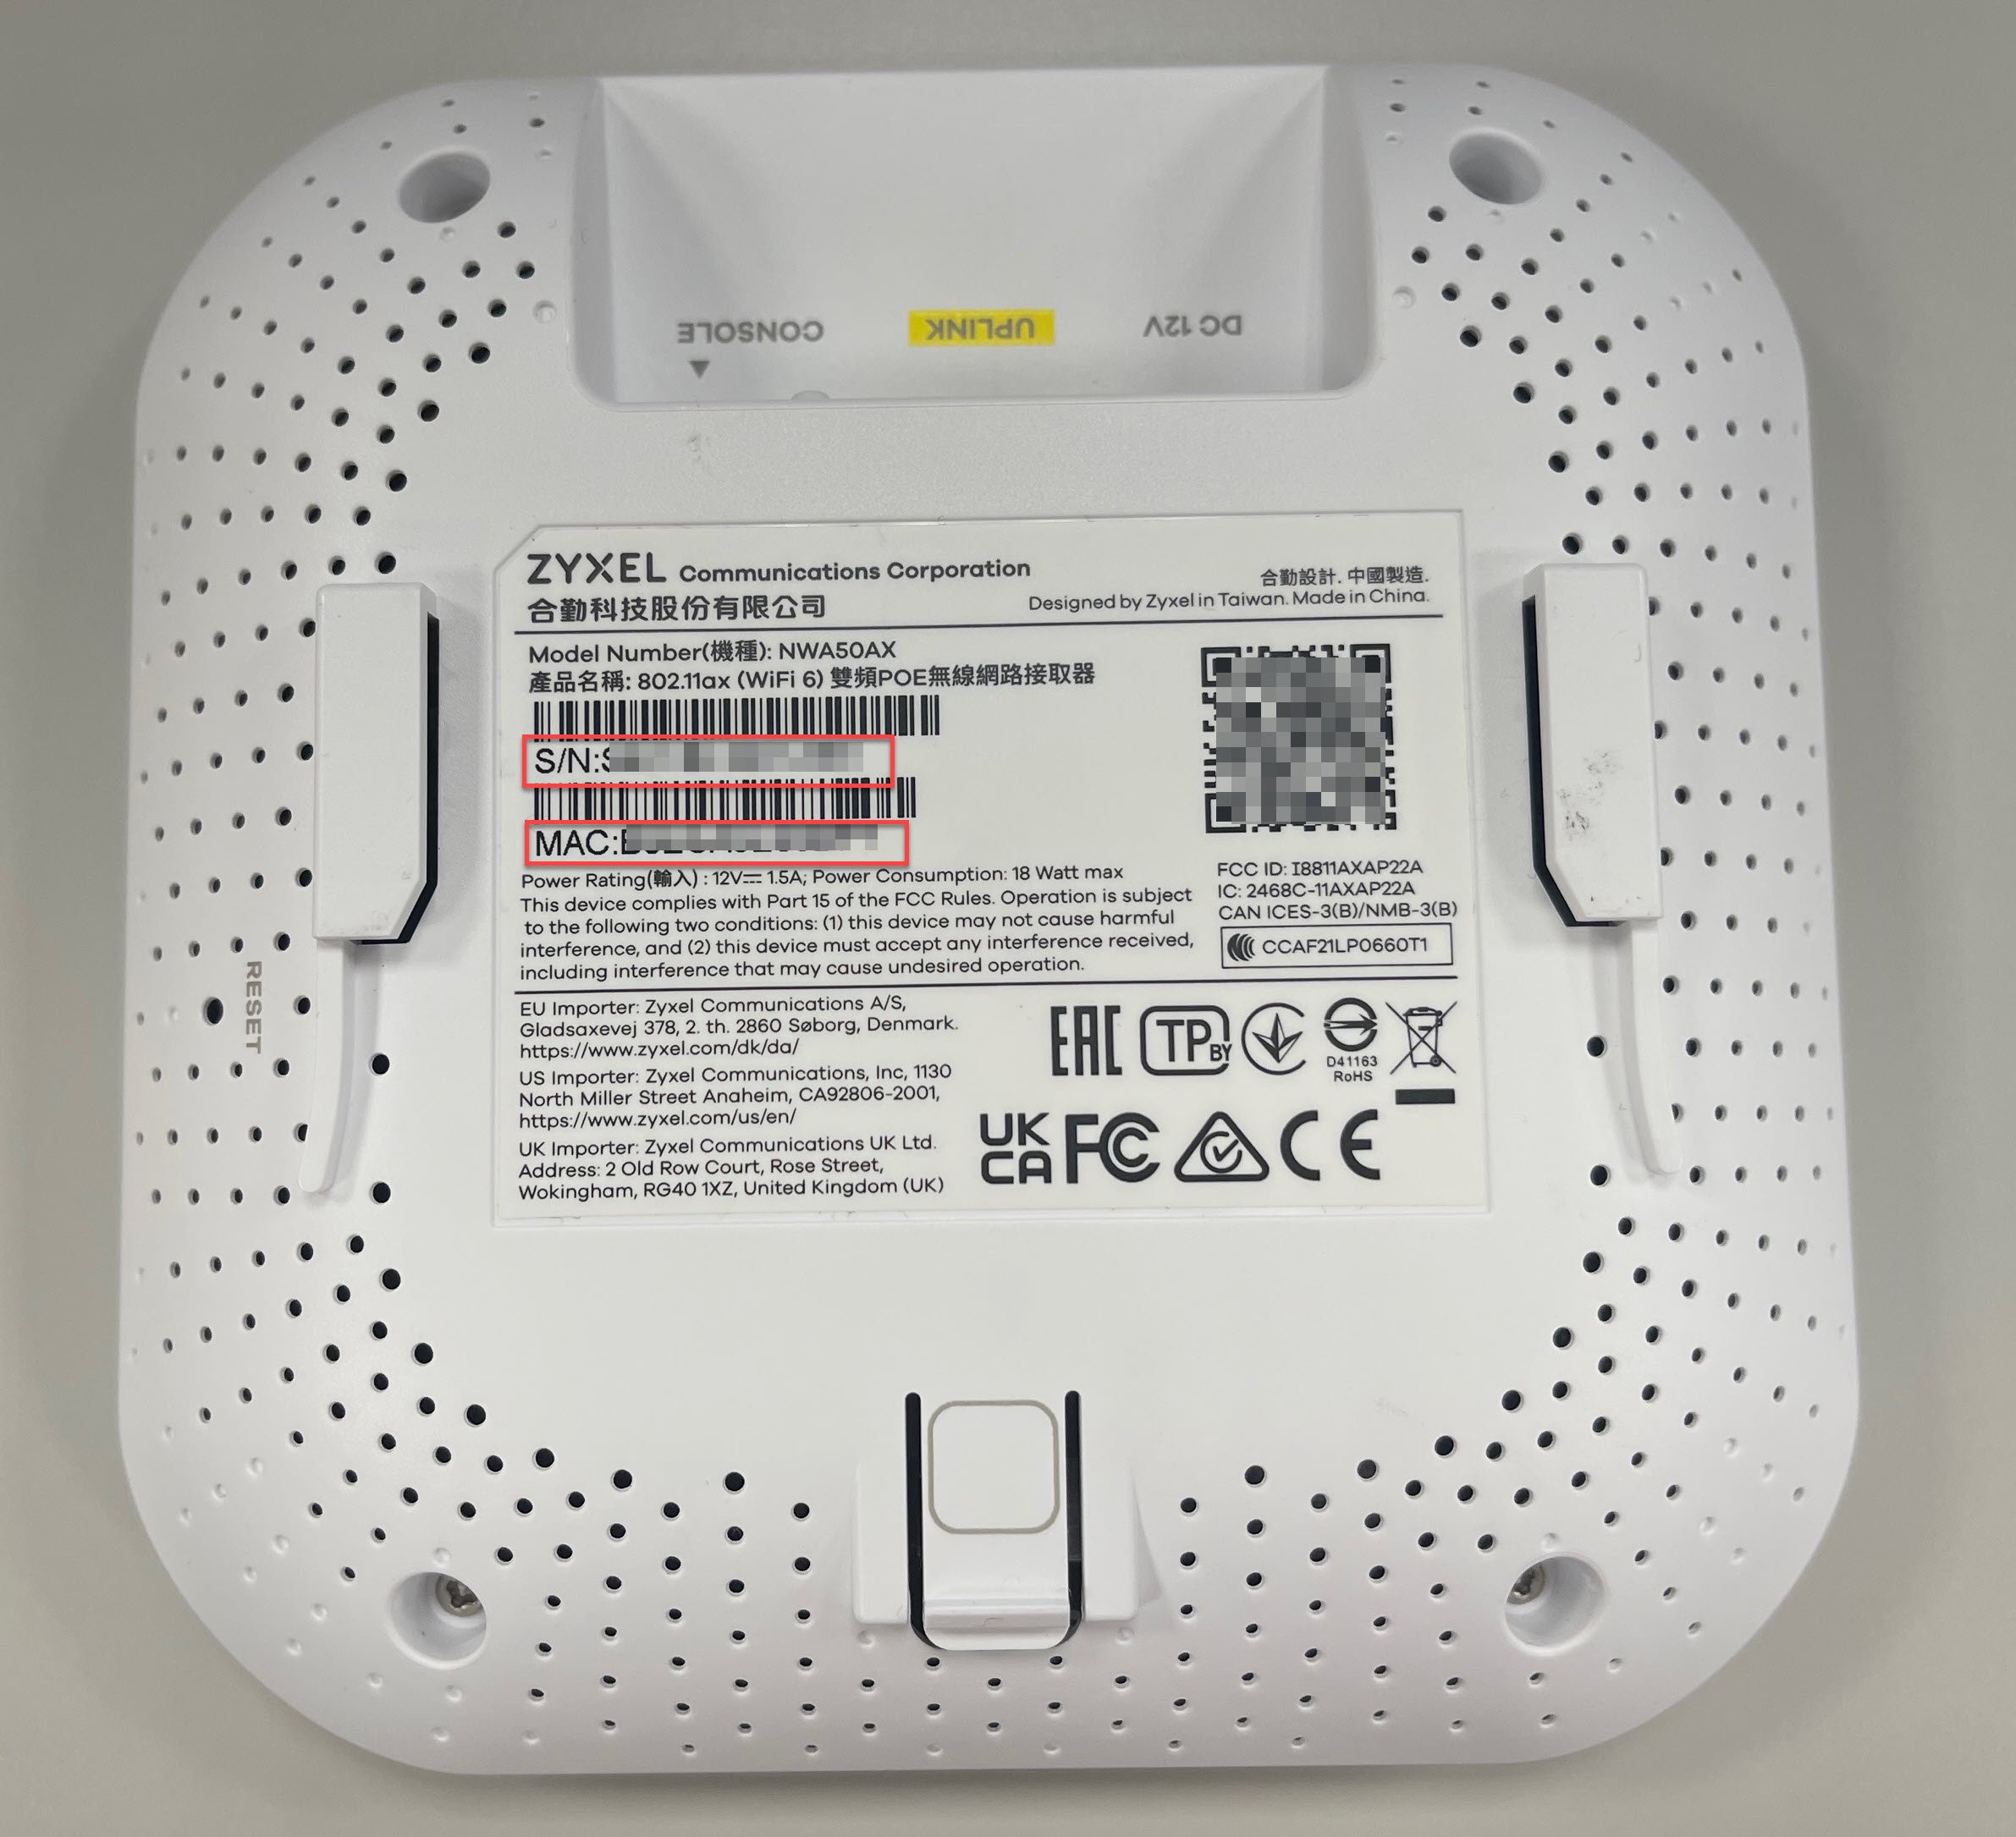
Note: ** QR code, MAC address, and serial number from the device back label/sticker.
Part 1: Adding devices by Nebula Mobile APP
The Nebula Mobile App offers a quick approach to network management. It allows administrators to use the QR code scanner to register a large number of devices on Nebula Control Center all at once. Specially, you can register a device while the device is already registered to another Organization or Site.
After logging in to Nebula Mobile APP, go to the designated Organization/Site
1. Choose the Devices tab, and click the “Add Device” or “+” button.
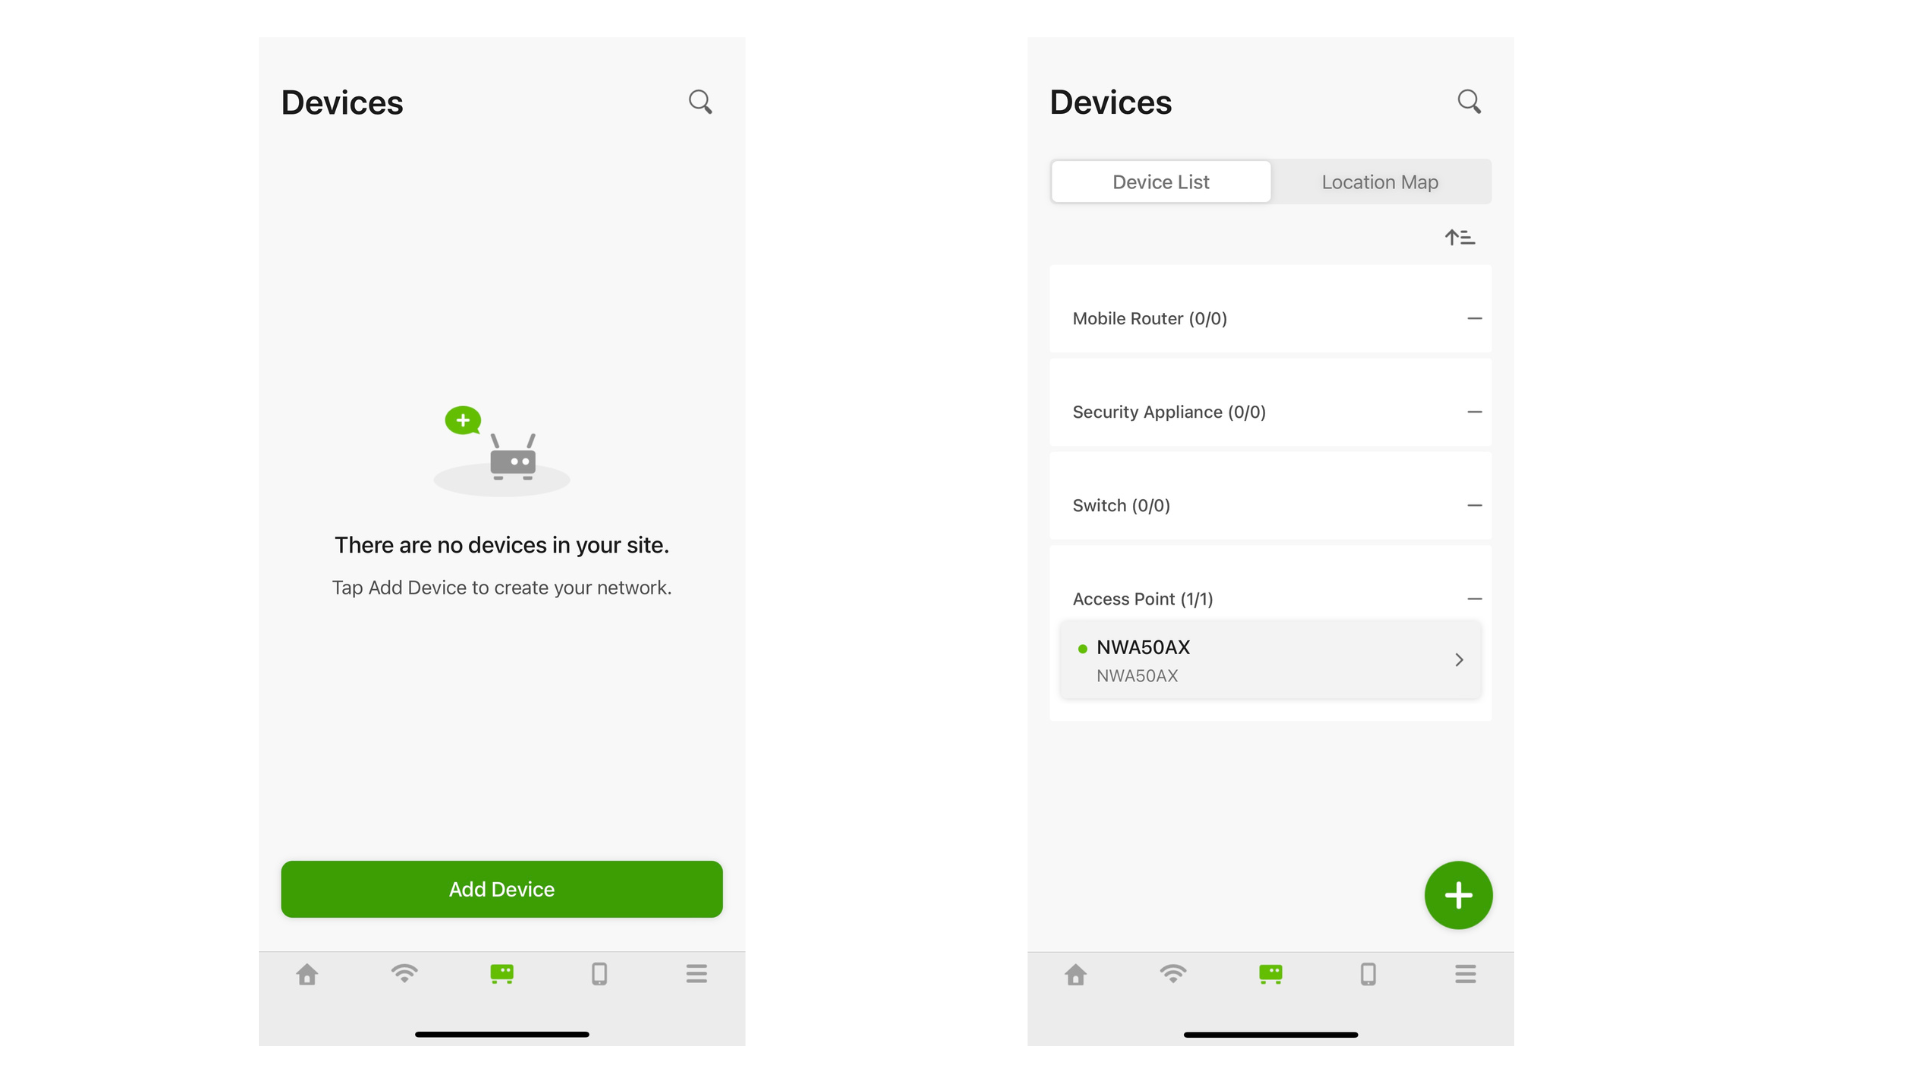
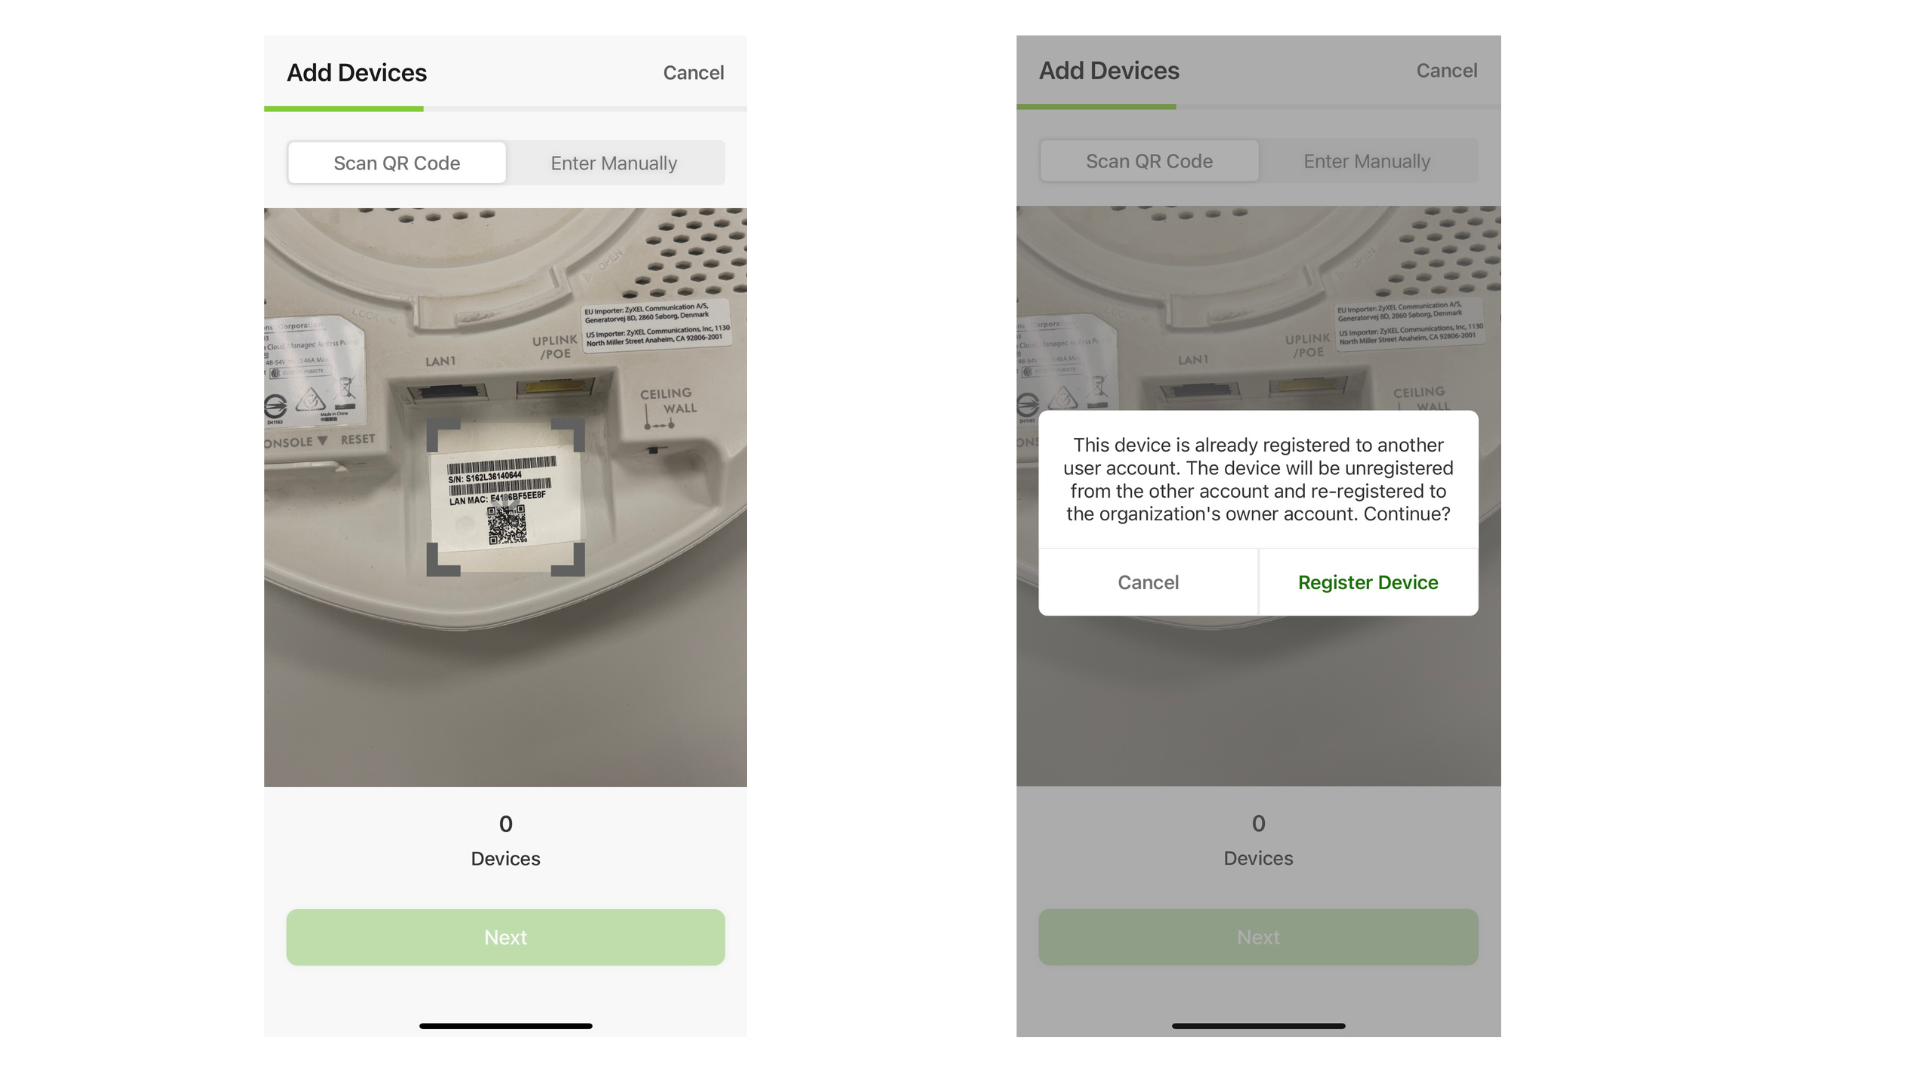
2. Scan the QR code, click “Next” if this device has not been registered to another Organization or Site, or click “Register Device” and “Next” if this device is already registered to another Organization or Site.
3. Click Register 1 Devices. The number of devices shown there depends on how many devices you scanned the QR code before.

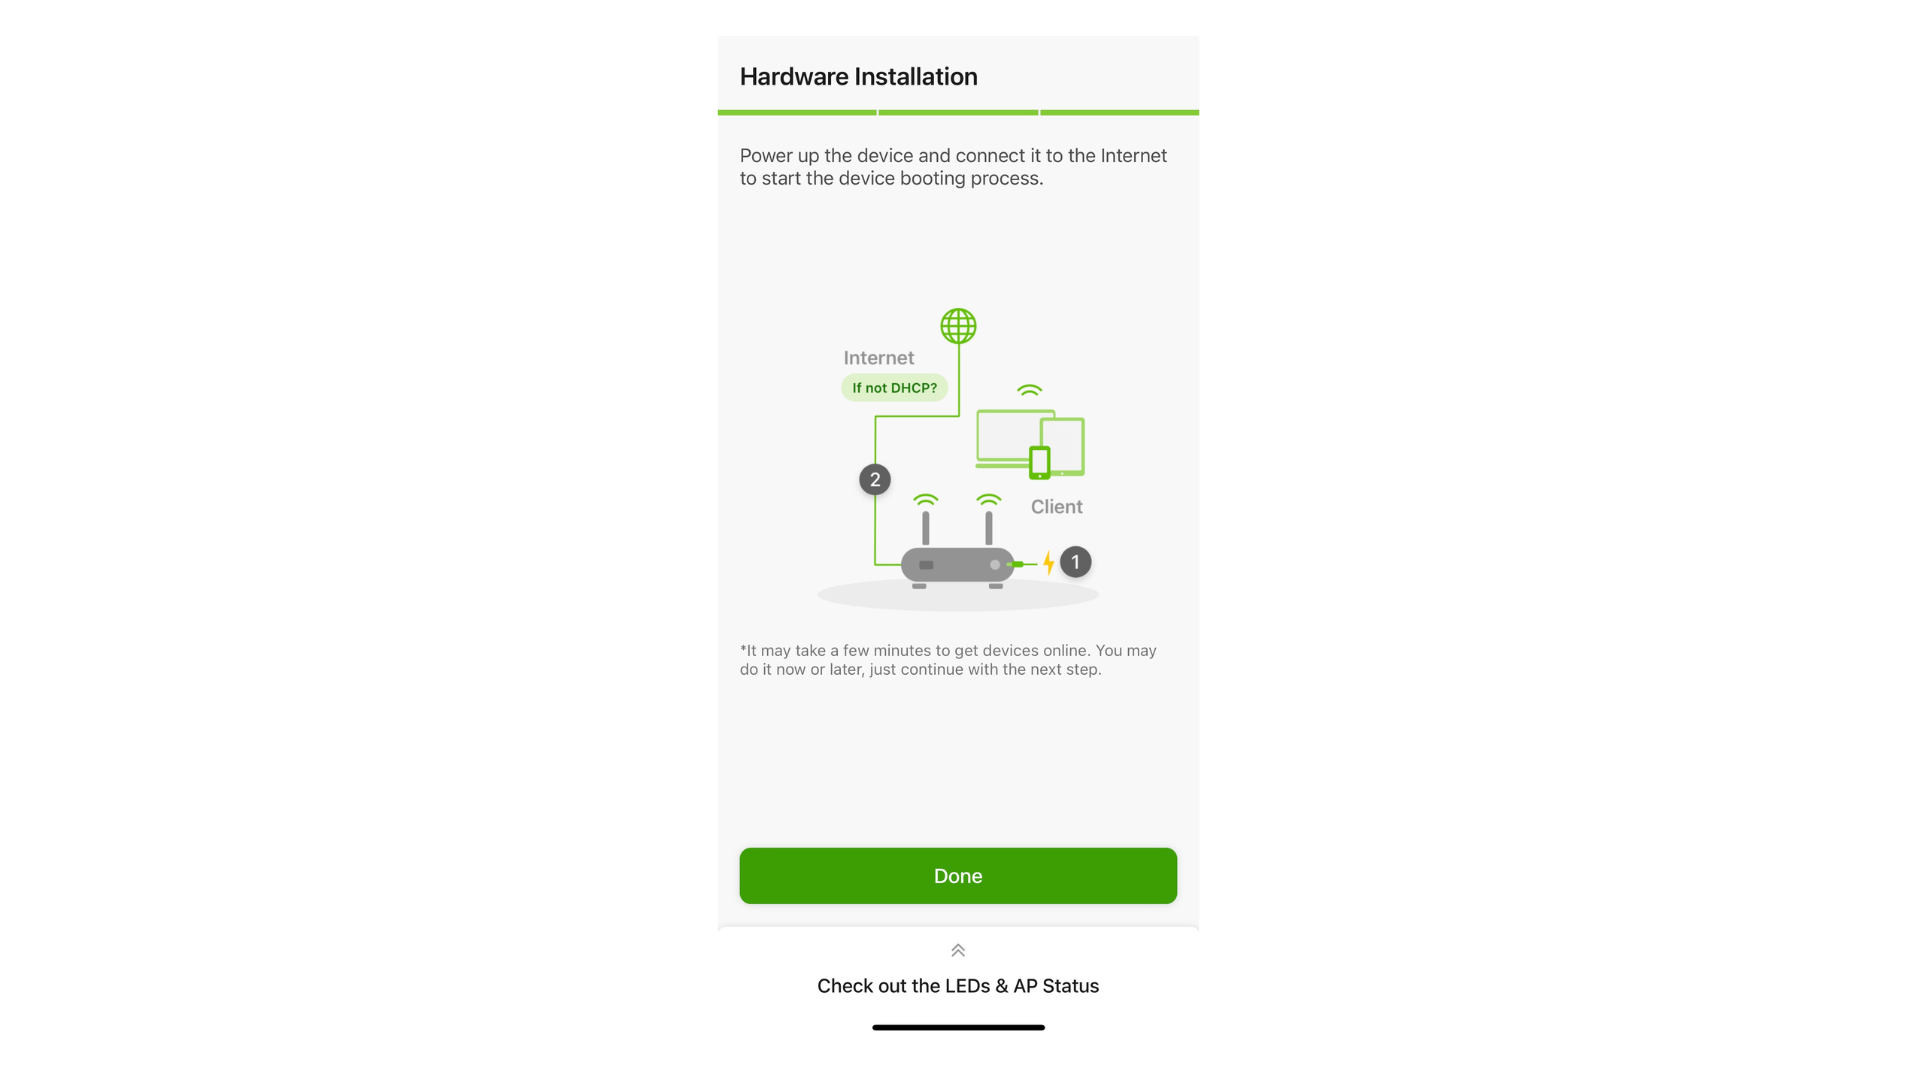
Verification:
Part 2: Adding devices to the Nebula Control Center (website)
Method 1: Adding devices on a single site (Site-wide)
Recommend using this method in the case there is a single site in your organization, you can add devices directly to the site. Note that the page has no option to remove devices from the site.
1. Choose your Organization and your Site

2. Go to Left Navigation Bar Devices >> click the " " button (Add devices) on the top right >> Click Add

3. Input MAC address and serial numbers of devices. Click Finish

Or click Add another device to input the MAC address and serial numbers of devices before clicking Finish.
Method 2: Adding device to multi-sites (Organization-wide)
Recommend using this method in case there are multi-sites in your organization. Go to License & Inventory page where you can add and view all Nebula devices currently operating under the organization. Devices can then be assigned or re-assigned to different Nebula sites created in these Nebula organizations.
Step 1. Adding devices to Organization-wide
1.1 Select your Organization.

1.2 Open License & Inventory >> Devices. Click Add.

1.3 Input MAC address and serial numbers of devices. Click Finish

Or click Add another device to input the MAC address and serial numbers of devices before clicking Finish.
Step 2. Assigning devices to Nebula sites
2.1 Click Action, then select Change Site Assignment

2.2 Select the site to add a device and click the Save button

Note: *** You also can add many devices to a site at the same time, and repeat the same procedure.

Note: ****Repeat the same procedure for other sites.
Verification:

Zyxel_Judy
Categories
- All Categories
- 442 Beta Program
- 2.9K Nebula
- 219 Nebula Ideas
- 127 Nebula Status and Incidents
- 6.5K Security
- 588 USG FLEX H Series
- 344 Security Ideas
- 1.7K Switch
- 84 Switch Ideas
- 1.4K Wireless
- 52 Wireless Ideas
- 7K Consumer Product
- 298 Service & License
- 476 News and Release
- 91 Security Advisories
- 31 Education Center
- 10 [Campaign] Zyxel Network Detective
- 4.8K FAQ
- 34 Documents
- 87 About Community
- 102 Security Highlight
