How to replace the existing firewall with a new USG FLEX H Series firewall?

 Zyxel Employee


Scope:
A Nebula site currently operating with access points (AP), switches, and a USG FLEX, ATP, or NSG firewall. The customer intends to replace the existing firewall with a new USG FLEX H Series firewall.
Objectives:
- Minimize downtime during the replacement process
- Reserve site-wide AP and switch monitoring historical data
- Backup the existing ZLD firewall settings prior to replacement
Steps to Replace the Existing ZLD Firewall with a New USG FLEX H Series Firewall
Create a Backup Site on NCC
On the Nebula Control Center (NCC), create a new site and clone the settings from the existing ZLD site. This serves as a backup of the site configuration.
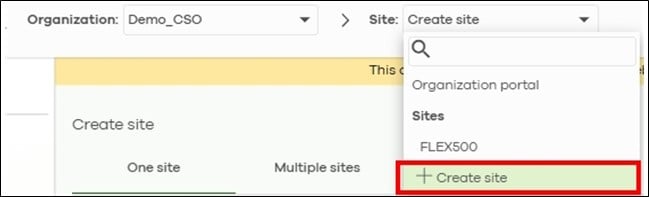
Select “Create Site” from the site list.
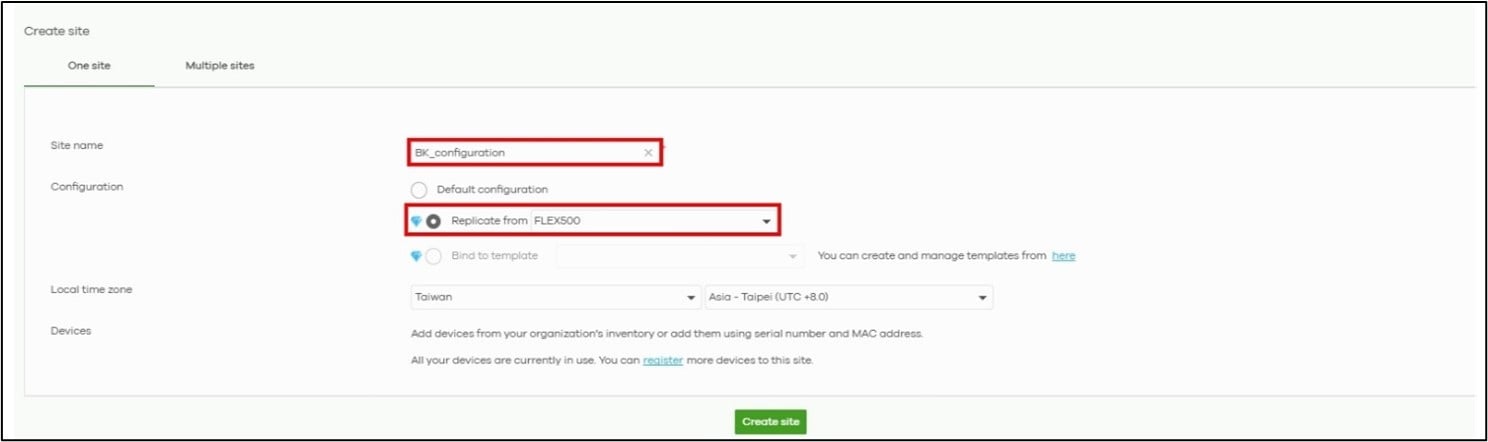
Type the site name, select “Replicate from”, choose the existing site “FLEX500”, and then click “Create Site.”
Unbox and Power on the H Series Firewall:
Internet access is required. Connect the WAN uplink of the H Series firewall toa LAN port of the existing firewall to provide temporary Internet connectivity.
Upgrade Firmware:
Use the initial setup wizard to upgrade the firmware to the latest version (uOSv1.35 or above).
Connect Locally:
Disconnect the WAN cable, then connect a PC to a LAN port of the H Series firewall. Open a web browser and log in to the device. You will see the initial setup wizard again.
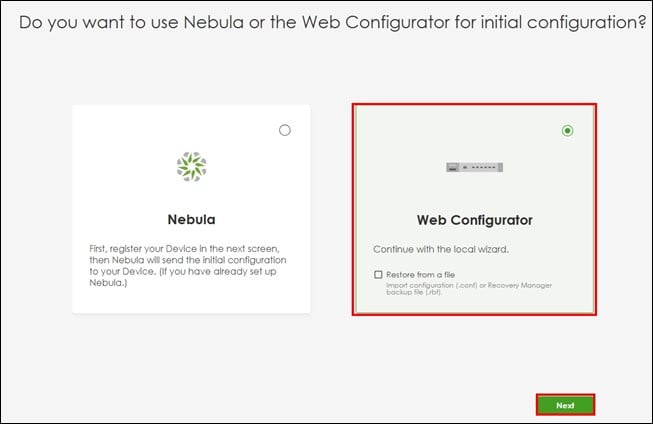
Enter Web Configurator Mode:
In the wizard, select “Web Configurator”, then click “Next” to continue.
Configure the Internet settings and system time settings, then click “Exit” to skip device Registration in Step 3.

Configure the Firewall Locally:
Complete the wizard, then configure the firewall settings through the local GUI.
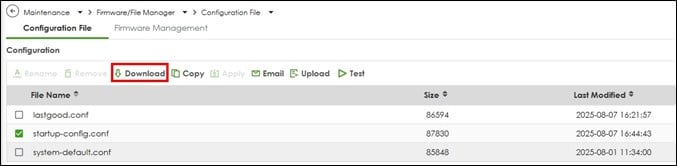
Backup Configuration:
Once the configuration is complete, back up the configuration file.
Go to the Maintenance page, select “startup-config.conf”, and click the “Download” button to save the file to your PC.
Replace the Old Firewall:
Disconnect all cables from the old firewall and reconnect them to the corresponding ports on the H Series firewall. Verify that the network is functioning properly.
Note: If there are network issues, switch back to the old firewall to restore connectivity.
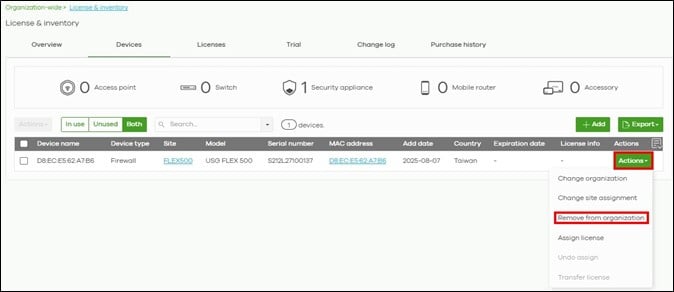
Remove existing firewall from Org, and Register the New Firewall in Nebula:
In the Nebula portal, remove the old firewall (USG FLEX, ATP, or NSG) from the existing site. Then register the H Series firewall to the same site.
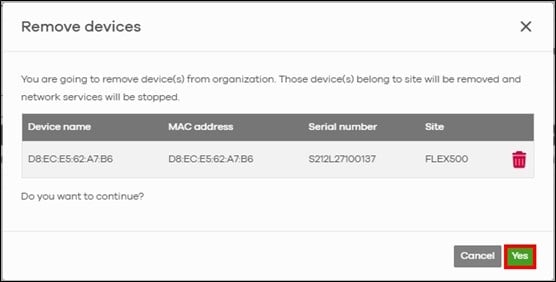
Navigate to Organization-wide > License & Inventory, go to the Devices tab, click the Action button, and select “Remove from the organization.”
Click “Yes” to continue.
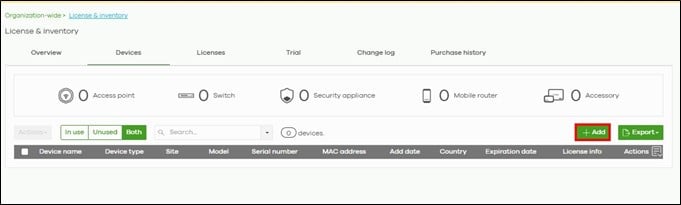
After completing the steps above, the FLEX/ATP firewall has been removed from the organization. Now we will need to register H series firewall to Nebula.
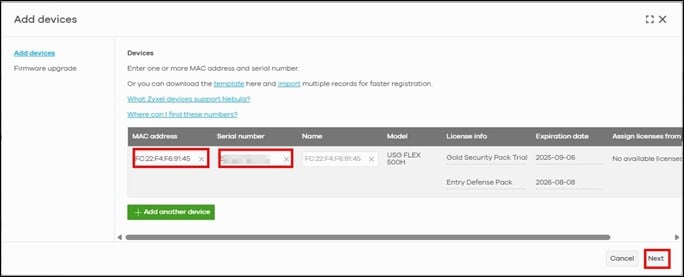
Click the “Add” button to register the H Series firewall
Fill in the serial number and MAC address, then click “Next” to continue.
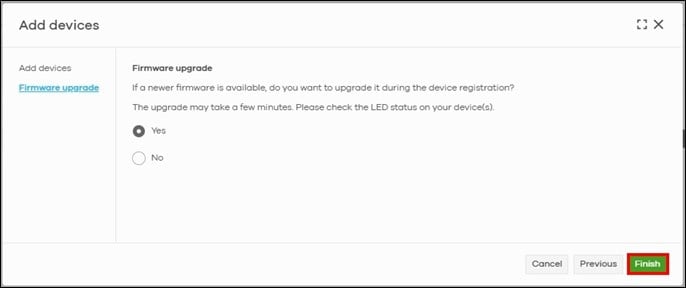
Click the “Finish” button to complete device registration.
Now, you will be able to see the firewall listed in the device list.
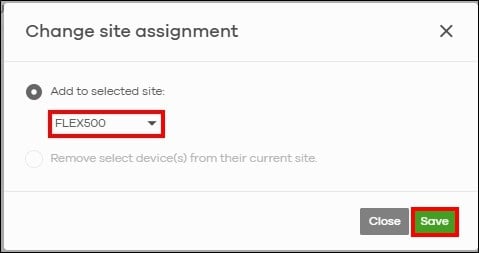
Click the “Actions” button and select “Change Site Assignment.”

Select the original site and click “Save.”
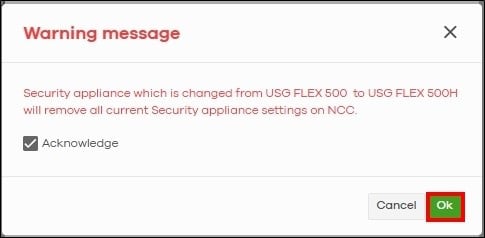
A warning message will pop up. Tick “Acknowledge”, and click “OK” to continue.
Allow Cloud Synchronization:
When the H Series firewall connects to the Internet and reaches Nebula, it will automatically initiate a full configuration sync to the Nebula cloud.
Verify Status in Nebula:
Go to the device detail page in Nebula and ensure the device is online. Wait until the "Configuration Status" shows “Up to date.”

Categories
- All Categories
- 442 Beta Program
- 3K Nebula
- 234 Nebula Ideas
- 6.7K Security
- 694 USG FLEX H Series
- 365 Security Ideas
- 1.8K Switch
- 87 Switch Ideas
- 1.4K Wireless
- 56 Wireless Ideas
- 7.1K Consumer Product
- 312 Service & License
- 508 News and Release
- 97 Security Advisories
- 31 Education Center
- 10 [Campaign] Zyxel Network Detective
- 5.1K FAQ
- 34 Documents
- 89 About Community
- 114 Security Highlight